background image

13

RQ

T

9

58

8

Getting S

tarted

Playing

 Discs

Ot

her Op

era

tions

Reference

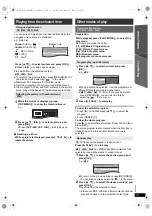
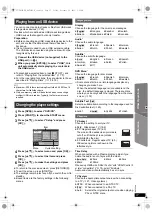
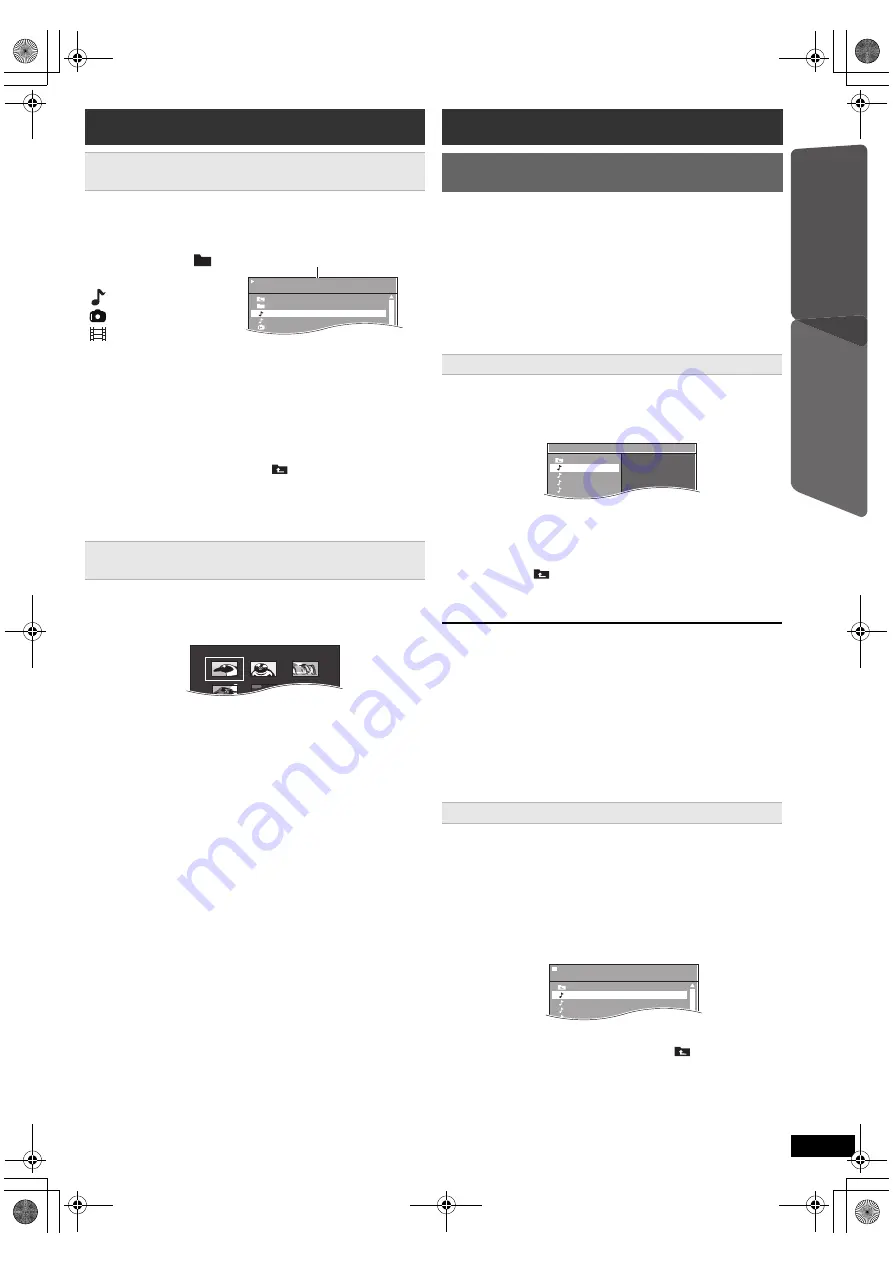
You can select to play from your desired item while the 
navigation menu screen is displayed.
e.g. Data disc

Play starts from the selected content.

[MP3]


[JPEG]


[DivX]

To return to the previous folder, press [RETURN]

D

. You 

can also do this by selecting “

” in the menu.

Maximum: 16 characters for file/folder name.

Only the contents in the current group will be played.

If there are MP3, JPEG and DivX contents in the current 

group, play will be based on the selected content type.

Rotating a picture

Preparation

To clear the selected program

1 Press [

1

]

8

 and then press [

3

,

4

]

8

 to select the 

program.

2 Press [CANCEL]

3

.

To clear the whole program

Press [

1

]

8

 several times to select “Clear All”, and then 

press [OK]

8

.

The whole program is also cleared when the disc tray is 

opened, the unit is turned off or another source is 

selected.

[CD]

 All tracks will be played in random order.

Press [

1

PLAY]

5

 to start play.

[MP3]


[JPEG]


[DivX] 

The MP3/JPEG/DivX contents of the 

selected group will be played in random order.

Playing from the selected item

Using navigation menu

[CD]


[MP3]


[JPEG]


[DivX]

Press [

3

,

4

]

8

 to select an item and press [OK]

8

.

Press [

2

,

1

]

8

 to skip page by page.

Selecting the picture in Thumbnail menu

[JPEG]

1

While the picture is displayed, press 
[TOP MENU]

7

 to show the thumbnail menu.

e.g.

2

Press [

3

,

4

,

2

,

1

]

8

 to select a picture and 

press [OK]

8

.

Press [SKIP

:

, SKIP

9

]

5

 to skip page by 

page.

While a picture is displayed, press [

3

,

4

,

2

,

1

]

8

 to 

rotate the picture.

/   . . . / U n d e r w a t e r. M P 3

1 / 3

. .
P e r f u m e

U n d e r w a t e r

F a n t a s y   p l a n e t
S t a r p e r s o n s 1

0 0 : 0 2 : 4 0

Group

 (Folder)

:

Content 

(File/Track)

:

: MP3/CD-DA
: JPEG
: DivX

®

Elapsed time

..

Other modes of play

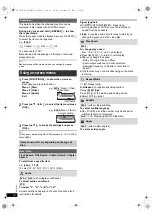
Program and Random play

[CD]


[MP3]


[JPEG]


[DivX]

While stopped, press [PLAY MODE]

9

 to select the 

play mode.

Each time you press the button:

[CD]


[MP3]

 Music Program menu

[JPEG]

 Picture Program menu

[DivX]

 Video Program menu

RND (Random) menu

Exit program and random menus

Program play (up to 30 items)

1

Press [

3

,

4

]

8

 to select an item and press 

[OK]

8

.

e.g. 

[MP3]

When a content is selected, it will be programmed.

Repeat this step to program other items.

[MP3]


[JPEG]


[DivX]

 To return to the previous folder, 

press [RETURN]

D

. You can also do this by 

selecting “

” in the menu.

2

Press [

1

PLAY]

5

 to start play.

Random play

1

Press [

3

,

4

]

8

 to select the desired group and 

press [OK]

8

.

e.g. 

[MP3]

To return to the previous folder, press [RETURN]

D

You can also do this by selecting “

” in the menu.

2

Press [

3

,

4

]

8

 to select the desired content

§

 and 

press [OK]

8

.

Play starts from the selected content.

§

If there are MP3, JPEG and DivX contents, random 
play will be based on the selected content type.

Music Program

1
2
3
4
5
6

..

Track 1

Track 2
Track 3
Track 4

..

/ .../Track 1.MP3

R N D

1/10

..

Track 1

Track 2
Track 3
Track 4

..

SC-XH170 EB_RQT9588-B_eng.book  Page 13  Friday, December 16, 2011  3:11 PM

Summary of Contents for SA-XH170

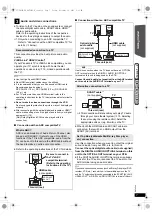
Page 1: ...e instructions carefully Please keep this manual for future reference The illustrations shown may differ from your unit Region number The player plays DVD Video marked with labels containing the region number 2 or ALL Example 2 ALL 3 5 2 The illustration shows SC PT70 Obrázek představuje model SC PT70 Na rysunku przedstawiono model SC PT70 Model number suffix EB denotes UK model SC XH170 EB_RQT958...

Page 2: ...rminals in your plug proceed as follows The wire which is coloured Blue must be connected to the terminal which is marked with the letter N or coloured Black or Blue The wire which is coloured Brown must be connected to the terminal which is marked with the letter L or coloured Brown or Red WARNING DO NOT CONNECT EITHER WIRE TO THE EARTH TERMINAL WHICH IS MARKED WITH THE LETTER E BY THE EARTH SYMB...

Page 3: ...on the above diagrams RETURN VOL STOP VOL TV INPUT AV SKIP SLOW PAUSE SEARCH SEARCH PLAY DVD RADIO EXT IN EXIT REPEAT PLAYMODE SOUND SURROUND FLDISPLAY 1 2 3 4 5 6 7 8 0 9 10 10 CANCEL FUNCTIONS MUTE M E N U START T O P M E N U OK SKIP SLEEP CHSELECT W SRD SC XH170 EB_RQT9588 B_eng book Page 3 Friday December 16 2011 3 11 PM ...

Page 4: ...operations Aim the remote control at the Panasonic TV and press the button TV Í Turn the TV on off INPUT AV Change the TV s video input mode r VOL s Adjust the TV volume This may not work properly with some models Adjust the volume of this unit Mute the sound MUTE flashes on this unit s display while the function is on To cancel press the button again or adjust the volume Muting is cancelled when ...

Page 5: ...play 13 Program and Random play 13 Repeat play 14 Using on screen menus 14 Other Operations Linked operations with the TV VIERA Link HDAVI ControlTM 15 Setting the audio link 15 Easy control only with VIERA remote control 16 Playing from an USB device 17 Reference Changing the player settings 17 DivX information 19 Displaying DivX subtitles text 20 Media that can be played 20 Maintenance 21 Speake...

Page 6: ... be used close to a TV but the picture may be affected on some TVs and setup combinations If this occurs turn the TV off for about 30 minutes The demagnetising function of the TV should correct the problem If it persists move the speakers further away from the TV Turn off all equipment before connection and read the appropriate operating instructions Do not connect the AC mains lead until all othe...

Page 7: ... HDMI cable and SCART cable are connected there will be no RGB output from the SCART AV terminal Use this connection when you want to output the original surround audio from your STB etc to this unit Connect the optical digital audio cable not supplied from the DIGITAL AUDIO IN OPTICAL terminal on this unit to the OPTICAL OUT terminal on your STB If the DIGITAL AUDIO IN OPTICAL terminal is already...

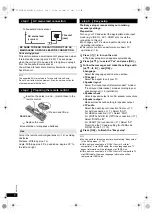
Page 8: ...s Use AC IN This unit rear AC mains lead supplied To household mains socket R6 LR6 AA Press in and lift up Replace the cover Insert so the poles r and j match those in the remote control step 5 Easy setup Preparation Turn on your TV and select the appropriate video input mode e g VIDEO 1 AV 1 HDMI etc to suit the connection to this unit To change your TV s video input mode refer to its operating i...

Page 9: ...u Listening to the radio Presetting stations automatically 1 Press RADIO 4 to select FM 2 Press MENU C to select LOWEST or CURRENT LOWEST To begin auto preset with the lowest frequency FM 87 50 CURRENT To begin auto preset with the current frequency To change the frequency refer to Manual tuning and presetting 3 Press and hold OK 8 Release the button when FM AUTO is displayed The tuner starts to p...

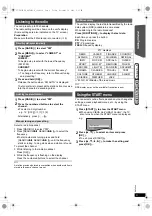
Page 10: ... 15 for other related functions Select to suit the type of audio from the DIGITAL AUDIO IN OPTICAL and HDMI AV OUT terminal on this unit Boxed items are the factory presets Selecting the source using the remote control Press To select DVD 4 DVD CD RADIO 4 FM B 9 EXT IN 4 Each time you press the button AV AUX ARC D IN USB For audio input through the SCART AV terminal For audio input through the AUX...

Page 11: ...UND Each time you press the button For Surround layout Recommended mode STANDARD Sound is output as it was recorded encoded Speaker output varies depending on the source MULTI CH You can enjoy sound from the front speakers as well as the surround speakers and center speaker even when playing stereo sources MANUAL B below While MANUAL is displayed press 2 1 8 to select other surround modes Each tim...

Page 12: ...lected Press 3 8 increase or 4 8 decrease to adjust the speaker level for each speaker C RS LS SW S 6 dB to i6 dB L R Only the balance is adjustable B below Adjusting the speaker balance during playback 1 Press CH SELECT F to select L or R 2 While L or R is selected Press 2 1 8 to adjust the speaker balance Basic play 1 Press Í 1 to turn on the unit 2 Press DVD 4 to select DVD CD 3 Press OPEN CLOS...

Page 13: ...TOP MENU 7 to show the thumbnail menu e g 2 Press 3 4 2 1 8 to select a picture and press OK 8 Press SKIP SKIP 9 5 to skip page by page While a picture is displayed press 3 4 2 1 8 to rotate the picture Underwater MP3 1 3 Perfume Underwater Fantasy planet Starpersons1 00 02 40 Group Folder Content File Track MP3 CD DA JPEG DivX Elapsed time Other modes of play Program and Random play CD MP3 JPEG D...

Page 14: ...dtrack VCD To select L R L R or L R Actual operations depend on the disc Read the disc s instructions for details T 1 C 1 1 5 5 Off O Title Search D Current item Item name e g DVD V Menu 1 Disc T 1 C 1 Off O Chapter Search 1 5 5 D Current setting e g DVD V Menu 1 Disc Signal type data LPCM D DTS MP3 MPEG Signal type During playback of DTS source there will be no sound from the speakers DivX It may...

Page 15: ...AVI Control 3 or later This function automatically provides synchronised audio and video output This works only when the source is DVD CD USB AV 2 AUX 2 ARC 1 2 or D IN 2 3 When using DVD CD or USB as the source set Time Delay in Video menu to 0ms Auto B 17 When the following operations are performed the TV will automatically switch the input channel and display the corresponding action Additional...

Page 16: ...ing playback or resume mode when DVD CD or USB is selected as the source 5 Only after the TV automatically switched to the HDMI input mode for this unit For HDAVI Control 2 or later You can control the playback menus of this unit with the TV s remote control When operating the TV s remote control refer to the below illustration for operation buttons You can operate the playback with the indicated ...

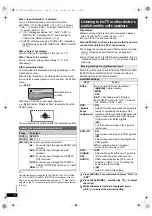
Page 17: ... and press OK 8 6 Press 3 4 8 to make the settings and press OK 8 Setup Display Audio Subtitle DVD Menu Subtitle Text English English Auto English Latin2 Language Video Audio HDMI Others Set RETURN Menu Item Current setting Language menu Display Choose the language for the on screen messages English Français Español Deutsch Italiano Nederlands Polski Svenska Audio Choose the audio language English...

Page 18: ...ect No To accept the setting select Yes again HD JPEG Mode JPEG This works only when using HDMI connection with Video Resolution B above set to Auto 720p 1080i or 1080p On HD JPEG playback is available JPEG images will be displayed in original resolution Off During HD JPEG playback there will be no on screen menus B 14 and on screen displays Audio menu Bitstream PCM Dynamic Range On Adjusts for cl...

Page 19: ...ice setup menu Go to vod divx com for more information on how to complete your registration Display the unit s registration code B left DivX Registration in Others menu HDMI menu VIERA Link On The VIERA Link HDAVI Control function is available B 15 Off Audio Out On When audio output is from the HDMI AV OUT terminal Depending on the capabilities of the connected equipment audio output may differ fr...

Page 20: ...xcluding the file extension The DivX video file and subtitles text file are inside the same folder and the file names are the same except for the file extensions If there are more than one subtitles text files inside the same folder they are displayed in the following order of priority srt sub txt Depending on the methods used to create the file or the state of the recording only parts of the subt...

Page 21: ...ces This unit does not support USB device charging FAT12 FAT16 and FAT32 file systems are supported This unit supports USB 2 0 Full Speed Never use alcohol paint thinner or benzine to clean this unit Before using chemically treated cloth carefully read the instructions that came with the cloth Do not use commercially available lens cleaners as they may cause malfunction Cleaning of the lens is gen...

Page 22: ...TV is changed This is normal when using VIERA Link HDAVI Control 4 or later For details please read the operating instructions for the TV No response when any buttons are pressed This unit cannot play discs other than the ones listed in these operating instructions B 20 The unit may not be operating properly due to lightning static electricity or some other external factor Turn the unit off and th...

Page 23: ...ontrol menu does not appear VCD with playback control Press MENU C to change to PBC on and then press RETURN D during playback Play does not start If playing DivX VOD content refer to the homepage where you purchased the DivX VOD content Example http vod divx com DivX If a disc contains CD DA and other formats proper playback may not be possible No subtitles Display the subtitles Subtitle in Menu ...

Page 24: ... Disconnect the HDMI cable from the TV and reconnect it to a different HDMI terminal The USB drive or its contents cannot be read The USB drive format or its contents is are not compatible with the system B 17 The USB host function of this product may not work with some USB devices USB devices with storage capacity of more than 32 GB may not work in some instances Slow operation of the USB device ...

Page 25: ...ds for a number The actual number following U70 will depend on the state of this unit The HDMI connection acts unusually The connected equipment is not HDMI compatible Use the High Speed HDMI Cables The HDMI cable is too long The HDMI cable is damaged REMOTE 1 or REMOTE 2 Match the modes on this unit and remote control Depending on the number being displayed 1 or 2 press and hold OK 8 and the corr...

Page 26: ...p Wavelength DVD CD 655 790 nm Laser power CLASS 1 Audio output Disc Number of channels 5 1 ch FL FR C SL SR SW VIDEO SECTION Video system PAL NTSC Composite video output Output level Terminal 1 Vp p 75 SCART 1 system S video output Y output level C output level Terminal 1 Vp p 75 PAL 0 3 Vp p 75 NTSC 0 286 Vp p 75 SCART 1 system RGB video output R output level G output level B output level Termin...

Page 27: ...hese products and batteries correctly you will help to save valuable resources and prevent any potential negative effects on human health and the environment which could otherwise arise from inappropriate waste handling For more information about collection and recycling of old products and batteries please contact your local municipality your waste disposal service or the point of sale where you ...

Page 28: ... caused by mobile telephones during use If such interference occurs please increase separation between this unit and the mobile telephone This unit is intended for use in moderate climates Placement Place this unit on an even surface To reduce the risk of fire electric shock or product damage Do not install or place this unit in a bookcase built in cabinet or in another confined space Ensure this ...

Page 29: ...29 RQT9588 Getting Started Playing Discs Other Operations Reference SC XH170 EB_RQT9588 B_eng book Page 29 Friday December 16 2011 3 11 PM ...

Page 30: ...c Testing Centre Panasonic Marketing Europe GmbH Winsbergring 15 22525 Hamburg Germany Panasonic Corporation Web Site http panasonic net C Panasonic Corporation 2011 RQT9588 B F1211AA0 p EU Pb SC XH170 EB_RQT9588 B_eng book Page 27 Friday December 16 2011 3 11 PM ...

Reviews: