background image

RQT6707

Recording operations

Cassette deck operations

13

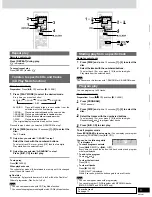
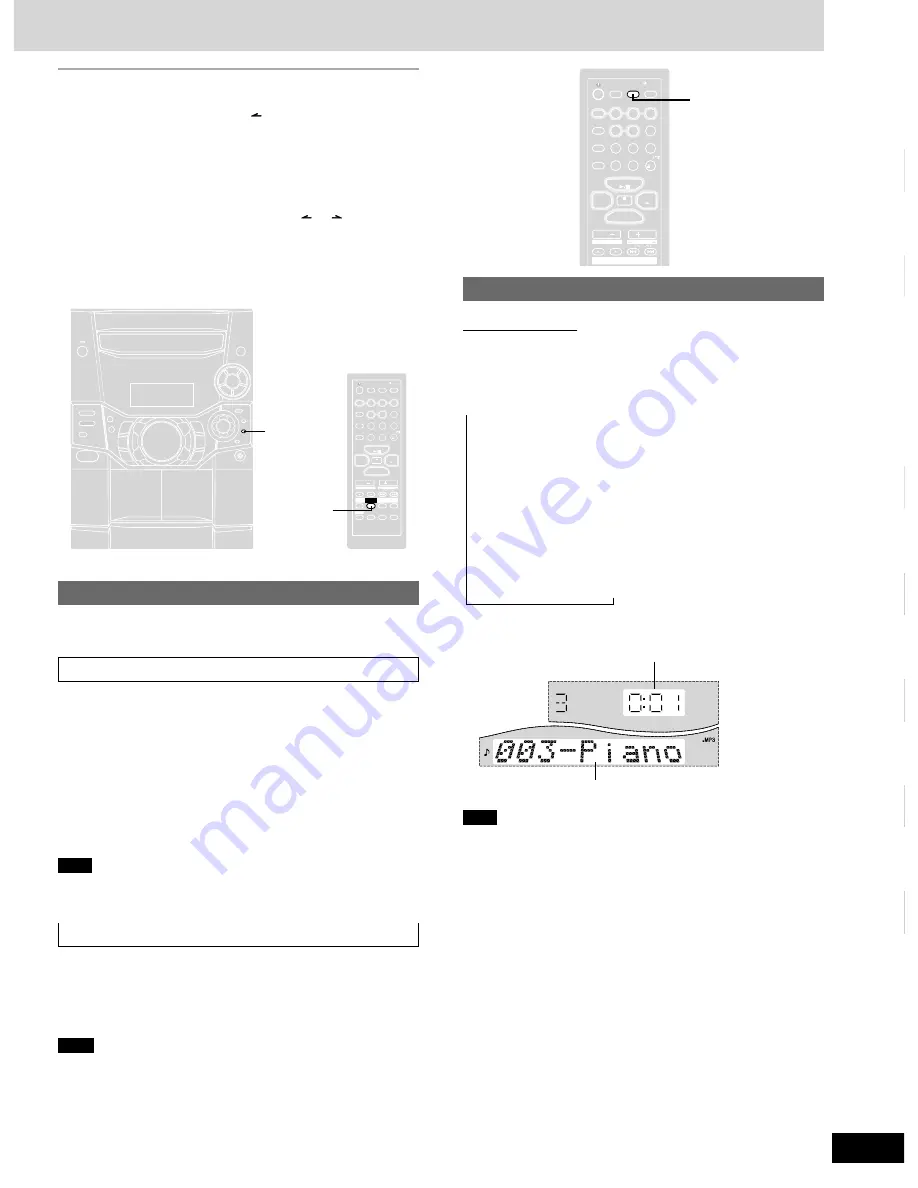
CD display for MP3/WMA

Remote control only

During play or pause

Press [CD DISP] to select a desired CD display mode.

Every time you press the button:

a

Remaining play time, Original spectrum analyzer display mode

b

Elapsed play time, Album title

c

Elapsed play time, Track title

d

Elapsed play time, ID3 album name (MP3 only)

e

Elapsed play time, ID3 title name (MP3 only)

f

Elapsed play time, ID3 artist name (MP3 only)

g

Elapsed play time, Original spectrum analyzer display mode

Example:

c

 Note

When a title is longer than 10 characters, it will scroll across the
display. If you selected a mode from  

b

 - 

f

 (see above), the

scrolling will start again after every 3 seconds.

“NO ID3” is displayed if titles with ID3 tags haven’t been entered.
(MP3 only)

Maximum number of displayable characters:
Album/track title: 31
ID3 album/title/artist name: 30
(ID3 is a tag embedded in MP3 track to provide information about
the track.)

This unit can display album and track titles with ID3 tags (version
1.0 and 1.1). Titles containing text data that the unit doesn’t support
cannot be displayed.

To recall a marked track number in the current disc

During play or stop

Press [MARKER, -RECALL] to recall a marker.

Remote control: Press [MARKER].
Play starts from the track recalled.

Note

“NO MARKER” indicates that the marker in the current disc is empty.

The marker memory is cleared when you open the CD tray.

For CD-DA, you cannot use this function during 1-Disc Random
play and All-Disc Random play.

You cannot use this function during program mode.

Marking a track

You can mark one track each on the discs loaded so that you can
start play from them later.

To mark a track number

1

During play or stop

Select your desired track.

(For MP3/WMA, refer to “Track skip play” on page 11.
For CD-DA, press the numbered buttons.
To select track 10 or over, press [

X

10] then the two digits.)

2

Hold down [MARKER, –MEMORY] until “STORING”
blinks on the display.

Remote control: Hold down [MARKER].

The selected track is stored in the marker of the current disc.

 Note

If a track is already stored in the marker, it will be replaced next time
you store a new track in the same marker.

For your reference
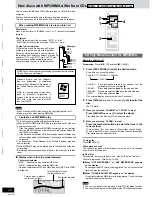
If you entered a character by mistake, push the joystick left ([

g

,

CURSOR]) (remote control: press [


CURSOR]) to move back to

the mistake, then enter the correct character.

L

Editing keywords

To move the cursor
On the main unit: Push the joystick left/right ([

CURSOR] or

[

CURSOR]).

On the remote control: Press [CURSOR (


 or 


 )].

Deleting a character
1. Move the cursor over the character to be deleted.
2. Press [DELETE] (remote control: [DEL]).

VOL

VOL

VOL

VOL

7

8

9

0

10

6

SHI

SHIFT

CLOCK

CLOCK

 TIMER

 TIMER

/

/

PL

PL AY

REC

REC

AUTO OFF

O OFF

INTRO

INTRO

S.

S.SO

SOUND EQ

UND EQ PRE

RESET EQ

T EQ MUT

UTING

ING

ENTER

ENTER

TITLE

TITLE

SEARCH

SEARCH

REW

FF

PROG

PROGRAM

AM

REP

REPE AT

AT

PLAY MODE

AY MODE

DISC

DISC

SPACE

SPACE

ABC

ABC

DEF

DEF

GHI

GHI

TUV

TUV

W X Y

W X Y Z

PQRS

PQRS

JKL

JKL

MNO

MNO

SLEEP

EEP

CD DISP

CD DISP

DIMMER

DIMMER

AL BUM

BUM

CURSOR

CURSOR

DEL

DEL

4

5

1

2

3

TAPE

TAPE

CD

CD

AUX

AUX

CLEAR

LEAR

TUNER

TUNER

BAND

ND

2

2

MARKER,
–MEMORY,
-RECALL

MARKER

MARKER

S.WOOFER

S.WOOFER

VOL

VOL

VOL

VOL

7

8

9

0

10

6

SHIFT

CLOCK

CLOCK

 TIMER

 TIMER

/

/

PL

PL AY

REC

REC

AUTO OFF

O OFF

INTRO

INTRO

S.SOUND EQ PRESET EQ MUTING

ENTER

ENTER

MARKER

MARKER

TITLE

TITLE

SEARCH

SEARCH

REW

FF

PROG

PROGRAM

AM

REP

REPE AT

AT

PLAY MODE

AY MODE

DISC

DISC

SPACE

SPACE

ABC

ABC

DEF

DEF

GHI

GHI

TUV

TUV

W X Y

W X Y Z

PQRS

PQRS

JKL

JKL

MNO

MNO

SLEEP

EEP

CD DISP

CD DISP

DIMMER

DIMMER

AL BUM

BUM

CURSOR

CURSOR

DEL

DEL

4

5

1

2

3

TAPE

TAPE

CD

CD

AUX

AUX

CLEAR

LEAR

TUNER

TUNER

BAND

ND

CD DISP

S.WOOFER

→→→

Elapsed play time

Track title
Summary of Contents for SAAK403 - MINI HES W/CD PLAYER

Page 1: ...usting this product please read these instructions completely Please keep this manual for future reference SC AK610 and SC AK403 are available in the U S A only As an ENERGY STAR Partner Panasonic has determined that this product meets the ENERGY STAR guidelines for energy efficiency P PC The illustrations show SC AK510 For U S A ...

Page 2: ...uto off function 16 Setting the time 16 Using the timers 17 Troubleshooting guide 18 Maintenance 18 Specifications 19 Limited Warranty ONLY FOR U S A Back cover Customer Services Directory ONLY FOR U S A Back cover Table of contents CAUTION DO NOT INSTALL OR PLACE THIS UNIT IN A BOOKCASE BUILT IN CABINET OR IN ANOTHER CONFINED SPACE ENSURE THE UNIT IS WELL VENTILATED TO PREVENT RISK OF ELECTRIC SH...

Page 3: ...s been damaged in any way such as power supply cord or plug is damaged liquid has been spilled or objects have fallen into the apparatus the apparatus has been exposed to rain or moisture does not operate normally or has been dropped Listening caution 1 Damage requiring service The unit should be serviced by qualified service personnel if a The AC power supply cord or AC adaptor has been damaged o...

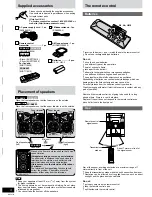
Page 4: ...Only for U S A To order accessories contact 1 800 332 5368 or web site http www panasonic com AC power supply cord 1 pc RJA0065 1D Remote control transmitter 1 pc N2QAHB000036 For U S A Black EUR7710010 Silver EUR7710020 For Canada EUR7710020 EUR7710010 FM indoor antenna 1pc RSA0006 J AM loop antenna 1 pc N1DADYY00002 Batteries 2 pcs R6 AA UM 3 Remote control signal sensor Transmission window Abou...

Page 5: ...ker cords Use only the supplied speakers The combination of the main unit and speakers provide the best sound Using other speakers can damage the unit and sound quality will be negatively affected SC AK410 Caution Use the speakers only with the recommended system Failure to do so may lead to damage to the amplifier and or the speakers and may result in the risk of fire Consult a qualified service ...

Page 6: ... SLEEP AUTO OFF 16 17 Disc button DISC 9 Program button PROGRAM 9 11 Play mode select button PLAY MODE 7 9 10 14 15 Use this for selecting CD play mode tune mode FM mode and AM beat proof _ Repeat button REPEAT 9 Album skip buttons ALBUM 10 Intro button INTRO 11 Shift button SHIFT To use functions labeled in orange While pressing SHIFT press the corresponding button SC AK610 SC AK510 For buttons A...

Page 7: ...dly to tune step by step TUNED is displayed when a radio station is tuned ST is displayed when a stereo FM broadcast is being received If noise is excessive in FM Remote control only Hold down PLAY MODE to display MONO Monaural sound is selected and noise reduces when reception is weak Hold down PLAY MODE again to cancel the mode MONO is also cancelled if the frequency is changed To receive FM bro...

Page 8: ...ipe with a soft dry cloth use CDs printed with label printers available on the market To prevent damage Always observe the following points Load only 1 CD on the tray Load CDs as shown in the figure An adaptor is not needed with 8cm CDs singles Set the system on a flat level surface Always unload all CDs before moving the unit Do not set the unit on top of magazines inclined surfaces etc move the ...

Page 9: ...D CD AUX AUX CLEAR LEAR TUNER TUNER BAND ND 1 3 4 S WOOFER S WOOFER Starting play from a specific track Remote control only 1 Press DISC and within 10 seconds 1 5 to select the disc 2 Select the track with the numbered buttons To select track 10 or over press X10 then the two digits Play starts from the selected track Note You cannot use this function with 1 RANDOM or A RANDOM mode Program play Yo...

Page 10: ...es must have the extension WMA or wma To play in a certain order Prefix the folder and file names with 3 digits numbers in the order you want to play them Files may not be recorded in numbered order if the prefixes have different numbers of digits For example 1 mp3 2 mp3 10 mp3 However some writing software may also cause recording to occur in a different order MPEG Layer 3 audio decoding technolo...

Page 11: ...ect track 10 or over press X10 once then the two digits To select track 100 or over press X10 twice then the three digits 4 Press ENTER Repeat steps 2 4 to program other tracks 5 Press J CD to start play To exit program mode Press PROGRAM in the stop mode You can replay your program by pressing PROGRAM then J CD You can do the following while P is displayed To check program contents Press g REW 3 ...

Page 12: ...ight 3 Press ENTER Track title search starts The matched track title is displayed To show the next track title search result push the joystick right f CURSOR Remote control Press f 4 FF When there is no match for the searched keyword the display shows NOT FOUND Press J CD to start play from the track found Title search mode is cancelled To cancel partway through Press L STOP 1 1 1 1 1 Press the nu...

Page 13: ...ur desired track For MP3 WMA refer to Track skip play on page 11 For CD DA press the numbered buttons To select track 10 or over press X10 then the two digits 2 Hold down MARKER MEMORY until STORING blinks on the display Remote control Hold down MARKER The selected track is stored in the marker of the current disc Note If a track is already stored in the marker it will be replaced next time you st...

Page 14: ...ton HEAVY SOFT CLEAR EQ OFF cancelled DISCO LIVE HALL HEAVY sound quality Adds punch to rock SOFT sound quality For background music CLEAR sound quality Clarifies higher sounds DISCO sound field Produces sound with the same kind of lengthy reverberations heard at a disco LIVE sound field Makes vocals more alive HALL sound field Adds an expansiveness to the sound to produce the atmosphere of a grea...

Page 15: ...r antenna Run a piece of vinyl wire horizontally across a window or other convenient location Leave the loop antenna connected Note Disconnect the outdoor antenna when the unit is not in use Do not use the outdoor antenna during an electrical storm Optional antenna connections AM outdoor antenna not included AM loop antenna included External unit connections An analog player with a built in phono ...

Page 16: ... to set the time 4 Press SHIFT CLOCK TIMER to finish setting the time The display will return to whatever was displayed before you set the time To display the time Press SHIFT CLOCK TIMER once when the unit is on or at standby mode The time is shown for about 5 seconds Note Reset the clock regularly to maintain accuracy Remote control only Previous display CLOCK REC PLAY VOL VOL VOL VOL 7 8 9 0 10...

Page 17: ...me Note The sleep timer will be turned off when you start recording from a CD Using the play record timer Remote control only You can set the timer to come on at a certain time to wake you up play timer or to record a radio station or from the aux source record timer The play and record timers cannot be used together Preparations Turn the unit on and set the clock A page 16 For the play timer prep...

Page 18: ...ctive Replace the disc The disc was incompletely formatted Use the recording equipment to fully format the disc before recording The unit cannot display the remaining play time for variable bit rate VBR tracks There is a problem with the disc mechanism A power failure may have occurred The tray will open automatically Remove the disc from the tray and after ensuring there is no disc in the tray cl...

Page 19: ... cassette tape CD SECTION Sampling frequency 44 1 kHz Decoding 16 bit linear Beam source wavelength Semiconductor laser 780nm Number of channels Stereo Frequency response 20Hz 20 kHz 1 2dB Wow and flutter Below measurable limit Digital filter 8fs D A converter MASH 1 bit DAC MP3 Bit rate 32kbps 320kbps Sampling frequency 32kHz 44 1kHz 48kHz WMA SC AK610 and SC AK510 only Sampling frequency 32kHz 4...

Page 20: ...es Company Division of Matsushita Electric of Puerto Rico Inc PSC Ave 65 de Infantería Km 9 5 San Gabriel Industrial Park Carolina Puerto Rico 00985 Panasonic Canada Inc 5770 Ambler Drive Mississauga Ontario L4W 2T3 www panasonic ca RQT6707 3P G1002TL3013 2003 Matsushita Electric Industrial Co Ltd Printed in Singapore Customer Services Directory ONLY FOR U S A Limited Warranty ONLY FOR U S A En ...

Reviews: