5
RQT8043
RQTV0079
LANG - 5
LANG - 4
FRANÇAIS
DANSK
ENGLISH
Optional antenna connections
Optional antenna connections
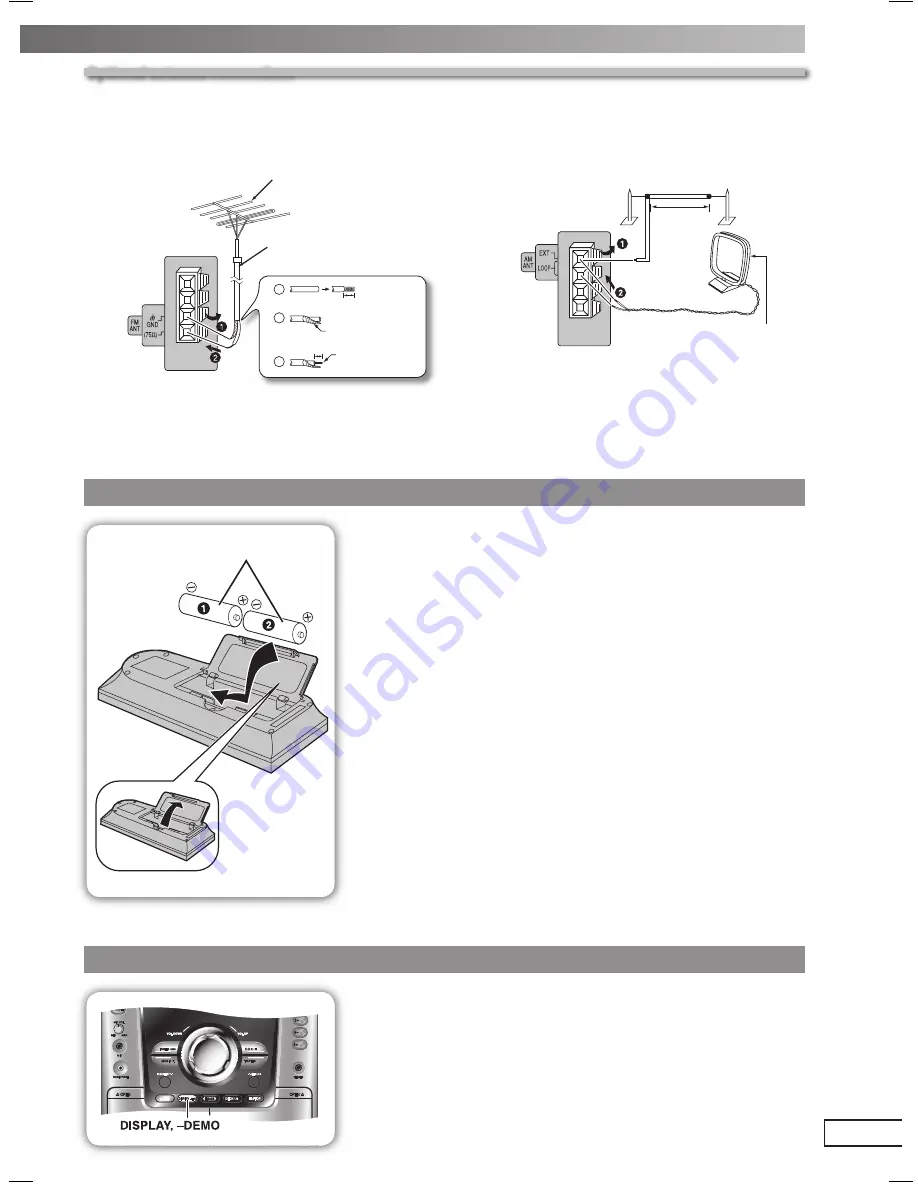
Use outdoor antenna if radio reception is poor.
Note:
Disconnect the outdoor antenna when the unit is not in use. Do not use the outdoor antenna during a lightning storm.
FM outdoor antenna
AM outdoor antenna
Rear panel
of this unit
FM outdoor antenna
(not included)
75
Ω
coaxial cable
(not included)
Shield braid
Core wire
30 mm
15 mm
Rear panel
of this unit
AM outdoor antenna (not included)
AM loop antenna
(included)
5-12 m
• Disconnect the FM indoor antenna.
• The antenna should be installed by a competent
technician.
• Run a piece of vinyl wire horizontally across a window or
other convenient location.
• Leave the loop antenna connected.
Step 2
Step 2
- Inserting batteries into the remote control
- Inserting batteries into the remote control
AA/R6/LR6
■
Batteries
• Insert so the poles (+ and –) match those in the remote control.
• Remove if the remote control is not going to be used for a long period of time.
Store in a cool, dark place.
• Replace if the unit does not respond to the remote control even when held
close to the front panel.
• Do not use rechargeable type batteries.
• Mishandling of batteries in the remote control can cause electrolyte leakage,
which may cause a fi re.
• If electrolyte leaks from the batteries, consult your dealer.
Wash thoroughly with water if electrolyte comes in contact with any part of
your body.
Do not:
• mix old and new batteries.
• use different types at the same time.
• heat or expose to fl ame.
• take apart or short circuit.
• attempt to recharge alkaline or manganese batteries.
• use batteries if the covering has been peeled off.
• put heavy objects on the remote control.
• spill liquids onto the remote control.
■
Use
Aim at the remote control sensor, avoiding obstacles, at a maximum range
of 7 m directly in front of the unit.
Refer to page 6 for the remote control sensor position.
Step 3
Step 3
- DEMO function
- DEMO function
When the unit is fi rst plugged in, a demonstration of its functions may be shown
on the display.
If the demo setting is off, you can show a demonstration by selecting “DEMO
ON”.
Press and hold [DISPLAY, –DEMO].
The display changes each time the button is held down.
NO DEMO (off)
Ô
DEMO ON (on)
While in standby mode, select “NO DEMO” to reduce power consumption.
Note:
DEMO function cannot be turned on when Dimmer is on.
RQTV0079-M_1EN.indd 5
RQTV0079-M_1EN.indd 5
12/8/05 3:51:55 PM
12/8/05 3:51:55 PM


