·
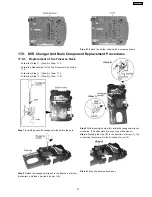
Follow the (Step 1) - (Step 2) of Item 17.2.
·
Follow the Disassembly for the Top Ornament Unit of Item
17.4.
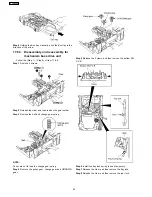
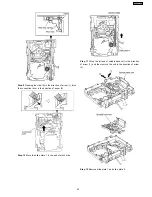
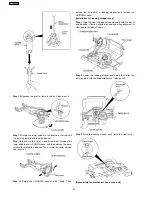
Step 1
Detach FFC Boards (FP5201, FP3202, FP3203 &
FP4202).
Step 2
Remove 1 screw at rear cabinet as show below.
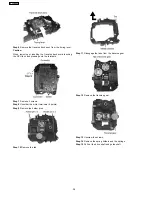
Step 3
Lift up the mechanism unit cover, and then push in the
mechanism unit cover.
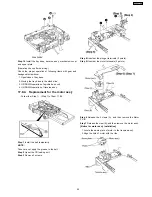
Step 4
Release the claws of both ends, and then lift up the
DVD changer unit.
·
Follow the (Step 1) - (Step 2) of Item 17.2.
·
Follow the Disassembly for the Top Ornament Unit of Item
17.4.
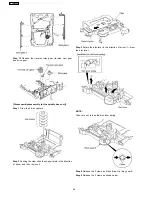
Step 1
Lay the unit as shown below.
17.5.1. Disassembly of the DVD Module
(1) P.C.B.
·
Follow the (Step 1) - (Step 2) of Item 17.2.
·
Follow the Disassembly for the Top Ornament Unit of Item
17.4.
·
Follow the (Step 1) - (Step 4) of Item 17.5.
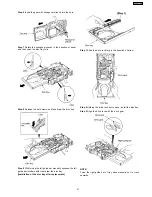
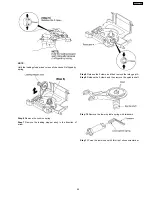
Step 1
Remove 4 screws.
Step 2
Remove the mechanism unit cover.
Step 3
Lay the unit.
Step 4
Connect the FFCs board from DVD Module (1) P.C.B..
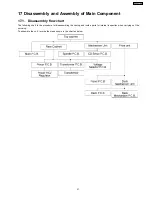
17.5. Disassembly for DVD changer unit
17.6. Disassembly for Panel P.C.B., LED P.C.B. & Tact Switch P.C.B.
34
SA-VK61DGS
Summary of Contents for SB-VK61
Page 10: ...10 Operation Procedures 10 SA VK61DGS ...
Page 11: ...11 SA VK61DGS ...
Page 12: ...11 Disc information 12 SA VK61DGS ...
Page 13: ...13 SA VK61DGS ...
Page 17: ...13 Procedure for repairing the set 17 SA VK61DGS ...
Page 57: ...18 3 1 Cassette Deck Section 18 3 2 Adjustment Point 18 3 Alignment Points 57 SA VK61DGS ...
Page 131: ...25 1 Deck Mechanism RAA3412 S 25 1 1 Deck Mechanism Parts Location 131 SA VK61DGS ...
Page 132: ...132 SA VK61DGS ...
Page 135: ...135 SA VK61DGS ...
Page 136: ...136 SA VK61DGS ...
Page 138: ...25 3 Cabinet 25 3 1 Cabinet Parts Location 138 SA VK61DGS ...
Page 139: ...139 SA VK61DGS ...
Page 140: ...140 SA VK61DGS ...
Page 155: ...25 6 Packaging 155 SA VK61DGS PRT0406 D K J N L ...
Page 156: ......

