
19
RQT9882
EN
G
L
ISH
4
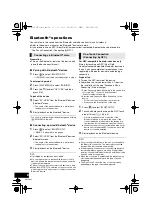
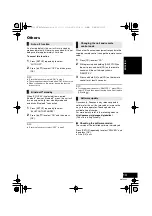
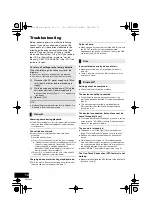
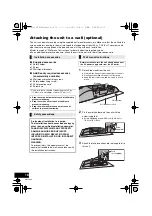
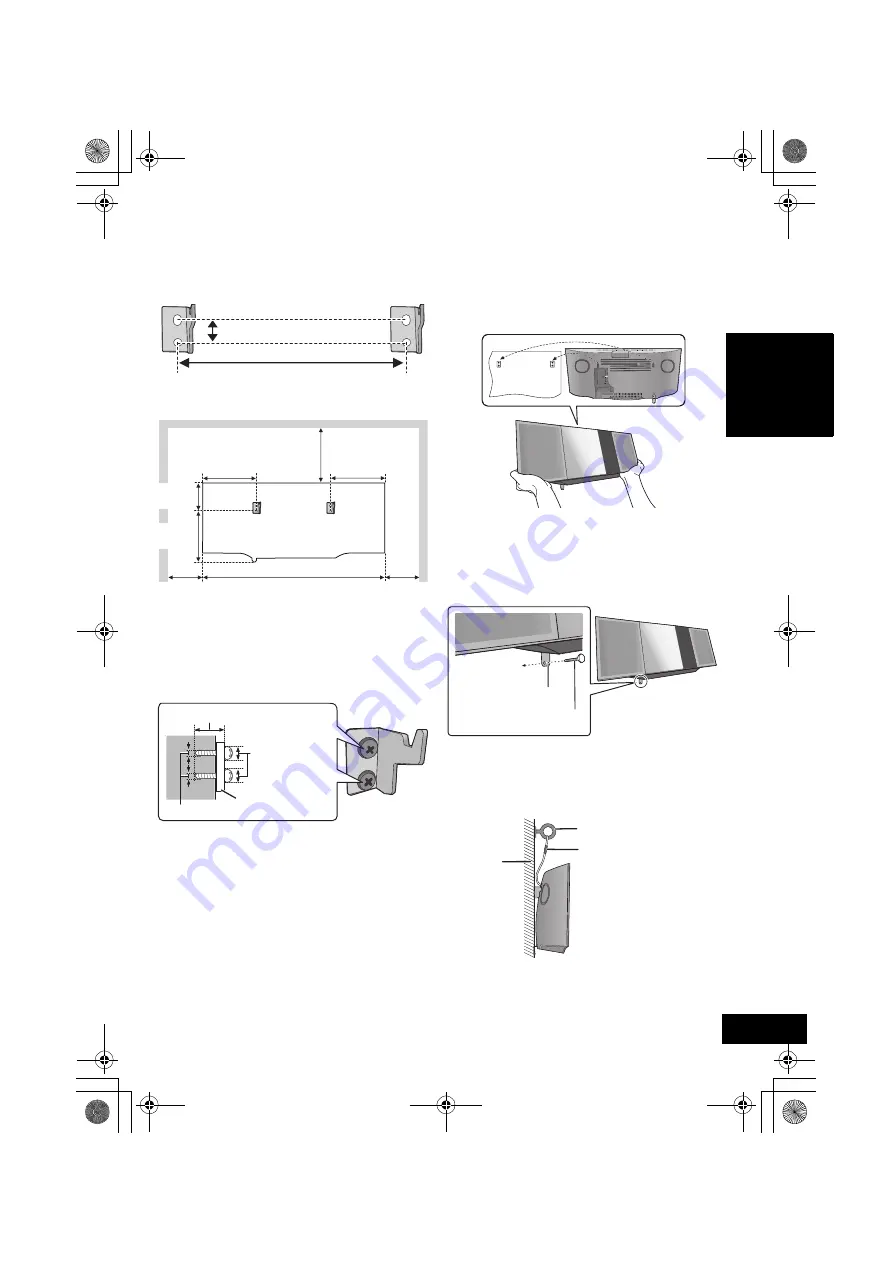
Measure and mark the position of both sides of
the wall mount brackets.
≥
Use figures below to identify the screwing positions.
The position to attach the wall mount brackets
Space required
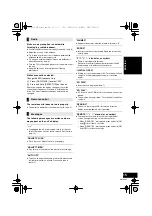
5
Attach the wall mount bracket to both sides of
the wall with two screws (not supplied).
≥
Use a level to ensure both wall mount brackets are
level.
6
Hook the unit securely onto the wall mount
brackets with both hands.
≥
Connect the FM antenna and the AC power supply
cord to the unit before hanging the unit onto the
wall. (
l
p. 6)
≥
After hanging the unit, release your hands carefully
to confirm the unit sits securely on the wall mount
brackets.
7
Drive the safety holder fixing screw
(not supplied) to secure the safety holder onto
the wall.
≥
Refer to step 5 for requirements before screwing.
8
Attach the fall prevention cord (not supplied) to
the wall.
≥
Make sure that the slack of the cord is minimal.
204 mm (8
q
)
13 mm (
1
/
2
q
)
300 mm
(11
13
/
16
q
)
500 mm
(19
11
/
16
q
)
75 mm
(2
15
/
16
q
)
142 mm
(5
19
/
32
q
)
154 mm
(6
1
/
16
q
)
100 mm
(3
15
/
16
q
)
142 mm
(5
19
/
32
q
)
100 mm
(3
15
/
16
q
)
At least 30 mm (1
3
/
16
q
)
‰
7.5 mm (
19
/
64
q
)
to
‰
9.4 mm (
3
/
8
q
)
‰
4 mm (
5
/
32
q
)
Wall mount bracket
Wall
Safety holder fixing screw
(not supplied)
Safety holder
Fix to the wall
Cord (not supplied)
Screw eye (not supplied)
Wall
SC-HC39_PPC~RQT9882_mst.book 19 ページ 2014年1月31日 金曜日 午後7時45分


