background image

K

CMY

CY

MY

CM

Y

M

C

14.eps 175 lpi  45˚

                    black 

3

2

1

4

5

6

7

0

9

10

8

CANCEL

CINEMA

ZOOM

DISPLAY

PLAY MODE

ENTER

Numbered
buttons

ALL PGM

RND

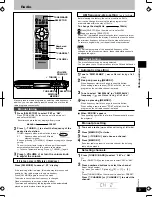
Press [     ] (PLAY).

Press [     ] (PLAY).

Some items will not be played even if you programmed 
them.

1

2

1

2

e.g.

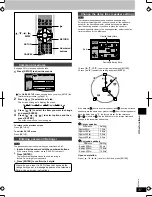
Program play

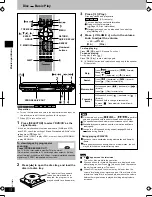
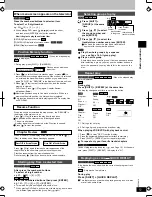
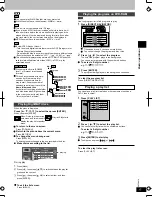
You can select up to 24 items to play in the order you choose.

Press the numbered buttons to select a group,title,
or track(               then press [ENTER]).

Some items cannot be selected.
Repeat this step to program
other items.
Times are not displayed when
programming DVD-Video and 
WMA

MP3.

Title No. Chapter No.

Program No.

Press the numbered buttons to
select a group or a title.

Some items cannot be selected.

Random play

Disc     Convenient functions

ALL PGM

ALL

The unit plays tracks in all the groups on a disc.

Press [      ] (PLAY).

All group play

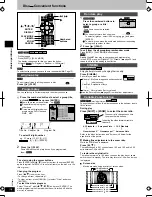
CINEMA

Cinema 1

During play

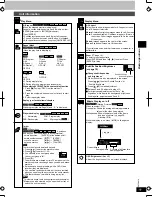
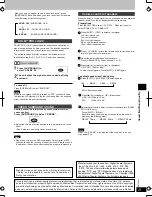
Press [SHIFT] + [ZOOM]  to select the zoom ratio. 

    Making fine adjustments to the zoom ratio

While the ZOOM icon is displayed:

Press [     ,     ].

The ratio changes in 0.01 units between 1.00 and 1.60 and in 0.02 
units between 1.60 and 2.00.

Indicating the video format suitable to 
this scale.

4:3 Standard  

  European Vista   

  16:9 Standard

Cinemascope 2 

 Cinemascope 1

 American Vista

x1.00

4:3 Standard

Variable Zoom function

Change the zoom ratio so the picture expands to the optimum size to 
fill the screen.

Refer to the disc's instructions and  Screen size below for the 
aspect ratio of the picture.

To restore the original ratio

The ratio also returns to 1.00 when you open the disc tray or space 
switch the unit to standby. The ratio may return to 1.00 when  a menu 
is displayed.

Screen size

Movies are made using a variety of screen sizes.

   (1. 66: 1)

   (1. 85: 1)

 (2 .3 5:1)
 (2 . 5 5:1)

16: 9 Standard

4: 3 Standard

European Vista

American Vista

Cinemascope 1

Cinemascope 2

 (moving pictures) 

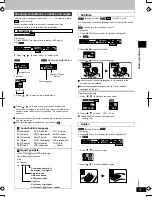
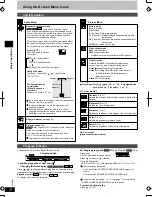
e.g.  23, press [    10]     [2]     [3].

                    [2]     [3]     [ENTER]

To select extra groups, you have to enter passwords (       Page 13)

    You can select more than one group. 
    To select all groups,  select  ALL using [     ,      ] and press
    [ENTER].
    To clear a group, press the numbered buttons corresponding
    to the group you want to clear.

To exit from the all group/program/random mode

Press [SHIFT] + [PLAY MODE] while stopped.

Note

Disable HighMAT disc play to use random and program play.
In the SETUP menu, set  HighMAT TO  Disable (      page 26) and 
reload the disc for the setting to be effective.

While stopped

Press [SHIFT] + [PLAY MODE]

The display changes each time you press the button.

All group(           )     Program      Random     Off(Normal)

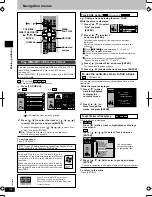
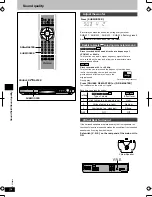
Enjoy better pictures by changing their quality.
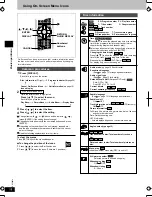
Press [CINEMA].

Each time you press the button:

    Cinema1:  Mellows images and enhances detail 

                     in dark scenes.    

    Cinema2:  Emphasize effects.  


    Normal:    Normal mode (Factory preset)

   Use the Picture Menu(       page20) to make finer adjustments.

The zoom ratio changes each time
you press the two buttons.

Basic operations

To select using the cursor buttons

Press [ENTER] and [     ,     ] to select an item, then press [ENTER] 
again to register. Select  ALL to enter all items (on the disc or in the 
title or group).

Changing the program

Press [     ,     ] to select an item.
- To change an item, repeat step 1.
- To clear an item, press [CANCEL ] (or select  Clear and press  
  [ENTER]).

To clear the whole program

Select  Clear all  with [     ,     ,     ,     ] and press [ ENTER ].The 
whole program is also cleared when the unit is turned off and the  
disc tray is opened.

To select 2-digit number:

PROGRAM

Choose a title and chapter, then press ENTER.

No

Time

T

Press PLAY to start

Play

Clear

Clear all

SELECT

ENTER    RETURN

1

C

SELECT
NUMBER

0

9

Random Playback

Title

Press PLAY to start

2

RQTC0019

-

-

-

-

-

-

e.g.

-

-

-

-

-

-

-

-

-

-

Summary of Contents for SC-HT600

Page 1: ...e connecting operating or adjusting this product The region number of this player is 5 The player will play DVD Video marked with labels containing 5 or ALL Example The region number of this player is 3 The player will play DVD Video marked with labels containing 3 or ALL Example Region numbers are allocated to DVD players and software according to where they are sold GCS GCU EE 35 2 3 ALL 35 1 5 ...

Page 2: ...as buttons with the same functions 5m cable x 3 10m cable x 2 5m cable RWJC0006 10m cable RWJC0005 5m cable x 1 10m cable x 2 5m cable x 2 enclosed in packing box for front speaker CAUTION THIS PRODUCT UTILIZES A LASER USE OF CONTROLS OR ADJUSTMENTS OR PERFORMANCE OF PROCEDURES OTHER THAN THOSE SPECIFIED HEREIN MAY RESULT IN HAZARDOUS RADIATION EXPOSURE DO NOT OPEN COVERS AND DO NOT REPAIR YOURSEL...

Page 3: ...ortion or abnormal sound effects there should be at least a distance of 15cm between the unit and the wall Do not place heavy objects on the top of the unit Voltage Overvoltage must be avoided overvoltage will lead to overload of the unit and fire Do not use a DC power supply Check if the power supply meets the requirement when the unit is set up in ships or other locations where DC power supply i...

Page 4: ... the labels given to the items on discs depend on the disc type Title the largest division on DVD Video usually an entire movie Chapter the smallest division on DVD Video Group collections of tracks on DVD Audio and equivalent to folders or albums on data discs Track the smallest division on DVD Audio CDs and Video CDs or a single WMA MP3 file Program the division on DVD RAM equivalent to a single...

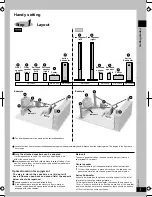
Page 5: ... not locate them on level planes take suitable measures to prevent the unit falling Main unit To ensure good ventilation the speaker and main unit must be kept at least 10 cm apart Center speaker It is acceptable to put the speaker directly under the television If the middle speaker is placed directly on the television the generated vibration may cause graphics image distortion Active Subwoofer It...

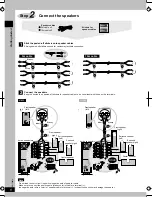
Page 6: ... those on the terminals 5m cable 10m cable Front speaker left Active subwoofers Active subwoofers Front speaker right Center speaker Center speaker Note Do not lead to short circuit in positive negative pole of speaker cable Make sure to connect the positive pole brassy color of cable to terminal the negative pole silvery color of speaker cable to terminal Incorrect connection may damage the speak...

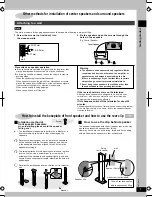
Page 7: ...he wooden walls How to use the clip behind speaker If there are abnormal colors on the television Although these speakers are designed to be located near televisions with some combinations of television and equipment the image may be affected If this happens switch off the television for about 30 minutes The demagnetizing function of television can correct the problem if the problem remains the sa...

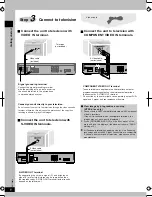
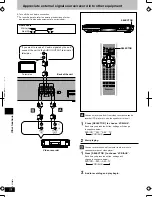
Page 8: ... the protection of the copy thus resulting in abnormal play of the images Connect the signal grounding terminal with the earthing wire so as to minimize the sound distortion in the microphone in Karaoke stereo system Connect the unit to television with S VIDEO IN terminals Video cable COMPONENT VIDEO OUT terminal These terminals are applicable to either interlace output or progressive scanning out...

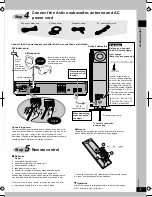
Page 9: ...an damage items the fluid contacts and may cause a fire Remove if the remote control is not going to be used for a long period of time Store in a cool dark place Operation Aim at the sensor avoiding obstacles at a maximum range of 7m directly in front of the unit Insert so the poles and match those in the remote control Do not use rechargeable type batteries AM loop aerial Fix the other end of the...

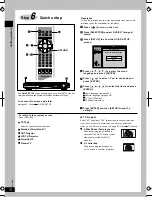
Page 10: ...ICK SETUP screen Press to select the menu language and press ENTER Audio language page 26 Subtitle language page 26 TV Type below TV Aspect below The QUICK SETUP screen sppears when you press SETUP the first time after purchase and assists you to make necessary settings To return to the previous screen Press RETURN Preparation Turn on the television and select the appropriate video input on the te...

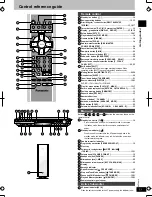
Page 11: ...Cursor button Enter button ENTER 13 Display group button DISPLAY GROUP 13 15 18 Setup button SETUP 10 27 Play mode button PLAY MODE 14 Cinema button CINEMA 14 Zoom button ZOOM 14 Doble re master button D RE MASTER DOUBLE RE MASTER 24 Cancel button CANCEL 14 Down mix button D MIX 22 Sound field control button SFC 22 Subwoofer button SUBWOOFER 24 Surround time delay button SURROUND DELAY 23 Center f...

Page 12: ...formation Open or close this display Page 18 Disc Information Navigation menus can be also used to control the play Page 16 CD text only Press Play Disc tray closes and play starts To stop playing Press page13 Resume Function To pause playing During play press Press Play to start playing again If this machine connected to TV set through video output or S video output terminal or used to play PALdi...

Page 13: ...the numbered buttons to select an item To select 1 or 2 digit number e g 23 10 2 3 When playing DVD press to select an item and then press ENTER to confirm the selection Now it begins to play the selected item RETURN Display menu scree TOP MENU Display the first menu screen MENU Display menu scree 1 Press to clear PBC from the display 2 Press the numbered buttons to select a track to start play 3 ...

Page 14: ...2 5 5 1 16 9 Standard 4 3 Standard European Vista American Vista Cinemascope 1 Cinemascope 2 moving pictures e g 23 press 10 2 3 2 3 ENTER To select extra groups you have to enter passwords Page 13 You can select more than one group To select all groups select ALL using and press ENTER To clear a group press the numbered buttons corresponding to the group you want to clear To exit from the all gro...

Page 15: ...age and turn the subtitles on and off You can turn the subtitles on and off During play Press DISPLAY to select disc information Page18 e g Press to select Subtitle Press to select subtitle language In some cases the subtitle language is not changed to the selected one immediately For the language abbreviations refer to Audio Subtitle Language on the left Clear Display Subtitle 1 Press to highligh...

Page 16: ...ween A E I O and U Press to erase a character You can erase the asterisk to search for the first word in a title You can enter numbers with the numbered buttons Repeat this step to enter O V and E Press to select Find and press ENTER The search results screen appears Press to select the track and press ENTER While the menu is displayed Press while a track is highlighted to display the contents scr...

Page 17: ... play them this may not work at times Playing HightMAT discs When the menu is displayed Press to select then press ENTER When you press ENTER Play list Play starts To return to the menu screen Press TOP MENU Return to the menu above the current menu Press RETURN To change the menu background Press DISPLAY The background is changed to the one recorded in the disc Playing the programs on DVD RAM Use...

Page 18: ... Angle number page 15 PG Program number PL Play list number T Title number C Chapter number T Track number G Group number T Track number in group G Group number P Picture number in group ON OFF ON OFF ON OFF 0 30 sec e g Time Track number in disc Total number of tracks on disc Picture number in disc Total number of pictures on disc Menu play Indicates whether menu play PBC is on or off Audio mode ...

Page 19: ...e volume of the frame and type of picture page 29 Glossary I P B While the display is on press to change the display Subtitle Position Brightness page 15 Moving Pictures Bitrate Display on off OSD Brightness 3 or 3 Adjust the brightness of the on screen displays 4 3 Aspect Select how to show images made for 4 3 aspect screens on a 16 9 aspect television Normal Laterally stretches images made for a...

Page 20: ...ing the time display Speaker Speaker 3 to 4 times distance A Position of appreciation Using On Screen Menu lcons Unit information Changing play speed Moving Pictures Dolby Digital only You can slow down or speed up play Press slower or faster There are five speeds After you change the speed If you turn off the SUPPER SURROUND SOUND output is in stereo You cannot use ADVANCED VIRTUAL SURROUND Sound...

Page 21: ...1 4 5 6 7 0 9 10 8 Numbered buttons CHANNEL VOLUME TUNER BAND SELECTOR MEMORY FM MODE TUNE MODE VOLUME DOWN UP TUNING SELECTOR Press SELECTOR to select FM or AM Press TUNE MODE on the front panel of the main unit and select MANUAL Each time you press the key display will vary in turn MANUAL PRESET Press TUNING to select the frequency of the desired radio station TUNED Appears when a radio station ...

Page 22: ...n operation this function does not work When Dolby Pro Logic is on the effect of the function is worse SOUND FIELD CONTROL Press SFC to select a setting Each time you press the button the settings varies as follows HEAVY to increase the forcefulness of rock music CLEAR to obtain distinct treble zone SOFT for background FLAT to cancel no effects added factory preset To check current setting Press S...

Page 23: ...om Digital Theater Systems Inc US Pat No 5 451 942 5 956 674 5 974 380 5 978 762 and other world wide patents issued and pending DTS and DTS Digital Surround are registered trademarks of Digital Theater Systems Inc Copyright 1996 2000 Digital Theater Systems Inc All rights reserved This product incorporates copyright protection technology that is protected by method claims of certain U S patents a...

Page 24: ...kers as if coming from behind you Set switch V R S on the rear panel of the main unit to ON Virtual Speaker Bass effect will increase as per the level order Discs recorded with 2 sound tracks at a frequency of LPCM44 1 or 48 kHz This function can add in higher frequency signals that are not available on the disc and allow you to appreciate more natural sound effects Discs recorded at 44 1 or 48 kH...

Page 25: ...ime minute Each time when you press To cancel the timer Press SLEEP to select SLEEP OFF To confirm the setup Press SLEEP again display the remaining length of timed shutdown To change the setup Press SLEEP to display the time remained press again to select the desired time Sound will automatically switch to stereo 2 channel If there is distorted sound just turn on the dynamic range compression pag...

Page 26: ...s are stored in the unit and do not change even if you shut down the unit For details see common operation procedures on page 27 Enable Play HighMAT discs as it is Disable Play HighMAT discs as ordinary WMA MP3 JPEG discs HighMAT Play HighMAT discs as HighMAT or as regular WMA MP3 JPEG discs Reload the disc to activate the setup DVD Video Mode Select picture play mode in DVD Audio CD Once the CD i...

Page 27: ... speaker setting Center speaker Setting 1 3ms 2 6ms 3 9ms 5 3ms Difference Approx 200cm Approx 400cm Approx 600cm Setting 5 3ms 10 6ms 15 9ms Surround speakers SELECT ENTER RETURN m s m s L LS R SW C RS 0 0 Central delay time Surround delay time Exit For central placed speakers and surround speakers only For optimum listening with 5 1 channel sound all the speakers except for the Active subwoofer ...

Page 28: ...ou can enjoy music from from video recorder cassette recorder CD player etc use the speaker of this unit Press SELECTOR to choose VCR AUX Each time you press the button settings will change in sequence below DVD CD FM AM TV VCR AUX Start playing You can record the sound from outer radio or discs to cassette recorder or video player Press SELECTOR to choose VCR AUX Each time you press the button se...

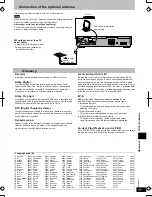
Page 29: ...Ukrainian 8575 Urdu 8582 Uzbek 8590 Vietnamese 8673 Volapük 8679 Welsh 6789 Wolof 8779 Xhosa 8872 Yiddish 7473 Yoruba 8979 Zulu 9085 Leave the loop aerial connected 75 coaxial cable not included 5 12 m Decoder A decoder restores coded audio signals on DVDs to normal Dolby Digital This is a method of coding digital signals developed by Dolby Laboratories Apart from stereo 2 channel audio these sign...

Page 30: ...ries Random and programmed plays cannot be seclected for some DVD Video When the playlist or the time of play are not displayed on the screen the adding of mark cannot be done This function depends on software availability Even if a disc has a number of angles recorded these angles may be recorded for specific scenes only Select DVD CD for the signal source Cancel all group programmed and random p...

Page 31: ...e to tune an AM frequency only for Asia Adjust the location of FM or AM aerial Use an outdoor aerial Turn off television or put it far away from the unit Place the aerial far away from other cables and connecting wires Change frequency step Press SELECTOR on the main unit to select FM and then press and hold the key and the current minimum frequency will be flashed on the display after AM mode is ...

Page 32: ...0 Type 1 way 2 speaker system Speaker Full frequency band 8cm cone shaped Resistance 6 Input Power 160W music Output Sound Pressure Level 81dB W 1m Frequency Range 80Hz 22kHz 16dB Dimension W x H x D 100 x 1098 x 132 mm included baseplate Weight 5 56kg Type 1 way 2 speaker system Speaker Full frequency band 8cm cone shaped Resistance 6 Input Power 160W music Output Sound Pressure Level 82dB W 1m F...

Reviews: