file:///C|/Documents and Settings/lopez/Pulpit/s/PANASONIC SA-HT870E_EG_EB/ALL/SVC/s1704010100.html
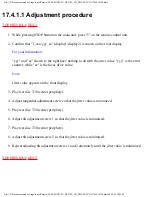
17.4.1.1 Adjustment procedure
1. While pressing STOP button on the main unit, press "5" on the remote control unit.
2. Confirm that "J_xxx/yyy_zz" (display1/display2) is shown on the front display.
For your information:
"yyy" and "zz" shown to the right have nothing to do with the jitter value. "yyy" is the error
counter, while "zz" is the focus drive value.
Note:
Jitter value appears on the front display.
3. Play test disc T30 (center periphery).
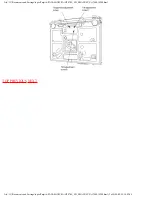
4. Adjust tangential adjustment screw so that the jitter value is minimized.
5. Play test disc T30 (center periphery).
6. Adjust tilt adjustment screw 1 so that the jitter value is minimized.
7. Play test disc T30 (center periphery).
8. Adjust tilt adjustment screw 2 so that the jitter value is minimized.
9. Repeat adjusting tilt adjustment screws 1 and 2 alternately until the jitter value is minimized.
file:///C|/Documents and Settings/lopez/Pulpit/s/PANASONIC SA-HT870E_EG_EB/ALL/SVC/s1704010100.html08-08-29 18:03:49
Summary of Contents for SC-HT870
Page 20: ...SHIFT SHIFT I SHIFT ...

