background image

RQTV0102

12

Timer (Continued)

Other basic operations

Other basic operations

To

Action

change the settings

Repeat steps 1 to 4 and 6 on page 11. 

change the source 
or volume

1) Press [

˚

PLAY/REC] to clear the timer 

indicator from the display.

2) Make changes to the source or volume.
3) Perform steps 5 and 6 on page 11. 

check the settings
(when the unit is on 
or in standby mode)

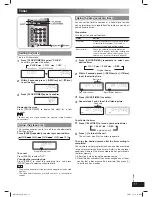
Press [CLOCK/TIMER] repeatedly to 
select 

˚

PLAY or 

˚

REC.

cancel Press 

[

˚

PLAY/REC] to clear the timer 

indicators from the display.

Note

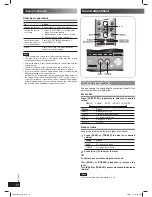
•  The play timer and record timer cannot be used together.
• The play timer will start at the preset time, with the volume 

increasing gradually to the preset level. 

•  The record timer will start 30 seconds before the set time with the 

volume muted.

•  The timer comes on at the set time every day if the timer is on.
•  The unit must be in the standby mode for the timer to function.
•  If you turn the unit off and on again while a timer is functioning, the 

fi nish time setting will not be activated.

•  If MUSIC PORT is selected as the source when the timer comes on, 

the system turns on and engages MUSIC PORT as the source. If 
you wish to playback or record from the portable audio equipment, 
activate the equipment’s play mode and increase the volume. (See 
the portable audio equipment’s instruction manual.)

Sound adjustment

Selecting sound effects

Selecting sound effects

You can change the sound effect by selecting Preset EQ or 
adjusting the bass or treble effect.

Preset EQ

Preset EQ

Press [PRESET EQ] repeatedly to select your desired 
setting.

HEAVY 

 CLEAR 

 SOFT 

 VOCAL 

 EQ-OFF 

Setting

Effect

HEAVY

Adds punch to rock

CLEAR

Clarifi es higher frequencies

SOFT

For background music

VOCAL

Adds gloss to vocal

EQ-OFF

No effect

Bass or treble

Bass or treble

Enable you to enjoy the lower or higher pitch sound.

1

Press [BASS] or [TREBLE] to select your desired 
setting.

Setting

Effect

BASS

For lower pitch sound

TREBLE

For higher pitch sound

2

Press [

5

] or [

] to adjust the level.

OR

To adjust bass or treble using the main unit.

Turn [BASS] or [TREBLE] clockwise to increase the 
level.
Turn [BASS] or [TREBLE] counter-clockwise to decrease 
the level.

Note

The tone level can be varied within -3 to +3.

RQTV0102_2B.indd   12

RQTV0102_2B.indd   12

2/9/07   11:14:34 AM

2/9/07   11:14:34 AM

Summary of Contents for SC-PM54

Page 1: ...ad 2 Safety precautions 3 Disc information 3 Placement of speakers 3 Getting started 4 Overview of controls 6 Discs 7 Cassette tape 9 Radio 10 Timer 11 Sound adjustment 12 External unit 13 Troubleshooting guide 14 Specifications 15 Maintenance 15 When moving the unit 15 SUPPLIED ACCESSORIES SUPPLIED ACCESSORIES Please check and identify the supplied accessories Use numbers indicated in parentheses...

Page 2: ...er upon the purchase of an equivalent new product Disposing of this product correctly will help to save valuable resources and prevent any potential negative effects on human health and the environment which could otherwise arise from inappropriate waste handling Please contact your local authority for further details of your nearest designated collection point Penalties may be applicable for inco...

Page 3: ...s display disappears OPEN CLOSE Always press OPEN CLOSE 0 to insert or remove a disc Do not push or pull out the tray by hand as this may cause an accident Place the disc label up in the center or tray Insert only one disc into each tray Placement of speakers SC PM53 Speakers are designed identically so that no left or right channel orientation is necessary SC PM54 Place the speakers so that the t...

Page 4: ...nlet used the front part of the connector may jut out as shown in the drawing However there is no problem using the unit 3 Connect the speaker cords Incorrect connection can damage the unit Red Black Red ª Black FM ANT 75 AM ANT EXT LOOP 2 Connect the FM indoor antenna Tape the antenna to a wall or column in a position with least amount of interference Adhesive tape FM indoor antenna 1 Connect the...

Page 5: ...e control Remove if the remote control is not going to be used for a long period of time Store in a cool dark place Do not use rechargeable type batteries Mishandling of batteries in the remote control can cause electrolyte leakage which may cause a fire Do not mix old and new batteries use different types of batteries at the same time heat or expose to flame take apart or short circuit attempt to...

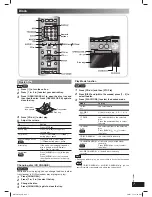
Page 6: ...he AC mains supply Music port jack 13 5 Treble selection 12 Disc tray open close 7 Disc skip search tape fast forward rewind tune preset channel selection time adjustment 9 Stop Demo 5 9 Remote control Remote control Buttons such as 1 function the same as the controls on the main unit 1 Clock Timer 11 Play timer Record timer 11 Numeric 7 10 Delete 8 Muting Play mode 7 9 10 Disc 7 Program 8 Clear 8...

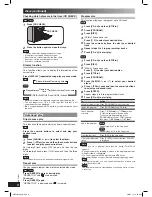
Page 7: ...lay or program play 1 Press CHANGE 0 2 Press 1 3 5 3 to select the tray 3 Change the disc 4 Press CHANGE 0 again to close the tray Play Mode function Play Mode function CD MP3 1 Press CD 6 and then STOP 7 2 Press DISC and within 10 seconds press 1 5 to select the disc 3 Press PLAY MODE to select the desired mode Mode To play 1 DISC 1DISC one selected disc ALL DISC ALL DISC all discs in trays e g 4...

Page 8: ...and are displayed To cancel Press REPEAT again REPEAT OFF is displayed and is cleared Program play Program play This function allows you to program up to 24 tracks CD 1 Press CD 6 and then STOP 7 2 Press PROGRAM 3 Press DISC 4 Within 10 seconds or so Press 1 5 to select your desired disc 5 Press the numeric buttons to select your desired track 6 Repeat steps 3 to 5 to program other tracks 7 Press ...

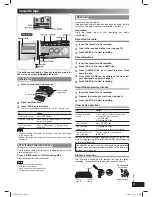
Page 9: ...io Recording the radio 1 Insert the cassette to be recorded 2 Tune to the required station refer to page 10 3 Press REC 8 to start recording Recording discs Recording discs 1 Insert the cassette to be recorded 2 Press CD 6 and then DEMO 7 3 Press OPEN CLOSE 0 to insert the disc Press again to close 4 Press PLAY MODE on the remote control to select your desired mode refer to page 7 5 Press REC 8 to...

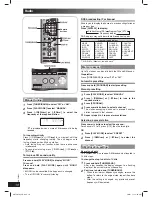
Page 10: ... JAZZ COUNTRY NATIONAL OLDIES FOLK M DOCUMENT TEST ALARM M O R M Middle of the road music Memory preset Memory preset Up to 15 stations can be set in both the FM and AM bands Preparation Press TUNER BAND to select FM or AM Automatic presetting Automatic presetting Press and hold PROGRAM to start presetting Manual presetting Manual presetting 1 Press PLAY MODE to select MANUAL 2 Press 4 REW 4 or 3 ...

Page 11: ...imer Preparation Turn the unit on and set the clock Timer Action Play timer Prepare the music source you want to listen to cassette disc number 1 5 radio or music port source and set the volume Record timer Check the cassette s erasure prevention tabs refer to page 9 insert the cassette and tune to the radio station refer to page 10 or select music port source refer to page 13 1 Press CLOCK TIMER ...

Page 12: ...urce when the timer comes on the system turns on and engages MUSIC PORT as the source If you wish to playback or record from the portable audio equipment activate the equipment s play mode and increase the volume See the portable audio equipment s instruction manual Sound adjustment Selecting sound effects Selecting sound effects You can change the sound effect by selecting Preset EQ or adjusting ...

Page 13: ... recording External unit The buttons described for External unit are mainly for the main unit unless indicated otherwise Connecting to a portable audio equipment Connecting to a portable audio equipment This feature enables you to enjoy music from portable audio equipment 53 0 Portable audio equipment not included Audio cord not included MUSIC PORT jack Playing from portable audio equipment Playin...

Page 14: ...appears or stripes appear on the screen The location and direction of the antenna are incorrect If you are using an indoor antenna change to an outdoor antenna refer to page 5 The TV antenna wire is too close to the unit Separate the antenna wire of the TV set from the unit Using the cassette deck Recording is not possible If the erasure prevention tabs have been removed cover the holes with adhes...

Page 15: ...e Music port 250 mV 12kΩ Output Impedance Headphone 16Ω to 32Ω Phone jack Terminal Stereo 3 5 mm Music port input jack Terminal Stereo 3 5 mm FM TUNER SECTION Frequency range 87 50MHz to 108 00MHz 50kHz steps Sensitivity 0 3µV IHF S N 26dB 0 2µV Antenna terminals 75Ω unbalanced Preset station FM 15 stations AM 15 stations AM TUNER SECTION Frequency range 522 kHz to 1629kHz 9kHz steps 520 kHz to 16...

Page 16: ... jp global RQTV0102 3B L0106CH3017 En SUOMI Laite tulee asettaa lähelle verkkopistorasiaa ja pistokkeen täytyy olla sellaisessa asennossa että siihen on helppo tarttua ongelman sattuessa NORSK RQTV0102_2B indd 16 RQTV0102_2B indd 16 2 9 07 11 14 38 AM 2 9 07 11 14 38 AM ...

Reviews: