7
TQB
J09
96
• The following explanations are based on a
smartphone.
1
Turn this system on.
2
Press [RADIO, EXT-IN] on the remote control
repeatedly to select “NETWORK”.
3
To enter “Setting” mode
1 Press [SETUP] on the remote control repeatedly
to select “Net Setup” and then press [OK].
2 Press [
2
,
1
] on the remote control to select
“Manual” and then press [OK].
3 Press [
2
,
1
] on the remote control to select
“OK? Yes” and then press [OK].
• After pressing [OK] to confirm “OK? Yes”, the
previous network connection you have set with this
unit will be cleared.
• Alternatively, while pressing and holding down
[
<
, OPEN/CLOSE] on the unit, press and hold down
[
1
/
;
] on the unit for at least 4 seconds.
“Setting” blinks on the display.
4
Go to Wi-Fi settings on your compatible device.
5
Select “PMX150
_AJ” to connect to this
system.
• “
” stands for a character that is unique to each set.
• This can take up to 1 minute to appear in your Wi-Fi list.
• If this operation does not work correctly, please repeat
it several times.
• iOS device: If “Panasonic PMX150
” appears
under “SET UP NEW AIRPLAY SPEAKER...” instead,
proceed to perform steps 5 to 7 of “Method 1” to
complete the network setting procedure. (
6)
• Make sure that DHCP is enabled for the network
setting on your compatible device.
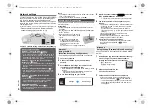
About the network setting page:
iOS device: The settings page will be automatically
displayed in the Internet browser.
Except the iOS device: Swipe down the device’s
notification bar to check for “Sign in to Wi-Fi network”
notification and tap on it to display the settings page.
• If there is no notification, open the Internet browser and
refresh the page to display the settings page. If the
settings page is not displayed, type
“http://172.19.42.1/” into the URL address field.
6
Type a device name and then select “Next”.
• The device name will be displayed as this system’s
name on the network.
• Maximum characters that can be shown: 32
• Emoji characters are not supported.
• The device name is set when “Next” is selected.
• You can also change the device name after the network
connection is set up. (
8, “To make network-related
settings”)
7
Select your security options for this system.
To set the AirPlay password
1 Select “Yes” and then select “Next”.
2 Set your password and then select “Next”.
• You will need this password the next time this network
setting method is used.
• If you have performed a network reset (
17) , the
password will be cleared.
To skip this setting
Select “No” and then select “Next”.
• You can also change this setting after the network
connection is set up. (
8, “To make network-related
settings”)
8
Select your network name (SSID) and type the
password.
• Check the wireless router for the network name (SSID)
and the password.
• A list of network names (SSIDs) will be appeared when
you select the “Network Name” box.
• To show the characters typed in the “Password” box,
select “Show Password”.
• If your network requires specific settings, deselect
“DHCP” to disable DHCP.
– You can use specific IP address, subnet mask,
default gateway, primary DNS, etc.
• To update the network name (SSID) list, select
“Refresh list”.
9
Select “Connect” to apply the settings.
• On the main unit’s display, “Success” appears when
the connection is established. (“
” will be
displayed.)
– If “Fail” is displayed press [OK], check the network
name (SSID) and the password, and then try the
setting again.
• Depending on the device, the connection complete
screen may not be displayed.
10
Make sure to connect your compatible device
back to your home wireless network.
Note:
• Enable Java and Cookies in your browser settings.
The operations and on-screen display items, etc. of
the app “Panasonic Music Streaming” are subject to
change.
For the latest information, visit
http://panasonic.jp/support/global/cs/audio/app/
(This site is in English only.)
Method 3:
Using an Internet browser
Settings
Wi-Fi settings
●●●●●●●●
Refresh list
SC-PMX150_PC-TQBJ0996_eng.book 7 ページ 2017年2月27日 月曜日 午後5時25分


