background image

VQT4X

4

9

6

6

ENGL

ISH

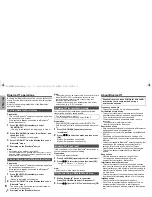
Bluetooth

®

 operations

By using the Bluetooth

®

 connection, you can listen to the 

sound from the Bluetooth

®

 audio device from this system 

wirelessly.

Refer to the operating instructions of the Bluetooth

®


device for details.

Preparation

• Turn on the Bluetooth

®

 feature of the device and place 

the device near this system.

• If this system is already connected to a Bluetooth

®


device, disconnect it.

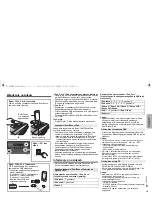
1

Press [SELECTOR] repeatedly to select 
“BLUETOOTH”.

If “Pairing” is indicated on the display, go to step 3.

2

Press [PLAY MENU] to select “New Device” and 
then press [OK].

“Pairing” is indicated on the display.

3

Select “SC-PMX7” from the Bluetooth

®

 device’s 

Bluetooth

®

 menu.

4

Start play on the Bluetooth

®

 device.

Note:

• If prompted for the passkey, input “0000”.

• You can register up to 8 devices with this system. If a 9th 

device is paired, the device that has not been used for the 

longest time will be replaced.

Preparation

• Turn on the Bluetooth

®

 feature of the device and place 

the device near the speaker unit.

• If this system is already connected to a Bluetooth

®


device, disconnect it.

1

Press [SELECTOR] repeatedly to select 
“BLUETOOTH”.

“Ready” is indicated on the display.

2

Select “SC-PMX7” from the Bluetooth

®

 device’s 

Bluetooth

®

 menu.

The name of the connected device is indicated on 

the display for 2 seconds.

3

Start play on the Bluetooth

®

 device.

Note:

• This system can only be connected to one device at a time.

• When “BLUETOOTH” is selected as the source, this 

system will automatically try and connect to the last 

connected Bluetooth

®

 device. 

• The Bluetooth

®

 device will be disconnected if a different 

audio source (e.g., “CD”) is selected.

You can change the transmission speed to prioritize 

transmission quality or sound quality.

Preparation

• Press [SELECTOR] repeatedly to select “BLUETOOTH”.

• If a Bluetooth

®

 device is already connected, disconnect 

it.

1

Press [PLAY MENU] repeatedly to select 
“Link Mode”.

2

Press [

2

,

1

] to select the mode and then press 

[OK].

Mode 1: Emphasis on connectivity

Mode 2: Emphasis on sound quality

If the sound input level of the Bluetooth

®

 transmission is 

too low, change the input level setting.

Preparation

• Connect a Bluetooth

®

 device. 

1

Press [PLAY MENU] repeatedly to select “Input Level”.

2

Press [

2

,

1

] to select the level and then press [OK].

“Level 0” 

,.

 “Level

i

1” 

,.

 “Level

i

2”

^-----------------------------------------J

Note:

• Select “Level 0” if the sound is distorted.

1

While a Bluetooth

®

 device is connected:

Press [PLAY MENU] to select “Disconnect?”.

2

Press [

2

,

1

] to select “OK? Yes” and then press [OK].

About Bluetooth

®

Frequency band used

• This system uses the 2.4 GHz frequency band.

Certification of this device

• This system conforms to frequency restrictions and 

has received certification based on frequency laws. 

Thus, a wireless permit is not necessary.

• The actions below are punishable by law in some 

countries:

- Taking apart or modifying this system.

- Removing specification indications.

Restrictions of use

• Wireless transmission and/or usage with all Bluetooth

®


equipped devices is not guaranteed.

• All devices must conform to standards set by Bluetooth 

SIG, Inc.

• Depending on the specifications and settings of a 

device, it can fail to connect or some operations can be 

different.

• This system supports Bluetooth

®

 security features. But 

depending on the operating environment and/or 

settings, this security is possibly not sufficient. 

Transmit data wirelessly to this system with caution.

• This system cannot transmit data to a Bluetooth

®


device.

Range of use

• Use this device at a maximum range of 10 m.

The range can decrease depending on the 

environment, obstacles or interference.

Interference from other devices

• This system may not function properly and troubles 

such as noise and sound jumps may arise due to radio 

wave interference if this system is located too close to 

other Bluetooth

®

 devices or the devices that use the 

2.4 GHz band.

• This system may not function properly if radio waves 

from a nearby broadcasting station, etc. is too strong.

Intended usage

• This system is for normal, general use only.

• Do not use this system near an equipment or in an 

environment that is sensitive to radio frequency 

interference (example: airports, hospitals, laboratories, 

etc).

Pairing Bluetooth

®

 devices

Connecting a paired Bluetooth

®

 device

Bluetooth

®

 transmission mode

• The default setting is “Mode 1”.

• To enjoy a higher sound quality, select ”Mode 2”.

Bluetooth

®

 input level

Disconnecting a Bluetooth

®

 device

Panasonic bears no responsibility for data and/or 

information that is compromised during a 

wireless transmission.

SC-PMX7EG-VQT4X49.book  6 ページ  2013年1月25日 金曜日 午前10時31分

Summary of Contents for SC-PMX7

Page 1: ...bsługi do wglądu Děkujeme za zakoupení tohoto výrobku Před použitím tohoto produktu si pečlivě přečtěte tyto pokyny a celý návod si uložte pro pozdější použití Kiitos että hankit tämän tuotteen Lue nämä ohjeet huolellisesti ennen tämän tuotteen käyttämistä ja säilytä tämä käsikirja tulevaa tarvetta varten Operating Instructions Instrukcja obsługi Návod k obsluze Käyttöohjeet CD Stereo System Zesta...

Page 2: ...s please contact your local authorities or dealer and ask for the correct method of disposal Table of contents Safety precautions 2 Supplied accessories 3 Maintenance 3 Preparing the remote control 3 Making the connections 3 Placement of speakers 4 Overview of controls 4 Inserting media 5 Media information 5 Bluetooth operations 6 About Bluetooth 6 Media Playback operations 7 Radio 8 Clock and tim...

Page 3: ...larity of the speaker wires as doing so may damage the speakers 3 Connect the AC mains lead Do not use an AC mains lead with other equipment Conserving power The system consumes approximately 0 4 W when it is in standby mode Disconnect the power supply if you do not use the system Some settings will be lost after you disconnect the system You have to set them again You can connect a VCR DVD player...

Page 4: ... 8 View content information 9 Clock and timer operation 10 Set the programme function 11 Adjust the volume of the system 12 Mute the sound of the system Press the button again to cancel MUTE is also cancelled when you adjust the volume or when you switch off the system 13 Set the play menu item 14 Set the radio menu item 15 Select the option 16 Enter setup menu 17 iPod_Dock for iPod iPhone 18 Head...

Page 5: ... that support bulk only transfer USB devices that support USB 2 0 full speed Note Files are defined as tracks and folders are defined as albums Track must have the extension mp3 or MP3 This system can access up to 255 albums including root folder 2500 tracks 999 tracks in one album CBI Control Bulk Interrupt is not supported Some files can fail to work because of the sector size NTFS file system i...

Page 6: ...U repeatedly to select Input Level 2 Press 2 1 to select the level and then press OK Level 0 Level i1 Level i2 J Note Select Level 0 if the sound is distorted 1 While a Bluetooth device is connected Press PLAY MENU to select Disconnect 2 Press 2 1 to select OK Yes and then press OK About Bluetooth Frequency band used This system uses the 2 4 GHz frequency band Certification of this device This sys...

Page 7: ... other tracks 5 Press 1 to start playback Note The programme memory is cleared when you open the disc tray CD CD audio in CD DA format and a CD that contains MP3 files iPod Compatible iPod iPhone iPad USB USB devices containing MP3 files Bluetooth Connected Bluetooth device Basic play CD iPod USB Bluetooth Play Press 1 Stop Press USB The position is memorised and Resume is displayed USB Press two ...

Page 8: ...s Note Reset the clock regularly to maintain accuracy The sleep timer switches off the system after the set time Press SLEEP repeatedly to select the setting in minutes To cancel select Off To show the remaining time Press SLEEP Note The sleep timer can be used together with the play timer The sleep timer always comes first Be sure not to set an overlap of timers You can set the timer to come on a...

Page 9: ... cause then switch the system on again It can be caused by straining of the speakers through excessive volume or power and when using the system in a hot environment A humming sound can be heard during playback An AC mains lead or fluorescent light is near the cables Keep other appliances and cords away from the cables of this system Display not shown correctly Playback does not start You have not...

Page 10: ...nnected iPod iPhone iPad If this display keeps appearing make sure that iPod iPhone iPad is inserted correctly and try again Error An incorrect operation was done Read the instructions and try again F61 or F76 There is a power supply problem iPod_Dock Over Current Error iPod_Port Over Current Error The iPod iPhone iPad or USB device is drawing too much power Remove the iPod iPhone iPad or USB devi...

Page 11: ...tyrke Ingen farlig stråling sendes ut Audio output Disc Number of channels 2 ch FL FR Speaker unit s Woofer 14 cm cone type x 1 Tweeter 1 9 cm dome type x 1 Super tweeter 1 5 cm piezo type x 1 Impedance 3 Dimensions W x H x D 161 mm x 238 mm x 262 mm Mass 2 6 kg Bluetooth system specification V 3 0 Wireless equipment classification Class 2 Supported profiles A2DP AVRCP GAVDP Frequency band 2402 MH...

Page 12: ...eniać na takie same lub na baterie równorzędnego typu zalecane przez producenta Zużyte baterie należy odpowiednio zutylizować Właściwą metodę powinny wskazać władze lokalne Spis treści Środki ostrożności 2 Dostarczone wyposażenie 3 Konserwacja 3 Przygotowanie pilota zdalnego sterowania 3 Podłączenie 3 Rozmieszczenie głośników 4 Opis elementów sterowania 4 Wsadzanie nośników 5 Informacje o nośnikac...

Page 13: ...w głośnikowych gdyż można w ten sposób uszkodzić głośniki 3 Podłącz przewód zasilania Nie stosować przewodów zasilania pochodzących z innych urządzeń Oszczędzanie energii System zużywa około 0 4 W energii w trybie spoczynku Gdy system nie jest używany należy go odłączać od zasilania Niektóre ustawienia zostaną utracone po odłączeniu systemu Trzeba będzie je wprowadzić ponownie Można podłączyć odtw...

Page 14: ...ięku 5 Podstawowe elementy sterowania odtwarzaniem 6 Wybór charakterystykę dźwięku 7 Wyświetlenie menu urządzenia iPod 8 Wyświetl zawartość 9 Funkcja zegara lub timera 10 Ustawianie funkcji programu 11 Regulacja głośności systemu 12 Wyciszanie dźwięku Ponownie naciśnij przycisk aby anulować wybór MUTE można wyłączyć również przez regulowanie głośności lub wyłączając system 13 Ustawienia elementów ...

Page 15: ...ad Urządzenia USB obsługujące protokół transferu Bulk Only Urządzenia USB obsługujące standard USB 2 0 pełna prędkość Uwaga Pliki są zdefiniowane jako utwory i foldery są zdefiniowane jako album Utwory powinny mieć rozszerzenie mp3 lub MP3 Urządzenie może odtwarzać do 255 albumów włącznie z folderem nadrzędnym 2500 utworów 999 utworów w jednym albumie CBI ang Control Bulk Interrupt nie jest obsług...

Page 16: ... Level 0 Level i1 Level i2 J Uwaga Wybierz Level 0 jeżeli dźwięk jest zniekształcony 1 Kiedy urządzenie Bluetooth jest podłączone Naciśnij PLAY MENU aby wybrać Disconnect 2 Naciśnij 2 1 aby wybrać OK Yes a następnie naciśnij OK Informacje o Bluetooth Stosowane pasmo częstotliwości System wykorzystuje pasmo częstotliwości 2 4 GHz Certyfikacja tego urządzenia Zestaw podlega ograniczeniom dotyczącym ...

Page 17: ...cie CD DA oraz płyty CD zawierające pliki MP3 iPod Kompatybilne modele urządzeń iPod iPhone iPad USB Urządzenia USB zawierające pliki MP3 Bluetooth Podłącz urządzenie Bluetooth Odtwarzanie podstawowe CD iPod USB Bluetooth Odtwarzanie Naciśnij 1 Zatrzymanie Naciśnij USB położenie jest zapamiętywane i wyświetlane jest Resume USB Naciśnij dwukrotnie przycisk aby całkowicie zatrzymać odtwarzanie Pauza...

Page 18: ...K TIMER Uwaga Zegar należy regularnie nastawiać aby zawsze była ustawiona dokładna godzina Timer wyłącza system po upływie ustawionego czasu Naciśnij SLEEP kilkakrotnie aby wybrać ustawienie w minutach Aby anulować wybierz Off Aby wyświetlić pozostały czas Naciśnij SLEEP Uwaga Timer wyłączający system może być używany łącznie z timerem odtwarzania Timer wyłączający ma zawsze priorytet Należy pamię...

Page 19: ... usunąć przyczynę następnie włączyć urządzenie ponownie Może to być spowodowane przeciążeniem głośników wskutek nadmiernego poziomu głośności zbyt wysokiego zasilania lub użytkowania systemu w warunkach w których panuje zbyt wysoka temperatura Podczas odtwarzania słychać buczenie Blisko urządzenia znajdują się przewody zasilania prądem przemiennym lub oświetlenie fluorescencyjne Utrzymywać przewod...

Page 20: ...ć Checking Connection Główne urządzenie sprawdza podłączone urządzenie iPod iPhone iPad Jeśli ten komunikat jest nadal wyświetlany sprawdź czy urządzenie iPod iPhone iPad jest włożone prawidłowo i spróbuj ponownie Error Wykonano niewłaściwą operację Przeczytaj instrukcję i spróbuj ponownie F61 lub F76 Wystąpił problem z zasilaniem iPod_Dock Over Current Error iPod_Port Over Current Error Urządzeni...

Page 21: ...y 8 cm lub 12 cm CD CD R RW CD DA MP3 Przechwytywanie Długość fali 790 nm CD Moc lasera CLASS 1 Wyjście audio płyta Liczba kanałów 2 kanały FL FR Głośnik Niskotonowy 14 cm stożkowy x 1 Wysokotonowy 1 9 cm głośnik kopułowy x 1 Urządzenie do tonów najwyższych 1 5 cm piezzoelektryczny x 1 Impedancja 3 Wymiary szer x wys x głęb 161 mm x 238 mm x 262 mm Masa 2 6 kg Bluetooth specyfikacja systemu V 3 0 ...

Page 22: ...učuje výrobce Při likvidaci baterií se obražte na místní úřady nebo na prodejce a informujte se o správném způsobu likvidace Obsah Bezpečnostní upozornění 2 Dodávané příslušenství 3 Údržba 3 Příprava dálkového ovladače 3 Provedení zapojení 3 Umístění reprosoustavy 4 Přehled ovládání 4 Vkládání médií 5 Informace o médiích 5 Operace Bluetooth 6 O zařízení Bluetooth 6 Činnosti přehrávání médií 7 Rádi...

Page 23: ...reproduktorů mohlo bydojít k jejich poškození 3 Zapojte kabel sížového napájení AC Nepoužívejte kabely sížového napájení AC z jiných zařízení Napájení Systém v pohotovostním režimu spotřebuje přibližně 0 4 W Jestliže systém nepoužíváte napájení odpojte Po odpojení systému budou některá nastavení ztracena Musíte je nastavit znovu Můžete připojit VCR DVD přehrávač atd Poznámka Před připojením odpojt...

Page 24: ...ní nabídky iPod 8 Zobrazení obsahových informací 9 Nastavení hodin a časovače 10 Nastavení programové funkce 11 Nastavení hlasitosti systému 12 Ztlumení zvuku systému Stiskněte tlačítko znovu pro zrušení funkce Funkce ztlumení MUTE se rovněž zruší když změníte hlastitost nebo když systém vypnete 13 Otevření nabídky přehrávání 14 Otevření nabídky rádia 15 Volba možnosti 16 Vstup do menu nastavení 1...

Page 25: ...erá podporují pouze hromadný přenos USB zařízení která podporují formát USB 2 0 Full Speed Poznámka Soubory jsou definovány jako skladby a složky jsou definovány jako alba Skladba musí mít příponu mp3 nebo MP3 Tento systém umí rozpoznat až 255 alb včetně kořenové složky 2500 skladeb 999 skladeb na album Přenos CBI v angličtině Control Bulk Interrupt není podporován Některé soubory mohou selhat kvů...

Page 26: ... Pro volbu úrovně stiskněte možnost 2 1 a pak stiskněte tlačítko OK Level 0 Level i1 Level i2 J Poznámka Je li zvuk zkreslený zvolte Level 0 1 Po připojení zařízení Bluetooth Stiskněte tlačítko PLAY MENU a vyberte možnost Disconnect 2 Stisknutím 2 1 zvolte OK Yes a poté stiskněte OK O zařízení Bluetooth Používané kmitočtové pásmo Tento systém využívá frekvenční pásmo 2 4 GHz Certifikace zařízení T...

Page 27: ...bory MP3 iPod Kompatibilní iPod iPhone iPad USB USB zařízení obsahující soubory MP3 Bluetooth Připojené zařízení Bluetooth Základní přehrávání CD iPod USB Bluetooth Přehrávání Stiskněte 1 Zastavení Stiskněte USB Pokud je zobrazeno Resume je pozice uložena do paměti USB Dvojím stisknutím tlačítka vyberte zvuk Pauza při přehrávání Stiskněte 1 Pro pokračování přehrávání stiskněte znovu Přeskočení Sti...

Page 28: ...ekund stiskněte CLOCK TIMER Poznámka Pro zachování přesného času pravidelně kontrolujte přesnost času Časovač vypnutí vypne systém po uplynutí nastavené doby Nastavte opakovaným stisknutím tlačítka SLEEP v minutách Pro zrušení vyberte Off Zobrazení zbývajícího času Stiskněte SLEEP Poznámka Časovač vypnutí lze používat společně s časovačem přehrávání Časovač vypnutí má vždy přednost Dávejte pozor a...

Page 29: ...rie vloženy správně Zvuk je nevyvážený nebo se neozývá žádný zvuk Upravte hlasitost systému Vypněte systém zjistěte a odstraňte příčinu a poté systém znovu zapněte Může to být způsobeno přetěžováním reproduktorů nadměrnou hlasitostí nebo výkonem a používáním systému v prostředí s příliš vysokou teplotou Během přehrávání je slyšet hučení V blízkosti přístroje je vedení sížového napájení AC nebo zář...

Page 30: ...Pod iPhone iPad Pokud se tato zpráva stále zobrazuje ujistěte se že je iPod iPhone iPad vložen správně a zkuste to znovu Error Byla provedena nesprávná operace Přečtěte si instrukce a zkuste to znovu F61 nebo F76 Nastal problem s napájením iPod_Dock Over Current Error iPod_Port Over Current Error iPod iPhone iPad nebo zařízení USB odebírá příliš mnoho příkonu Odeberte iPod iPhone iPad nebo zařízen...

Page 31: ...tení Vlnová délka 790 nm CD Výkon laseru CLASS 1 Audio výstup disk Počet kanálů 2 kanály FL FR Reproduktor y Hloubkový reproduktor 14 cm kónický x 1 Výškový 1 9 cm klenbový x 1 Super výškový 1 5 cm typu piezo x 1 Impedance 3 Rozměry Š x V x H 161 mm x 238 mm x 262 mm Hmotnost 2 6 kg Specifikace systému Bluetooth V 3 0 Klasifikace bezdrátového zařízení Třída 2 Podporované profily A2DP AVRCP GAVDP F...

Page 32: ...ään ja kysy heiltä oikea hävitystapa Sisällysluettelo Turvallisuustoimet 2 Toimitetut lisävarusteet 3 Ylläpito 3 Kaukosäätimen valmistelu 3 Liitäntöjen tekeminen 3 Kaiutinten sijoittelu 4 Hallintatoimintojen yleiskatsaus 4 Tietovälineen laittaminen 5 Tietoja tietovälineistä 5 Bluetooth toimenpiteet 6 Tietoja toiminnosta Bluetooth 6 Tietovälineiden toistotoimenpiteet 7 Radio 8 Kello ja ajastukset 8...

Page 33: ...injohtojen polaarisuutta sillä se voi vahingoittaa kaiuttimia 3 Liitä vaihtovirtajohto Älä käytä muille laitteille tarkoitettuja vaihtovirtajohtoja Virran säästäminen Järjestelmä kuluttaa noin 0 4 W valmiustilassa Irrota virtalähde kun järjestelmä ei ole käytössä Jotkut asetukset menetetään kun irrotat laitteen Sinun on asetettava ne uudelleen Voit liittää videonauhurin DVD soittimen ym Huomautus ...

Page 34: ...t 6 Valitsee äänitehosteet 7 Näyttää iPod valikon 8 Näyttää sisältötiedot 9 Kellon ja ajastimen käyttö 10 Asettaa ohjelmointitoiminnon 11 Säätää järjestelmän äänenvoimakkuutta 12 Vaimentaa järjestelmän äänen Peruuta painamalla painiketta uudelleen MUTE peruuntuu myös kun äänenvoimakkuutta säädetään tai laite sammutetaan 13 Asettaa toistovalikkokohdanm 14 Asettaa radiovalikkokohdan 15 Valitsee aset...

Page 35: ...ukevat USB 2 0 standardin täyttä nopeutta Huomaa Tiedostot näytetään raitoina ja kansiot näytetään albumeina Raidan tiedostopäätteen on oltava mp3 tai MP3 Tämä järjestelmä pystyy käsittelemään enintään 255 albumia mukaan lukien juurikansion 2500 raitaa 999 raitaa yhdessä albumissa CBI standardia englanniksi Control Bulk Interrupt eitueta Jotkin tiedostot eivät ehkä toimi sektorikoon vuoksi NTFS ti...

Page 36: ...0 jos ääni on vääristynyt 1 Samalla kun Bluetooth laite on yhdistetty Paina PLAY MENU valitaksesi Disconnect 2 Paina 2 1 valitaksesi OK Yes ja paina sitten OK Tietoja toiminnosta Bluetooth Käytetty taajuuskaista Tämä järjestelmä käyttää 2 4 GHz n taajuuskaistaa Laitteen sertifiointi Tämä järjestelmä on taajuuden rajoituksia koskevien vaatimusten mukainen ja se on sertifioitu taajuutta koskevien la...

Page 37: ... levykelkka avataan CD Audio CD muodossa CD DA ja CD joka sisältää MP3 tiedostoja iPod Yhteensopiva iPod iPhone iPad USB USB laitteet jotka sisältävät MP3 tiedostoja Bluetooth Yhdistetty Bluetooth laite Perustoisto CD iPod USB Bluetooth Toista Paina 1 Stop Paina USB Asento tallennetaan muistiin ja näytetään Resume USB Paina kaksi kertaa toiston pysäyttämiseksi kokonaan Tauko Paina 1 Paina uudellee...

Page 38: ...uomautus Aseta kellonaika usein jotta se säilyy tarkkana Uniajastin sammuttaa järjestelmän asetetun ajan kuluttua Paina SLEEP toistuvasti valitaksesi asetuksen minuuteissa Peruuta valitsemalla Off Jäljellä olevan ajan näyttäminen Paina SLEEP Huomautus Uniajastinta voidaan käyttää yhdessä toistoajastimen kanssa Uniajastin on aina etusijalla Varmista ettet aseta ajastimia päällekkäisiksi ajoiksi Voi...

Page 39: ... on vääristynyt tai ääntä ei kuulu Säädä järjestelmän äänenvoimakkuutta Sammuta järjestelmä määritä ja korjaa ongelman syy ja käynnistä järjestelmä uudelleen Ongelma voi johtua kaiutinten toimimisesta äärirajoilla kun äänenvoimakkuus tai teho on liian suuri sekä kun järjestelmää käytetään kuumassa ympäristössä Toiston aikana kuuluu hurinaa Vaihtovirtajohto tai loistevalolamppu on johtojen lähellä ...

Page 40: ... on tarkistamassa liitettyä iPod iPhone iPad laitetta Jos tämä näyttö tulee edelleen näkyviin varmista että iPod iPhone iPad on laitettu oikein ja yritä uudelleen Error Virheellinen toiminto suoritettiin Lue ohjeet ja yritä uudelleen F61 tai F76 Virtalähteessä on ongelma iPod_Dock Over Current Error iPod_Port Over Current Error iPod iPhone iPad tai USB laite käyttää liian paljon tehoa Poista iPod ...

Page 41: ...nm CD Laserteho CLASS 1 Äänilähtö Levy Kanavien määrä 2 kanavaa FL FR Kaiutinyksiköt Woofer 14 cm n kartiotyyppinen kaiutin x 1 Diskantti 1 9 cm n kupumainen kaiutin x 1 Superdiskantti 1 5 cm n pietsokaiutin x 1 Impedanssi 3 Mitat L x K x S 161 mm x 238 mm x 262 mm Massa 2 6 kg Bluetooth järjestelmän tiedot V 3 0 Langattoman laitteiston luokittelu Luokka 2 Tuetut profiilit A2DP AVRCP GAVDP Taajuus...

Page 42: ...rope GmbH Panasonic Testing Centre Winsbergring 15 22525 Hamburg Vokietija Šis gaminys skirtas bendrajam vartojimui 3 kategorija Slovensko Izjava o skladnosti DoC S pričujočo izjavo podjetje Panasonic Corporation izjavlja da so svoji izdelki skladni s poglavitnimi zahtevami in drugimi odgovarjajočimi predpisi direktive 1999 5 ES Stranka lahko naloži izvod izvirnega DoC o naših izdelkih R TTE s str...

Page 43: ...onic Testing Centre Winsbergring 15 22525 Hamburg Germania Acest produs a fost proiectat pentru clientela generală Categoria 3 Magyar Megfelelőségi Nyilatkozat DoC Ezennel a Panasonic Corporation kijelenti hogy a jelen termék kielégíti az 1999 5 EK Irányelv létfontosságú követelményeit és más vonatkozó rendelkezéseit A vásárlók letölthetik az R TTE termékek eredeti DoC másolatát a DoC szerverünkrő...

Page 44: ...sonell Produkt For å redusere faren for brann elektrisk støt eller skade på apparatet Ikke plasser apparatet i en bokhylle et innebygget kabinett eller et annet lukket sted Pass på at apparatet er godt ventilert Apparatets ventilasjonsåpninger må ikke dekkes til med aviser duker gardiner eller lignende Plasser ikke åpen ild slik som levende lys oppå apparatet Dette apparatet er beregnet til bruk u...

Reviews: