background image

24

RQ

TX00

94

Usi

n

g the VI

ERA Li

nk

TM


“HD

A

V

I Contr

o

l

TM

Using the VIERA Link

TM 

“HDAVI Control

TM

VIERA Link “HDAVI Control”

VIERA Link

TM

 is a new name for EZ Sync

TM

VIERA Link “HDAVI Control” is a convenient function that offers linked 
operations of this unit, and a Panasonic TV (VIERA) under “HDAVI 
Control”. You can use this function by connecting the equipment with the 
HDMI cable. See the operating instructions for connected equipment for 
operational details.

VIERA Link “HDAVI Control”, based on the control functions provided by 
HDMI which is an industry standard known as HDMI CEC (Consumer 
Electronics Control), is a unique function that we have developed and 
added. As such, its operation with other manufacturers’ equipment that 
supports HDMI CEC cannot be guaranteed.

This unit supports “HDAVI Control 3” function.
“HDAVI Control 3” is the newest standard (current as of December, 
2007) for Panasonic’s HDAVI Control compatible equipment. This 
standard is compatible with Panasonic’s conventional HDAVI 
equipment.

Please refer to individual manuals for other manufacturers’ equipment 
supporting VIERA Link function.

The TV with “HDAVI Control 2 (or later)” function enables the following 
operation: VIERA Link Control only with TV’s remote control [for 
“HDAVI Control 2 (or later)”] (

 25)

Preparation

Confirm that the HDMI connection has been made (

 7).

Set “VIERA Link” to “ON” (

 22, “HDMI” menu).

To complete and activate the connection correctly, turn on all VIERA 
Link “HDAVI Control” compatible equipment and set the TV to the 
corresponding HDMI input mode for this unit.

Setting the TV audio for VIERA Link “HDAVI Control”

Select between “AUX” and “D-IN” to work with the linked operations.
Confirm the audio connection to the AUX terminal (for “AUX”) (

 7) or 

OPTICAL IN terminal (for “D-IN”) (

 8).

1

Press [FM/AM/EXT-IN] to select “AUX” or “D-IN”.

2

Press and hold [—SETUP] to select “TV AUDIO”, then press [

3

,

4

to switch “AUX” or “D-IN”.

Whenever the connection or settings are changed, reconfirm the points 
above.

Automatic setup

The settings for “TV ASPECT”

§

1

 (

 21, “VIDEO” menu) and 

“LANGUAGE”

§

2

 (

 22, “DISPLAY” menu) will automatically follow to 

the settings of the TV.
(This may not work if the corresponding setting you have made for 
your TV is not available on this unit.)

§

1

 When using VIERA Link “HDAVI Control” with “HDAVI Control 3” 

compatible TV

§

2

 When using VIERA Link “HDAVI Control” with “HDAVI Control 2 

(or later)” compatible TV

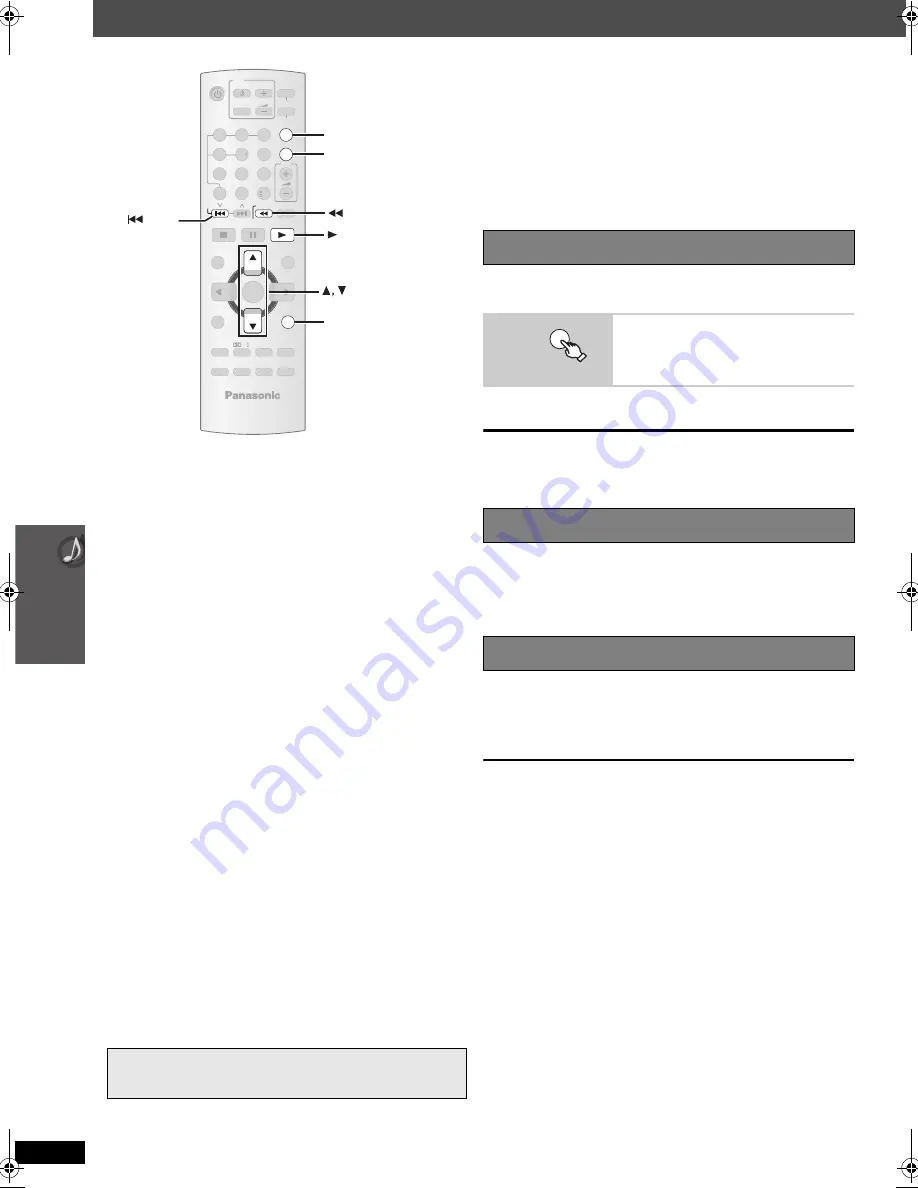
You can turn on this unit and the TV, and start playing the disc with a 
single press of a button.

This function also works if you press [

1

PLAY] on this unit’s remote 

control when this unit is in standby mode.

[Note]

Playback may not be immediately displayed on the TV. If you miss the 
beginning portion of playback, press [

:

] or [

6

] to go back to where 

playback started.

When you switch the TV input to TV tuner mode, this unit will 
automatically switch to “AUX”

§

 or “D-IN”

§

. (This does not work when this 

unit is in “IPOD” mode.)

When you start disc play, the TV will automatically switch its input mode 
for this unit.

When the TV is turned off, this unit goes into standby mode automatically.

This function works only when “DVD/CD”, “AUX”

§

 or “D-IN”

§

 is selected 

as the source on this unit.

When the TV is turned on, this unit does not turn on automatically. 
(Power on link is not available.)

[Note]

When you press [

Í

], only this unit turns off. Other connected equipment 

compatible with VIERA Link “HDAVI Control” stays on.

§

“AUX” or “D-IN” (“DIGITAL IN”) works depending on the “TV AUDIO” 
setting (

above, Setting the TV audio for VIERA Link “HDAVI 

Control”).

-

S

LEEP

-

REPEAT

-FL DI

S

PLAY

-PLAY MODE

VOL

OK

MUTING

S

UBWOOFER

-CH 

S

ELECT

FUNCTION

S

CANCEL

S

OUND

LEVEL

TOP MENU

MENU

DIRECT

NAVIGATOR

S

TART

PLAY
LI

S

T

-

RETURN

-

S

ETUP

S

LOW/

S

EARCH

PLAY

PAU

S

E

S

TOP

S

KIP

-

CD

MODE

1

2

3

4

5

6

7

8

9

0

10

ONE TOUCH PLAY

FM/AM/

EXT-IN

TV/VIDEO

VOL

iPod

TV

-DVD

-

2ND 

S

ELECT

-W.

S

.

PL

DI

S

C

S

LOW/

S

EARCH

PLAY

ONE TOUCH PLAY

S

ETUP

S

KIP

FM/AM/EXT-IN

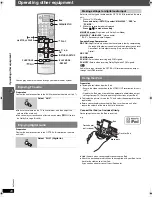
One touch play

To start disc playback.

This unit’s speakers will be automatically 
activated (

 25).

Auto input switching

Power off link

ONE TOUCH PLAY

SC-PT660-663P-PC_eng.book  24 ページ  2007年12月11日 火曜日 午後6時27分

Summary of Contents for SC-PT660

Page 1: ...ence If you have any questions contact In the U S A 1 800 211 PANA 7262 In Canada 1 800 561 5505 Region number The player plays DVD Video marked with labels containing the region number 1 or ALL Example 1 ALL 2 4 1 As an ENERGY STAR Partner Panasonic has determined that this product meets the ENERGY STAR guidelines for energy efficiency Sound enhancement options Surround Enhancer Dolby Pro Logic I...

Page 2: ...RES OTHER THAN THOSE SPECIFIED HEREIN MAY RESULT IN HAZARDOUS RADIATION EXPOSURE DO NOT OPEN COVERS AND DO NOT REPAIR YOURSELF REFER SERVICING TO QUALIFIED PERSONNEL WARNING TO REDUCE THE RISK OF FIRE ELECTRIC SHOCK OR PRODUCT DAMAGE DO NOT EXPOSE THIS APPARATUS TO RAIN MOISTURE DRIPPING OR SPLASHING AND THAT NO OBJECTS FILLED WITH LIQUIDS SUCH AS VASES SHALL BE PLACED ON THE APPARATUS USE ONLY TH...

Page 3: ...ing RAM and DVD R RW DVD VR discs 17 Using on screen menus 18 Changing the player settings 20 Selecting the delay time of the speakers 23 Using the VIERA LinkTM HDAVI ControlTM 24 One touch play 24 Auto input switching 24 Power off link 24 Speaker control 25 VIERA Link Control only with TV s remote control for HDAVI Control 2 or later 25 Using sound effects 26 Setting the sound effects 26 Using Do...

Page 4: ...speakers e g PT754 Front speakers step 1 Assembling the speakers Make sure you have all the indicated components before starting assembly setup and connection 2 Set of pipes with cable For front speakers 2 Bases 8 Screws 4 Small screws 2 Front speakers Match these holes when you insert the pipe 1 Join the pipes Screws Phillips head screwdriver not included Pipe Small screws 2 Tighten securely Pipe...

Page 5: ...ireless sound system Optional Panasonic wireless accessory SH FX85 You can enjoy a multi room wireless sound system when you use the optional Panasonic wireless accessory SH FX85 For details please refer to the operating instructions for the optional Panasonic wireless accessory step 2 Positioning 60 120 To allow for proper ventilation and to maintain good airflow around the main unit position it ...

Page 6: ...ll Improper attachment may result in damage to the wall and speakers 1 Drive a screw not included into the wall 2 Fit the speaker securely onto the screw s with the hole s Fitting speaker stands not included Except subwoofer Ensure the stands meet these conditions before purchasing them Note the diameter and length of the screws and the distance between screws as shown in the diagram The stands mu...

Page 7: ...ble you can operate your TV synchronizing with home theater operations or vice versa 24 Using the VIERA LinkTM HDAVI ControlTM Make the audio connection above when you use VIERA Link HDAVI Control function All Panasonic televisions that have 480p input connectors are compatible Consult the manufacturer if you have another brand of TV COMPONENT VIDEO Connect to terminals of the same color This conn...

Page 8: ... not bend sharply when connecting OPTICAL IN 2 Speaker connections 3 Radio antenna connections Lch SURROUND 3 CENTER SUBWOOFER FRONT 6 5 2 1 4 3 L R L R SURROUND Connecting the speakers to the main unit Connect to terminals of the same color Speaker Terminal connector color 1 FRONT L White 2 FRONT R Red 3 SURROUND L Blue 4 SURROUND R Gray 5 CENTER Green 6 SUBWOOFER Purple e g PT754 Surround speake...

Page 9: ...directly in front of the unit Using an FM AM outdoor antenna optional FM ANT 75 AM ANT EXT LOOP LOOP ANT GND Leave the AM loop antenna connected AM outdoor antenna Using a vinyl wire not included Run a piece of vinyl wire horizontally across a window or other convenient location 5 0 m to 12 m 16 ft to 39 ft FM outdoor antenna Using a TV antenna not included The antenna should be installed by a com...

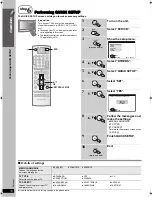
Page 10: ...ONE TOUCH PLAY FM AM EXT IN TV VIDEO VOL iPod TV DVD 2ND SELECT W S PL DISC RETURN SETUP OK 1 Turn on the unit 2 Select DVD CD 3 Show the setup menu 4 Select OTHERS 5 Select QUICK SETUP 6 Select SET 7 Select YES 8 Follow the messages and make the settings MENU LANGUAGE TV TYPE TV ASPECT To return to the previous screen press RETURN 9 Finish QUICK SETUP 10 Exit DVD 2ND SELECT RETURN SETUP press and...

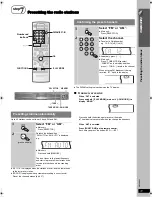
Page 11: ...UTO or AM AUTO is displayed e g Main unit Press and hold MEMORY The tuner tunes to the lowest frequency and starts to preset all the stations it can receive into the channels in ascending order SLEEP REPEAT FL DISPLAY PLAY MODE VOL MUTING SUBWOOFER CHSELECT FUNCTIONS CANCEL SOUND LEVEL TOP MENU MENU DIRECT NAVIGATOR START PLAY LIST RETURN SETUP SLOW SEARCH PLAY PAUSE STOP SKIP CD MODE 1 2 3 4 5 6 ...

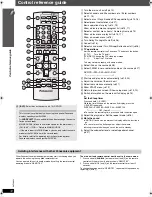
Page 12: ... DVD 2ND SELECT 1 Turn the main unit on off 10 2 Select channels and title numbers etc Enter numbers 11 15 3 Select a disc Play all loaded CDs sequentially 15 16 4 Select preset radio stations 27 5 Basic operations for play 14 15 6 Show a disc top menu or program list 15 17 7 Select or confirm menu items Frame by frame 15 8 Show a disc menu or play list 15 17 9 Show on screen menu 18 Turn Dolby Pr...

Page 13: ...mode or vice versa In standby mode the unit is still consuming a small amount of power 14 2 5 DISC SELECTOR Select a disc directly 14 3 Disc exchange Open the disc tray to exchange the disc 14 4 Open Close the disc tray 14 5 Turn Subwoofer Boost on off 27 6 Select the source DVD CD FM AM AUX D IN IPOD 7 Skip or slow search play Select the radio stations 11 14 8 Stop playing Select the tuning mode ...

Page 14: ...ow motion play during pause Press 1 Play to start normal play Open all the disc trays To select a desired tray below Selecting the desired tray Press OPEN CLOSE again to close all the disc trays Load the disc Load double sided discs so the label for the side you want to play is facing up Press EXCHANGE to load discs one by one For DVD RAM remove the disc from its cartridge before use Do not Load m...

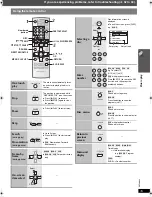
Page 15: ...Pod TV DVD 2ND SELECT W S PL 2 1 ONETOUCH PLAY SLOW SEARCH 5 SKIP STOP PAUSE TOP MENU DIRECT NAVIGATOR OK FL DISPLAY RETURN MENU PLAY LIST DISC DISC Numbered buttons ONE TOUCH PLAY STOP PAUSE SKIP SLOW SEARCH OK Select Confirm OK Selecting a disc Disc information screen is displayed To exit the screen press DISC e g DVD V Enter number DVD VR DVD V VCD CD e g To select 12 S10 1 2 VCD with playback ...

Page 16: ...another source is selected All Disc random when CD Mode is on VCD CD You can playback all the items on all the discs in random order Press 1 PLAY e g CD Playing CDs sequentially CD Mode VCD CD WMA MP3 While stopped Repeat play 1 During play Show the repeat mode 2 While the repeat mode is displayed Select an item to be repeated e g DVD V TITLE CHAP OFF To cancel select OFF Program and Random play W...

Page 17: ...CH PLAY FM AM EXT IN TV VIDEO VOL iPod TV DVD 2ND SELECT W S PL DISC STOP TOP MENU DIRECT NAVIGATOR MENU PLAY LIST OK SKIP RETURN RETURN SETUP DATA DISC ROOT OK Perfume My favorite1 My favorite2 My favorite3 Underwater Fantasy planet City of cascade Infinite unit Lady Starfish Metal Glue Life on Jupiter Starpersons1 Starpersons2 Group Folder Content File WMA MP3 JPEG OK 1 While picture is displaye...

Page 18: ...ack DVD VR VCD To select L R L R or L R DVD V Karaoke disc To select ON or OFF for vocals To select OFF V1 V2 or V1 V2 for vocal selections Actual operations depend on the disc Read the disc s instructions for details Signal type data LPCM PPCM ÎD DTS MP3 MPEG Signal type kHz Sampling frequency bit ch Number of channels 3 2 1ch 0 No surround 1 Mono surround 2 Stereo surround left right 1 Low frequ...

Page 19: ...orded in the center channel OFF ON Dolby PLII OFF MOVIE MUSIC 26 Using Dolby Pro Logic II JPG DATE PLII HDMI STATUS To show HDMI information below Confirming HDMI information HD ENHANCER This works when the HDMI connection is being used with VIDEO PRIORITY 22 HDMI menu is set to ON To sharpen the 720p 1080i and 1080p picture quality OFF 1 weakest to 3 strongest VIDEO FORMAT This works when the HDM...

Page 20: ...S EXIT SETUP RETURN Menu OK SET RETURN DISC EXIT SETUP SETTING STATE AUDIO SUBTITLE MENUS RATINGS PASSWORD ENGLISH AUTO ENGLISH 8 NO LIMIT Display the current setting of the items below Item Setting OK OK RETURN SETUP press and hold QUICK SETUP enables successive settings of the items in the shaded area AUDIO Choose the audio language ENGLISH FRENCH SPANISH ORIGINAL 1 OTHER 2 SUBTITLE Choose the s...

Page 21: ...in sync This works only when DVD CD is selected as the source STILL MODE Specify the type of picture shown when paused AUTO FIELD 4 The picture is not blurred but picture quality is lower FRAME 4 Overall quality is high but the picture may appear blurred BLACK LEVEL Change the black level of the picture LIGHTER DARKER VIDEO OUT I P Select PROGRESSIVE only if connecting to a progressive output comp...

Page 22: ...s not from the HDMI AV OUT terminal The audio is output using the settings of the main unit RGB RANGE This works only when COLOR SPACE in Menu 4 HDMI is set to RGB 19 STANDARD ENHANCED When the black and white images are not distinct VIERA Link ON The VIERA Link HDAVI Control function is available 24 OFF JPEG TIME Set the speed of the slideshow Factory preset 3 SEC 1 SEC to 15 SEC in 1 unit steps ...

Page 23: ...li Bangla 6678 Bhutani 6890 Bihari 6672 Breton 6682 Bulgarian 6671 Burmese 7789 Byelorussian 6669 Cambodian 7577 Catalan 6765 Chinese 9072 Corsican 6779 Croatian 7282 Czech 6783 Danish 6865 Dutch 7876 English 6978 Esperanto 6979 Estonian 6984 Faroese 7079 Fiji 7074 Finnish 7073 French 7082 Frisian 7089 Galician 7176 Georgian 7565 German 6869 Greek 6976 Greenlandic 7576 Guarani 7178 Gujarati 7185 H...

Page 24: ...r the connection or settings are changed reconfirm the points above Automatic setup The settings for TV ASPECT 1 21 VIDEO menu and LANGUAGE 2 22 DISPLAY menu will automatically follow to the settings of the TV This may not work if the corresponding setting you have made for your TV is not available on this unit 1 When using VIERA Link HDAVI Control with HDAVI Control 3 compatible TV 2 When using V...

Page 25: ...te control refer to the below illustration for operation buttons 1 Select this unit s operation menu by using the TV menu settings For details refer to the operating instructions of your TV The START menu will be shown e g DVD V The START menu can also be shown by using a button on the TV s remote control e g SUB MENU When DVD CD is selected as the source this works only during stop mode This does...

Page 26: ...C OFF Dolby Pro Logic II is an advanced decoder that derives 5 channel surround from stereo sound sources whether or not it has been specifically Dolby Surround encoded ÎPLII lights when there is effect This does not work when audio is output from HDMI AV OUT terminal You can adjust the volume of the surround speakers to get the best surround effect 27 Adjusting the speaker level You can enhance t...

Page 27: ...sly stored is overwritten when another station is stored in the same channel preset FM frequency step Main unit only The step is factory set to 0 2 MHz but you can change it to receive broadcasts allocated in 0 1 MHz steps 1 Press SELECTOR to select FM 2 Press and hold SELECTOR After a few seconds the display changes to show the current minimum frequency Continue to hold the button down The minimu...

Page 28: ...OPTICAL IN terminal cannot be output through the HDMI terminal Preparation To view photos videos from the iPod Ensure the video connection to the VIDEO OUT terminal on this unit 7 Operate the iPod menu to make the appropriate photo video output settings for your TV Refer to operating instructions of your iPod To display the picture turn on the TV and select the appropriate video input mode Before ...

Page 29: ...ging will not occur Compatible iPod iPod touch 8GB 16GB iPod nano 3rd generation video 4GB 8GB iPod classic 80GB 160GB iPod nano 2nd generation aluminum 2GB 4GB 8GB iPod 5th generation video 60GB 80GB iPod 5th generation video 30GB iPod nano 1st generation 1GB 2GB 4GB iPod 4th generation color display 40GB 60GB iPod 4th generation color display 20GB 30GB iPod 4th generation 40GB iPod 4th generatio...

Page 30: ...scs and Photo CD DVD RAM that cannot be removed from their cartridge 2 6 GB and 5 2 GB DVD RAM and Chaoji VCD available on the market including CVD DVCD and SVCD that do not conform to IEC62107 Disc handling precautions Do not attach labels or stickers to discs This may cause disc warping rendering it unusable Do not write on the label side with a ball point pen or other writing instrument Do not ...

Page 31: ...20 kbps JPEG DVD RAM DVD R RW CD R RW JPG jpg JPEG jpeg JPEG files taken on a digital camera that conform to DCF Standard Design rule for Camera File system Version 1 0 are displayed Files that have been altered edited or saved with computer picture editing software may not be displayed This unit cannot display moving pictures MOTION JPEG and other such formats still pictures other than JPEG e g T...

Page 32: ...Match the modes on the main unit and remote control Depending on the number being displayed 1 or 2 press and hold OK and the corresponding numbered button 1 or 2 for at least 2 seconds 12 General operation No response when any buttons are pressed This unit cannot play discs other than the ones listed in these operating instructions The unit may not be operating properly due to lightning static ele...

Page 33: ...r of connected devices When using the HDMI connection ensure that AUDIO OUT in the HDMI menu is set to ON 22 No sound from the TV Confirm the audio connection Press FM AM EXT IN to select the corresponding source 7 28 No surround sound Press ÎPLII to turn on Dolby Pro Logic II or turn on Surround Enhancer 26 Picture The picture on the TV is not displayed correctly or disappears Ensure that the uni...

Page 34: ...ideo connections When using the COMPONENT VIDEO OUT terminal set VIDEO OUT I P in VIDEO menu to INTERLACE Alternatively press and hold CANCEL until PRG disappears from the main unit display 19 21 Pictures not in progressive output Select PROGRESSIVE in VIDEO OUT I P in VIDEO menu The unit s VIDEO OUT terminal outputs the interlaced signal even if PRG is displayed 21 Closed captions not displayed W...

Page 35: ... quality considering the degree of compression Linear PCM pulse code modulation These are uncompressed digital signals similar to those found on CDs MP3 MPEG Audio Layer 3 An audio compression method that compresses audio to approximately one tenth of its size without any considerable loss of audio quality Playback control PBC If a Video CD has playback control you can select scenes and informatio...

Page 36: ...oups 4000 audio and picture contents and 400 groups Pick up Wavelength DVD CD 655 785 nm Laser power DVD CD U S A CLASS II CLASS I Canada CLASS 1 CLASS 1M Audio output Disc Number of channels 5 1 ch FL FR C SL SR SW Video system NTSC Composite video output Output level 1 Vp p 75 Terminal Pin jack 1 system Component video output Y output level 1 Vp p 75 PB output level 0 7 Vp p 75 PR output level 0...

Page 37: ... trademarks of DTS Inc U S Patent Nos 6 836 549 6 381 747 7 050 698 6 516 132 and 5 583 936 This product incorporates copyright protection technology that is pro tected by U S patents and other intellectual property rights Use of this copyright protection technology must be authorized by Macrovi sion and is intended for home and other limited viewing uses only unless otherwise authorized by Macrov...

Page 38: ...OR INCIDENTAL OR CONSEQUENTIAL DAMAGES RESULTING FROM THE USE OF THIS PRODUCT OR ARISING OUT OF ANY BREACH OF THIS WARRANTY As examples this excludes damages for lost time travel to and from the servicer loss of media or images data or other memory content The items listed are not exclusive but are for illustration only ALL EXPRESS AND IMPLIED WARRANTIES INCLUDING THE WARRANTY OF MERCHANTABILITY A...

Page 39: ... cover any product which is used commercially Dry cell batteries are also excluded from coverage under this warranty This warranty is extended to the original end user purchaser only A purchase receipt or other proof of date of original purchase is required before warranty service is performed THIS EXPRESS LIMITED WARRANTY IS IN LIEU OF ALL OTHER WARRANTIES EXPRESS OR IMPLIED INCLUDING ANY IMPLIED...

Page 40: ...1DAAAA00002 1 FM indoor antenna RSA0007 M 1 Sheet of speaker cable stickers PT754 2 Speaker cables PT754 REEX0860E L Blue REEX0868E L Gray 1 Speaker cable PT754 REEX0858 2 Set of pipes with cable PT754 RYBX0182 K White RYBX0183 K Red 2 Bases PT754 RYBX0176 K 8 Screws PT754 XTN5 10FFJK 4 Small Screws PT754 XTB3 8JFJK CAUTION DO NOT INSTALL OR PLACE THIS UNIT IN A BOOKCASE BUILT IN CABINET OR IN ANO...

Reviews: