background image

RQT7800

2

Dear customer

Thank you for purchasing this product.
For optimum performance and safety, please read these instructions
carefully.

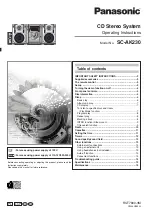
These operating instructions are applicable to the following systems.
Unless otherwise indicated, illustrations in these operating instructions
are of SC-AK230: 

PL

.

System

SC-AK230

Main unit

SA-AK230

Speakers

SB-AK230

GCP only

Inside of product

WARNING:

TO REDUCE THE RISK OF FIRE, ELECTRIC SHOCK
OR PRODUCT DAMAGE, DO NOT EXPOSE THIS
APPARATUS TO RAIN, MOISTURE, DRIPPING OR
SPLASHING AND THAT NO OBJECTS FILLED WITH
LIQUIDS, SUCH AS VASES, SHALL BE PLACED
ON THE APPARATUS.

CAUTION!

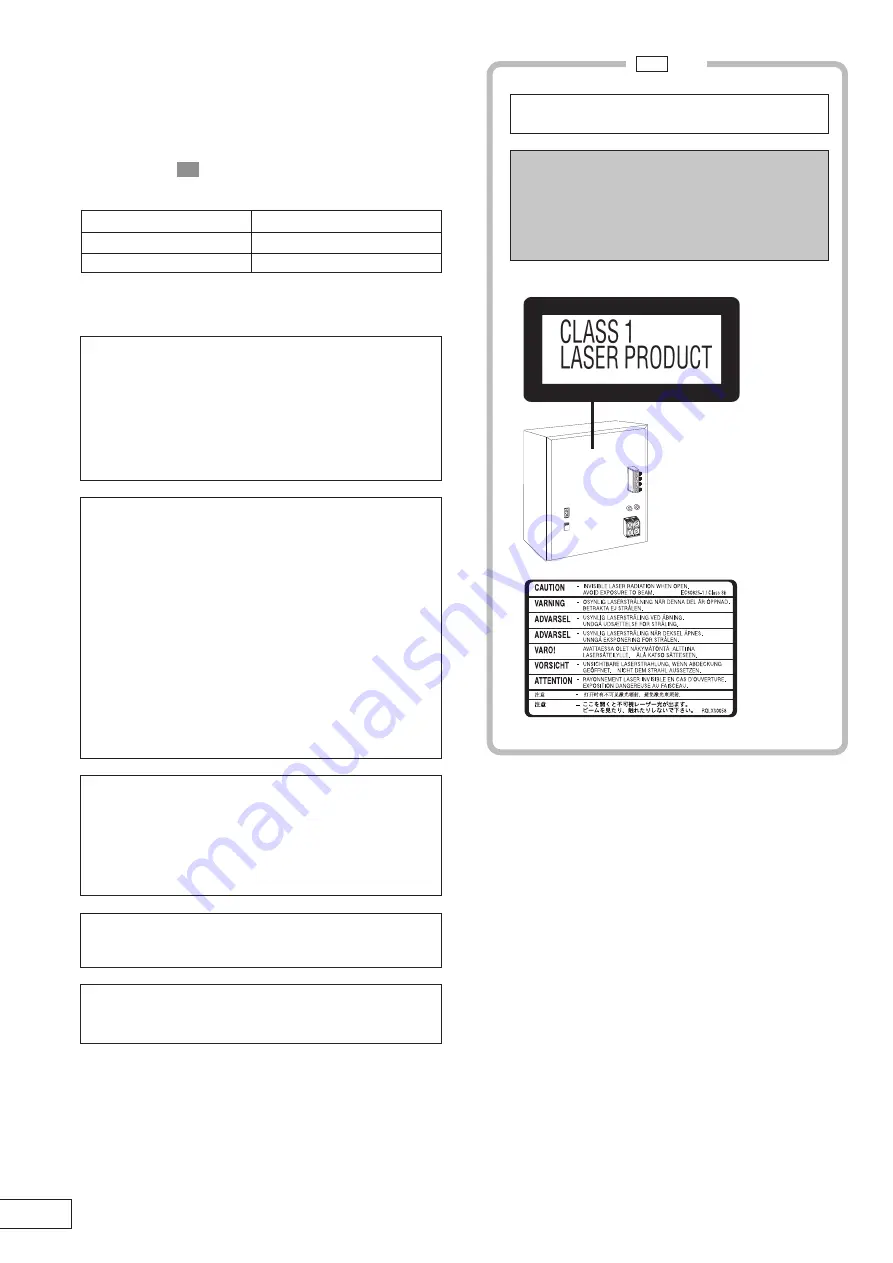
THIS PRODUCT UTILIZES A LASER.
USE OF CONTROLS OR ADJUSTMENTS OR PERFORM-
ANCE OF PROCEDURES OTHER THAN THOSE SPECI-
FIED HEREIN MAY RESULT IN HAZARDOUS RADIATION
EXPOSURE.
DO NOT OPEN COVERS AND DO NOT REPAIR YOUR-
SELF. REFER SERVICING TO QUALIFIED PERSONNEL.

CAUTION!

DO NOT INSTALL OR PLACE THIS UNIT IN A
BOOKCASE, BUILT-IN CABINET OR IN ANOTHER
CONFINED SPACE. ENSURE THE UNIT IS WELL
VENTILATED. TO PREVENT RISK OF ELECTRIC
SHOCK OR FIRE HAZARD DUE TO OVERHEATING,
ENSURE THAT CURTAINS AND ANY OTHER
MATERIALS DO NOT OBSTRUCT THE VENTILATION
VENTS.

DO NOT OBSTRUCT THE UNIT’S VENTILATION
OPENINGS WITH NEWSPAPERS, TABLECLOTHS,
CURTAINS, AND SIMILAR ITEMS.

DO NOT PLACE SOURCES OF NAKED FLAMES, SUCH
AS LIGHTED CANDLES, ON THE UNIT.

DISPOSE OF BATTERIES IN AN ENVIRONMENTALLY
FRIENDLY MANNER.

The socket outlet shall be installed near the equipment and
easily accessible or the mains plug or an appliance coupler
shall remain readily operable.

This product may receive radio interference caused by mobile
telephones during use. If such interference is apparent, please
increase separation between the product and the mobile telephone.

THIS UNIT IS INTENDED FOR USE IN TROPICAL
CLIMATES.

CAUTION:

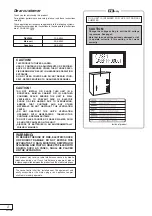
Change the voltage setting to suit the AC voltage
in your area. See page 4.
Note that the unit will be seriously damaged or fail
to operate correctly if this setting is not made
correctly.

Summary of Contents for SCAK230 - MINI HES W/CD PLAYER

Page 1: ... los discos 6 Discos 6 Reproducción básica 6 Reproducción con salto de álbum 7 Visualización de discos compactos 7 Para escuchar discos compactos y pistas específicos Función del modo de reproducción 7 Reproducción programada 8 Repetición de reproducción 8 Marcación de una pista 8 Función INTRO Exploración de álbumes 9 Función de búsqueda de títulos 9 Radio 10 Casetes 11 Puesta de la hora 11 Tempo...

Page 2: ...RICAS O INCENDIOS DEBIDOS AL RECALENTAMIENTO NO OBSTRUYA LAS ABERTURAS DE VENTILACIÓN DE LA UNIDAD CON PERIÓDICOS MANTELES CORTINAS U OBJETOS SIMILARES NO COLOQUE OBJETOS CON LLAMA DESCUBIERTA UNA VELA POR EJEMPLO ENCIMA DE LA UNIDAD TIRE LAS PILAS DE FORMA QUE NO CONTAMINE EL MEDIO AMBIENTE El equipo deberá colocarse cerca de la toma de CA y a la clavija del cable de alimentación deberá poder acc...

Page 3: ...ón fue estropeado se ha derramado líquido sobre la unidad se ha caído un objeto dentro de la unidad la unidad no funciona como es debido o se cayó INSTRUCCIONES IMPORTANTES DE SEGURIDAD Cable de alimentación de CA 1 GCP PL Marque e identifique los accesorios suministrados Pilas para el mando a distancia 2 Mando a distancia 1 EUR7710020 GCP solamente Adaptador para la clavija de alimentación 1 Ante...

Page 4: ...poner de una ventilación apropiada Estos altavoces no disponen de blindaje magnético No los ponga cerca de televisores ordenadores personales y otros dispositivos a los que afecte fácilmente el magnetismo No puede retirar la red delantera de los altavoces Los altavoces han sido diseñados identicamente por lo que no es necesario orientar el canal derecho o izquierdo 1 3 2 Negro Rojo Negro Rojo Use ...

Page 5: ...REC 11 Botón de apertura de la platina 1 c DECK1 11 Botón del equipo auxiliar AUX 13 Control de volumen VOLUME DOWN UP 13 Botón para la reproducción de la cinta TAPE 11 Botón de apertura de la platina 2 DECK2 c c c c c 11 Botón selector de platina DECK 1 2 11 Los botones como el 3 funcionan exactamente igual que los botones del aparato principal Botón del temporizador para dormir apagado automátic...

Page 6: ... 001 002 003 001 mp3 002 mp3 003 mp3 001 mp3 002 mp3 003 mp3 004 mp3 001 mp3 002 mp3 003 mp3 Ejemplo Limitaciones de la reproducción MP3 Este aparato no es compatible con el formato de escritura de paquete Cuando se graben datos MP3 y CD DA en el disco durante cierto número de sesiones Si la primera sesión contiene grabaciones MP3 el aparato reproducirá desde el MP3 hecho en esa sesión hasta la se...

Page 7: ...duce un disco seleccionado g 1 ALBUM RANDOM MP3 Se reproduce un álbum seleccionado en orden aleatorio Mando a distancia solamente Preparación Pulse J CD y luego L CLEAR Pulse PLAY MODE para seleccionar el modo deseado Cada vez que pulse el botón CD a ALL DISC b 1 SONG f 1 DISC d 1 DISC RANDOM e ALL DISC RANDOM MP3 a ALL DISC c 1 ALBUM b 1 SONG g 1 ALBUM RANDOM f 1 DISC d 1 DISC RANDOM ALL DISC RAN...

Page 8: ...do PROGRAM y luego J CD Mientras se visualiza P usted puede hacer lo siguiente Para comprobar el contenido del programa Pulse g REW 3 o f 4 FF Cada vez que pulse el botón CD Se visualiza el número de la pista y el orden del programa MP3 Se visualiza el orden del programa y luego el número del álbum y el número de la pista Para añadir una pista al programa CD Siga los pasos 2 y 3 MP3 Siga los pasos...

Page 9: ...al 2 Mientras se reproduce su álbum deseado pulse J CD La reproducción continúa desde la primera pista del álbum Para detener el proceso pulse INTRO o L CLEAR Nota No puede utilizar esta función durante la reproducción programada ni la reproducción aleatoria Introducción de caracteres Usted puede introducir una palabra clave que tenga un máximo de 8 caracteres para buscar títulos de álbumes pistas...

Page 10: ...emisoras que la radio puede recibir Presintonización manual Usted puede seleccionar las emisoras a presintonizar y el orden en que quiera presintonizarlas Se puede presintonizar un máximo de 15 emisoras en cada banda FM y AM Preparación Pulse TUNER BAND para seleccionar FM o AM Presintonización automática Haga lo siguiente una vez para cada banda de FM y AM Preparación Sintonice la frecuencia desd...

Page 11: ... pistas programadas En la página 8 Reproducción programada siga los pasos CD 1 3 MP3 1 4 Para grabar discos pistas específicos 1 Pulse PLAY MODE para seleccionar el modo deseado A página 7 2 Pulse DISC y luego 1 5 para seleccionar el disco Asegúrese de que el disco esté parado 3 MP3 Para el modo 1 ALBUM y el modo 1 SONG Pulse ALBUM o para seleccionar el álbum 4 Para el modo 1 SONG Pulse g REW 3 o ...

Page 12: ...IFT CLOCK TIMER mientras el aparato está encendido para seleccionar rPLAY o rREC Los ajustes se muestran en el orden siguiente Temporizador de reproducción Hora de encendido hora de apagado fuente volumen Temporizador de grabación Hora de encendido hora de apagado fuente Para comprobar los ajustes mientras el aparato está apagado pulse SHIFT CLOCK TIMER dos veces Siutilizaelaparatodespuésdehaberaj...

Page 13: ...MER El visualizador se oscurece y el indicador se apaga El indicador de alimentación de CA permanece encendido Pulse de nuevo DIMMER para restaurar la visualización Para silenciar el volumen Pulse MUTING Pulse de nuevo el botón para cancelar MUTING se apagará Para cancelar desde el aparato gire VOLUME hasta el mínimo dB y luego súbalo hasta el nivel requerido El silenciamiento también se cancela c...

Page 14: ...l aparato Separe el cable de antena del televisor del aparato Deficiente calidad de sonido No se puede grabar Utilización de la platina de casete Limpie las cabezas Si se han quitado las lengüetas para impedir el borrado cubra los orificios con cinta adhesiva Restablecer memoria Inicialización Cuando ocurre la siguiente situación consulte las instrucciones de abajo para restablecer la memoria Los ...

Page 15: ... de avance rápido y rebobinado 120 segundos aproximadamente con cinta de casete C 60 SECCIÓN DE DISCOS COMPACTOS Discos reproducìdos 8cm ó 12cm 1 CD Audio CD DA 2 CD R RW CD DA disco formateado con MP3 3 MP3 Velocidad de transferencia de bits MP3 32 kbps 320 kbps Frecuencia de muestreo MP3 32 kHz 44 1 kHz 48 kHz CD 44 1 kHz Descodificación Lineal de 16 bits Filtro digital 8 fs Convertidor D A MASH...

Page 16: ...RQT7800 16 Matsushita Electric Industrial Co Ltd Web Site http www panasonic co jp global ...

Page 17: ...e control 3 Set up 4 Turning the demo function on off 4 Front panel controls 5 Disc information 6 Discs 6 Basic play 6 Album skip play 7 CD display 7 To listen to specific discs and tracks Play Mode function 7 Program play 8 Repeat play 8 Marking a track 8 INTRO function Album scan 9 Title search function 9 Radio 10 Cassettes 11 Setting the time 11 Timers 12 Sound quality sound field 13 Other func...

Page 18: ...ALL OR PLACE THIS UNIT IN A BOOKCASE BUILT IN CABINET OR IN ANOTHER CONFINED SPACE ENSURE THE UNIT IS WELL VENTILATED TO PREVENT RISK OF ELECTRIC SHOCK OR FIRE HAZARD DUE TO OVERHEATING ENSURE THAT CURTAINS AND ANY OTHER MATERIALS DO NOT OBSTRUCT THE VENTILATION VENTS DO NOT OBSTRUCT THE UNIT S VENTILATION OPENINGS WITH NEWSPAPERS TABLECLOTHS CURTAINS AND SIMILAR ITEMS DO NOT PLACE SOURCES OF NAKE...

Page 19: ...ch as power supply cord or plug is damaged liquid has been spilled or objects have fallen into the apparatus the apparatus has been exposed to rain or moisture does not operate normally or has been dropped IMPORTANT SAFETY INSTRUCTIONS AC power supply cord 1 pc GCP PL Please check and identify the supplied accessories Batteries for remote control 2 pcs Remote control transmitter 1 pc EUR7710020 GC...

Page 20: ...lation These speakers do not have magnetic shielding Do not place them near televisions personal computers or other devices easily influenced by magnetism You cannot take the front net off the speakers Speakers are designed identically so that no left or right channel orientation is necessary 1 3 2 Black Red Black Red Use only the supplied speakers The combination of the main unit and speakers pro...

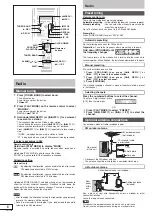
Page 21: ... 1 open button c DECK1 11 AUX button AUX 13 Volume control VOLUME DOWN UP 13 Tape play button TAPE 11 Deck 2 open button DECK2 c 11 Deck select button DECK 1 2 11 Buttons such as 3 function in exactly the same way as the buttons on the main unit Sleep timer Auto off button SLEEP AUTO OFF 12 13 Disc button DISC 7 Program button PROGRAM 8 10 Play mode select button PLAY MODE 7 10 11 Use this for sel...

Page 22: ...der MPEG Layer 3 audio decoding technology licensed from Fraunhofer IIS and Thomson multimedia Limitations on MP3 play This unit is not compatible with packet write format When both MP3 and CD DA data is recorded on the disc over a number of sessions If the first session contains MP3 recordings the unit will play from the MP3 made in that session till the session before the first CD DA recordings ...

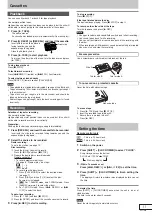
Page 23: ...andom order Remote control only Preparation Press J CD and then L CLEAR Press PLAY MODE to select the desired mode Every time you press the button CD a ALL DISC b 1 SONG f 1 DISC d 1 DISC RANDOM e ALL DISC RANDOM MP3 a ALL DISC c 1 ALBUM b 1 SONG g 1 ALBUM RANDOM f 1 DISC d 1 DISC RANDOM ALL DISC RANDOM CD Press J CD to start play ALL DISC 1 DISC 1 DISC RANDOM CD MP3 Press DISC and then 1 5 to sel...

Page 24: ...elect the tracks with the numbered buttons To select a 2 digit track press 10 once then the two digits Repeat steps 2 and 3 to program other tracks 4 Press J CD to start play MP3 Preparation 1 Press DISC and then 1 5 to select the disc 2 Press L CLEAR 1 Press PROGRAM PGM appears 2 Press ALBUM or to select the album To select an album directly press the numbered buttons after pressing ALBUM or To s...

Page 25: ...n search for or by entering or The characters change each time a numbered button is pressed For example every time you press 2 A B C 2 The special characters will be displayed as below Numbered Characters Numbered Characters buttons buttons 1 1 6 M N O 6 2 A B C 2 7 P Q R S 7 3 D E F 3 8 T U V 8 4 G H I 4 9 W X Y Z 9 5 J K L 5 0 0 10 space _ Blinks to indicate album title search mode Matched album...

Page 26: ...e are preset Manual presetting You can select the stations to preset and the order they are preset in Up to 15 stations each can be set in the FM and AM bands Preparation Press TUNER BAND to select FM or AM Automatic presetting Do the following once each for FM and AM Preparation Tune to the frequency where pre setting is to begin Hold down PROGRAM until the frequency changes The tuner presets all...

Page 27: ...ontrol only To record programmed tracks On page 8 Program play do steps CD 1 3 MP3 1 4 To record specific discs tracks 1 Press PLAY MODE to select the desired mode A page 7 2 Press DISC and then 1 5 to select the disc Ensure disc is stopped 3 MP3 For 1 ALBUM mode and 1 SONG mode Press ALBUM or to select the album 4 For 1 SONG mode Press g REW 3 or f 4 FF to select the track Tape to tape recording ...

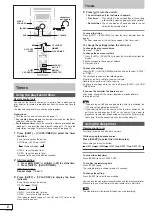
Page 28: ...it is on To change the play record times Do steps 1 2 and 4 To change the source or volume 1 Press SHIFT rPLAY REC to clear the timer indicator from the display 2 Make changes to the source or volume 3 Do steps 3 to 4 To check the settings Press SHIFT CLOCK TIMER while the unit is on to select rPLAY or rREC The settings are shown in the following order Play timer on time off time source volume Rec...

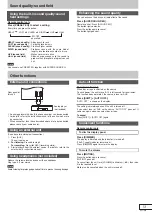
Page 29: ... to cancel The button light goes out Using an external unit See above for external unit connection 1 Press AUX The unit comes on 2 For listening Proceed to step 3 For recording Press a REC recording starts 3 Start playback from the external source For details refer to the external unit s instruction manual Using headphones not included Reduce the volume level and connect the headphones Plug type 3...

Page 30: ...ange to an outdoor antenna The TV antenna wire is too close to the unit Separate the antenna wire of the TV set from the unit Poor quality sound Recording is not possible Clean the heads If the erasure prevention tabs have been removed cover the holes with adhesive tape The display is wrong or play won t start Cannot perform all disc random play The total number of tracks displayed differs each ti...

Page 31: ...20 seconds with C 60 cassette tape DISC SECTION Discs played 8 cm or 12 cm 1 CD Audio CD DA 2 CD R RW CD DA MP3 formatted disc 3 MP3 Bit rate MP3 32 kbps 320 kbps Sampling frequency MP3 32 kHz 44 1 kHz 48 kHz CD 44 1 kHz Decoding 16 bit linear Digital filter 8 fs D A converter MASH 1 bit DAC Pickup Wavelength 780 nm Beam Source Semiconductor laser Audio output Disc Number of channels 2 Stereo FL F...

Page 32: ...RQT7800 16 Matsushita Electric Industrial Co Ltd Web Site http www panasonic co jp global ...

Reviews: