

15
RQT8043
RQTV0070
LANG - 5
LANG - 4
FRANÇAIS
DANSK
ENGLISH
Timer
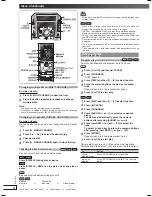
Setting the clock
Setting the clock
This is a 24-hour clock.
1
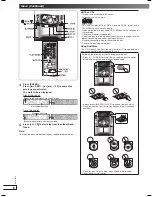
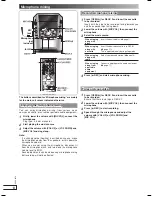
Press [CLOCK/TIMER] to select “CLOCK”.
Each time you press the button:
➞
CLOCK
˚
PLAY
Original display
˚
REC
➞
2
(
Within 8 seconds or so
)
Press [
4
, REW / ] or [
¢
, / FF] to set the time.
3
Press [CLOCK/TIMER] to finish setting the time.
Displaying the clock
Press [CLOCK/TIMER] once when the unit is on or in standby
mode.
The time is displayed for a few seconds.
Note:
Reset the clock regularly to maintain accuracy.
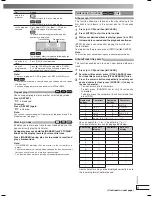
Using the play or record timer
Using the play or record timer
You can set the timer to come on at a certain time to wake
you up (play timer) or to record from the radio or music port
source (record timer).
Play timer and record timer cannot be used together.
Turn the unit on and set the clock.
Timer
Action
Play timer
Prepare the music source you want to listen to;
cassette (DECK 2 has the priority), disc number
(1~5), radio or music port source, and set the
volume.
Record
timer
Check the cassette’s erasure prevention tabs
(
\
page 12), insert the cassette in DECK 2 and
tune to the radio station (
\
page 13) or select the
music port source (
\
page 17).
1
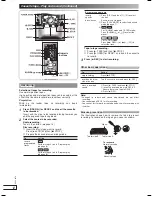
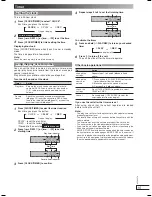
Press [CLOCK/TIMER] to select the timer function.
Each time you press the button:
➞
CLOCK
˚
PLAY
Original display
˚
REC
➞
˚
PLAY : to set the play timer
˚
REC : to set the record timer
(Proceed to the next step
within 8 seconds
)
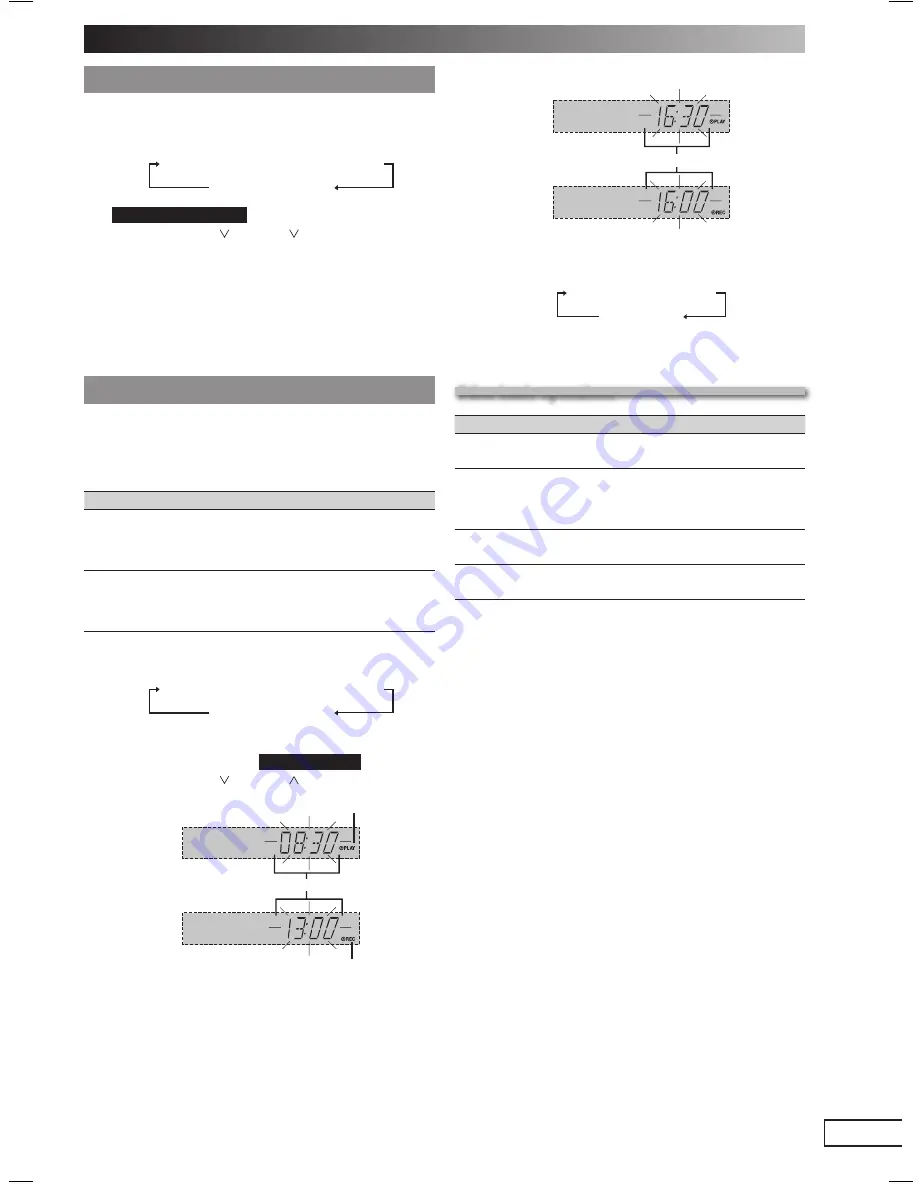
2
Press [
4
, REW / ] or [
¢
, / FF] to set the
starting time.
Record timer indicator
Play timer indicator
Start time
3
Press [CLOCK/TIMER] to confirm.
4
Repeat steps 2 to 3 to set the finishing time.
Finish time
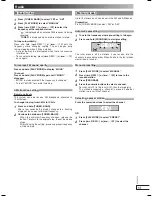
To activate the timer
5
Press and hold [–
˚
PLAY/REC] to turn on your desired
timer.
˚
PLAY
no display (off)
˚
REC
➞
6
Press [
y
] to turn off the unit.
The unit must be off for the timers to operate.
Other basic operations
Other basic operations
To
Action
change the
settings
Repeat steps 1 to 4 and 6 (
\
see left and
above).
change the
source or
volume
1) Press and hold [–
˚
PLAY/REC] to clear the
timer indicator from the display.
2) Make changes to the source or volume.
3) Do steps 5 to 6 (
\
see above).
check the
settings
Press [CLOCK/TIMER] repeatedly to select
˚
PLAY or
˚
REC.
cancel
Press and hold [–
˚
PLAY/REC] to clear the
timer indicators from the display.
If you use the unit after the timers are set
After using, check that the correct tape/disc are loaded
before turning the unit off.
Note:
• The play timer will start at the preset time with volume increasing
gradually to preset level.
• The record timer will start 30 seconds before the set time with the
volume muted.
• The timer comes on at the set time everyday if the timer is on.
• The unit must be in the standby mode for the timer to function.
• If you turn the unit off and on again while a timer is functioning, the
fi nish time setting will not be activated.
• If MUSIC PORT is selected as the source when the timer comes on,
the system turns on and engages MUSIC PORT as the source. If
you wish to playback or record from the portable audio equipment,
just activate the equipment’s play mode and increase the volume.
(See the portable audio equipment’s instruction manual.)
RQTV0070-M_1EN.indd 15
RQTV0070-M_1EN.indd 15
11/16/05 2:38:34 PM
11/16/05 2:38:34 PM


