
8
RQT8043
RQTV0070
LANG - 5
LANG - 4
FRANÇAIS
DANSK
ENGLISH
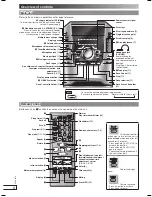
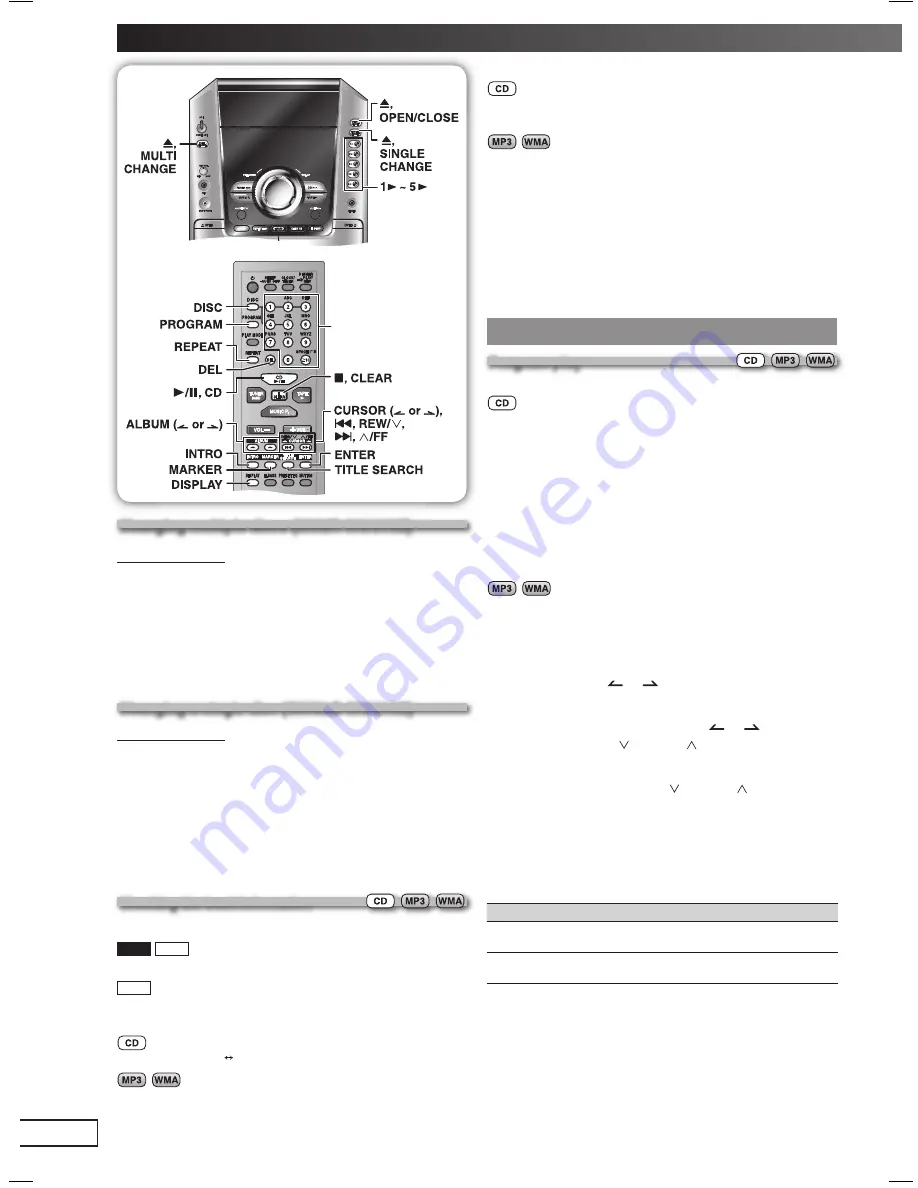
Numeric
buttons
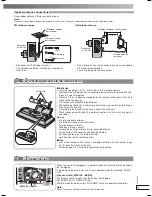
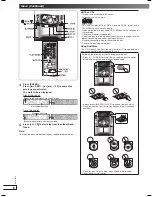
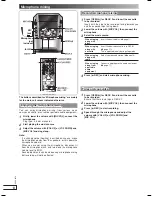
Changing multiple discs (MULTI CHANGE)
Changing multiple discs (MULTI CHANGE)
By main unit only
1
Press [
0
, MULTI CHANGE] to open the trays.
2
Press the button repeatedly to check and change
multiple discs.
Note:
• The tray with a disc being played will not open.
• If the player is stopped, all trays will open. To close the remaining
trays simultaneously, press [
0
, OPEN/CLOSE].
Changing a single disc (SINGLE CHANGE)
Changing a single disc (SINGLE CHANGE)
By main unit only
While one disc is playing, you can change the discs in other
trays.
1
Press [
0
, SINGLE CHANGE].
2
Press [1
3
~ 5
3
] to select the desired tray.
3
Change the disc.
4
Press [
0
, SINGLE CHANGE] again to close the tray.
C
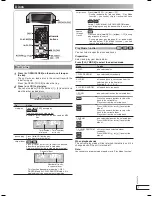
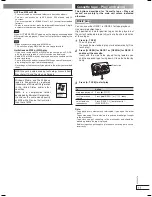
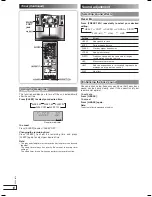
Checking the track information
hecking the track information
You can select a desired disc display mode.
AK340
AK240
Press [DISPLAY] during play or pause.
AK240
Press [DISPLAY, –DEMO] on the main unit during play or
pause.
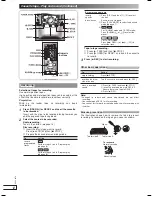
Elapsed play time Remaining play time
Elapsed
play time
➞
Remaining
play time
➞
Album Name
Tag (Artist)
➞
Tag (Track)
➞
Tag (Album)
➞
Track Name
➞
➞
Note:
• When track number 25 or greater is playing, remaining play time
display shows “– –:– –”.
• When a title is longer than 9 characters, it will scroll across the
display. The scrolling will start after every 3 seconds.
• “NO TAG” is displayed if titles with tags have not been entered.
• Maximum number of displayable characters: approximately 32
• This unit can display album, track and artist name with WMA tags
and MP3 ID3 tags (version 1.0 and 1.1).
• Titles containing text data that the unit does not support cannot be
displayed.
• ID3 is a tag embedded in MP3 track to provide information about
the track.
• Titles entered with 2-byte code cannot be displayed correctly on
this unit.
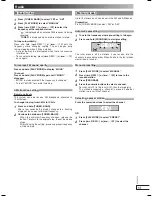
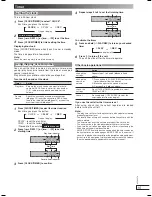
Advanced play
Advanced play
Program play
Program play
This function allows you to program up to 24 tracks.
1
Press [
6
, CD] and then [
7
, CLEAR].
2
Press [PROGRAM].
“PGM” appears.
3
Press [DISC] and then [1] ~ [5] to select the disc.
4
Press the numeric buttons to select your desired
track.
Repeat steps 3 to 4 to program other tracks.
5
Press [
6
, CD] to start play.
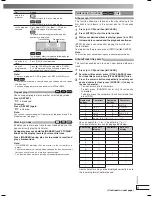
1
Press [DISC] and then [1] ~ [5] to select the disc.
2
Press [
7
, CLEAR].
3
Press [PROGRAM].
4
Press [ALBUM (
or
)] to select your desired
album.
To select an album directly, press the numeric
buttons after pressing [ALBUM (
or
)].
5
Press [
4
, REW / ] or [
¢
, / FF] to select the
track.
To select a track directly, press the numeric buttons
after pressing [
4
, REW / ] or [
¢
, / FF].
6
Press [ENTER].
Repeat steps 4 to 6 to program other tracks.
7
Press [
6
, CD] to start play.
For two-digit track, press [
h
10] once then the two digits.
For three-digit track, press [
h
10] twice then the three digits.
To
Action
cancel
program mode
Press [PROGRAM] in the stop mode.
replay the
program
Press [PROGRAM] then [
6
, CD] in the stop
mode.
Discs (Continued)
RQTV0070-M_1EN.indd 8
RQTV0070-M_1EN.indd 8
11/16/05 2:38:07 PM
11/16/05 2:38:07 PM


