background image

R

Q

T

804

6

31

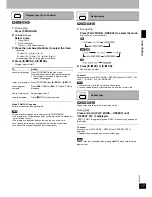
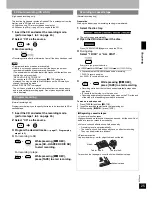
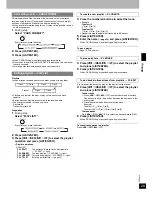
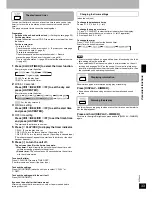
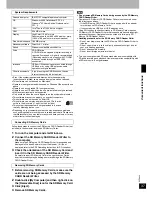
The unit can record the disc titles for 100 CDs, 25 track titles per CD.

Preparation

1 Insert the CD. (

 page 8)

2 Press [

q

/

h

 CD] and then [

g

 STOP] to select “CD” as the source. 

3 To select a CD

Press [DISC], then press the numbered button to select the CD and 

press [

g

 STOP].

1

Press [TITLE IN].

2

Press [

u


2

/REW, 

i


1

/FF] to select the title 

type (Disc title/Artist name/Track title), track 
number, etc. and press [LIST/ENTER].

3

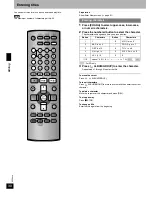
Enter the characters

 (

 page 30)

 and press [LIST/ENTER].

Repeat steps 2 and 3 as necessary.

4

Press [TITLE IN].

The title name is entered.

To stop partway

Press [TITLE IN].

To check titles

Press [DISPLAY, –DIMMER] several times while stopped.

Track titles appear during play or when you skip tracks while stopped. 

(Nothing is shown if you only enter spaces.)

To delete titles

1 During stop, press [EDIT MODE].

“TITLE ERASE?” appears.

2 Press [LIST/ENTER].

3 Press [

e

r

] to select the title and press [LIST/ENTER].

“TITLE ERASE?” and “PRESS ENTER” alternatively appear.

4 Press [LIST/ENTER].

The title is erased after “COMPLETE” is displayed. All the titles you 

entered for the disc are deleted.

Repeat to delete the titles on other CDs.

To cancel, press [

g

 STOP].

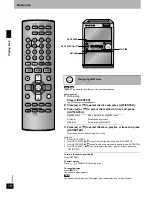
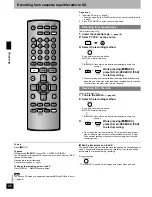
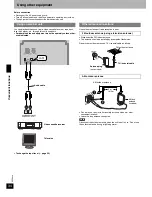
Preparation

1 Insert the SD card. (

 page 8)

Securely close the lid of the SD card slot. You cannot edit if the lid is 

open.

2 Press [

q

/

h

 SD] and then [

g

 STOP] to select “SD” as the source.

1

Press [TITLE IN].

2

Press [

u


2

/REW, 

i


1

/FF] to select the track 

number and press [LIST/ENTER].

3

Enter the track title

 (

 page 30)

 and press [LIST/ENTER].

4

Enter the artist name

 (

 page 30)

 and press [LIST/ENTER].

Repeat steps 2 through 4 as necessary.

5

Press [TITLE IN].

When “CARD Writing” stops flashing editing is complete.

To stop partway

Press [TITLE IN].

Note

Do not open the SD card lid while editing as the operation in progress 

stops and the editing is not completed properly.

You can use SD cards with capacities between 8MB and 1GB on this 

unit. (

 page 6)

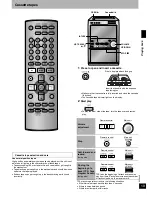
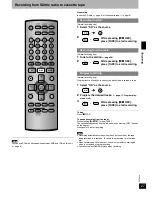
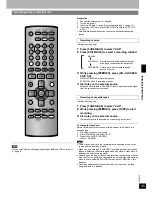
Preparation

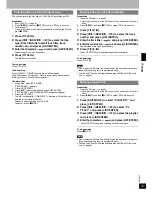
1 Insert the SD card. (

 page 8)

Securely close the lid of the SD card slot. You cannot edit if the lid is 

open.

2 Press [

q

/

h

 SD] and then [

g

 STOP] to select “SD” as the source.

1

Press [EDIT MODE] to select “PLAYLIST?” and 
press [LIST/ENTER].

2

Press [

u


2

/REW, 

i


1

/FF] to select “PL 

TITLE?” and press [LIST/ENTER].

3

Press [

u


2

/REW, 

i


1

/FF] to select the playlist 

and press [LIST/ENTER].

4

Enter the characters

 (

 page 30)

 and press [LIST/ENTER].

When "CARD Writing" stops flashing editing is complete.

To stop partway 

Press [

g

 STOP].

Note

Do not open the SD card lid while editing as the operation in progress 

stops and the editing is not completed properly.

You can use SD cards with capacities between 8MB and 1GB on this 

unit. (

 page 6)

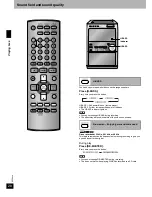
Entering titles on a CD (CD title memory)

Entering titles on a SD after recording

Entering a playlist title

Edi

ting

Summary of Contents for SCPM71SD - MINI HES W/CD PLAYER

Page 1: ...nstructions completely Please keep this manual for future reference n High speed recording Performance and convenience page 24 n More fun with SD Connect and expand page 36 n Never forget a recording again with the Record timer page 33 n Save your favorite tracks from an external source to SD page 35 If you have any questions contact 1 800 211 PANA 7262 If the display lights up when the unit is tu...

Page 2: ...C Rules These limits are designed to provide reasonable protection against harmful interference in a residential installation This equipment generates uses and can radiate radio frequency energy and if not installed and used in accordance with the instructions may cause harmful interference to radio communications However there is no guarantee that interference will not occur in a particular insta...

Page 3: ...e radio to SD 26 Recording from SD the radio to cassette tape 27 Editing SDs 28 Erasing tracks TRACK ERASE ALL ERASE 28 Moving tracks MOVE 28 Formatting a card CARD FORMAT 29 Editing playlists PLAYLIST 29 Entering titles 30 Convenient functions 32 Setting the time 32 Auto off function 32 The sleep timer 32 The play record timer 33 Displaying information 33 Dimming the display 33 Using other equipm...

Page 4: ...ort level adapts to higher volumes of sound So what sounds normal can actually be loud and harmful to your hearing Guard against this by setting your equipment at a safe level BEFORE your hearing adapts To establish a safe level Start your volume control at a low setting Slowly increase the sound until you can hear it comfortably and clearly and without distortion Once you have established a comfo...

Page 5: ...ng prong The wide blade or the third prong are provided for your safety If the provided plug does not fit into your outlet consult an electrician for replacement of the obsolete outlet 10 Protect the power cord from being walked on or pinched particularly at plugs convenience receptacles and the point where they exit from the apparatus 11 Only use attachments accessories specified by the manufactu...

Page 6: ...yrights to ensure the healthy development of music culture and to pro tect the rights of valid purchasers This unit records music data in encrypted form Encrypted data cannot be moved copied to other equipment for use This unit cannot back up or restore music data recorded in encrypted form Use Panasonic SD Jukebox software included to move data contained in the SD card You may not be able to use ...

Page 7: ...or 2 except for extended formats If you have recorded MP3 WMA on the same disc as CD DA only the format recorded in the first session can be played This unit is compatible with multi session but if there are a lot of sessions it takes more time for play to start Keep the number of sessions to a minimum to avoid this If there is a large amount of JPEG data etc within a WMA MP3 file sound may not be...

Page 8: ... CD for a second time within 74 minutes of finishing the first high speed recording You can record at normal speed If you accidentally open the cover when recording from the radio recording stops If you accidentally open the cover when editing an SD card reinsert the card and check what you have edited If there is a problem delete what was edited then do the editing again Inserting discs 1 Open cl...

Page 9: ...s and corners can result in excessive bass Cover walls and windows with thick curtain Keep your speakers at least 10 mm 13 32 away from the system for proper ventilation To avoid damage to the speakers do not touch the speaker cones if you have taken the nets off n Notes on speaker use These speakers do not have magnetic shielding Do not place them near televisions personal computers or other devi...

Page 10: ...need to reset some memory items after plugging in the unit again Keep loose antenna cord away from other wires and cords Video cassette recorder Television To AUX terminals page 34 DEMO function AM loop antenna Stand the antenna up on its base Press and hold until DEMO OFF is displayed Every time you press the button DEMO OFF DEMO ON If the display lights up when the unit is turned off the demo fu...

Page 11: ...matically Grey Blue Black Red White Blue Black Red When disconnecting the AC power supply cord 1 Press POWER 8 2 Disconnect after GOODBYE disappears from the display Note Never short circuit positive and negative speaker wires Incorrect connection can damage the speakers If the speaker cords have vinyl tips twist the vinyl tip and pull off Confirm the colors of the tags on the ends of the cords Fo...

Page 12: ...s page 14 q TAPE page 19 q h SD page 15 q h CD page 14 REC MODE page 24 h SD page 24 CD q SD HI SPEED AUTO REC page 25 LIST ENTER page 16 Display below SD card indicator page 8 H BASS indicator page 20 H BASS page 20 STOP g page 15 DEMO page 10 VOLUME UP DOWN page 15 CD CHECK page 15 CHANGE page 15 CD lid page 8 Remote control sensor LIST SELECT e r page 16 RETURN page 16 TUNER AUX page 22 OPEN CL...

Page 13: ...page 25 To record to cassette tapes PLAY MODE page 15 REPEAT page 17 e r LIST ENTER page 16 VOL page 15 SLEEP page 32 AUTO OFF page 32 page 33 PROGRAM page 17 DISC page 15 TITLE IN page 31 CHARA page 30 EDIT MODE page 26 28 DEL page 30 ALBUM GROUP page 16 18 q TAPE page 19 q h SD page 15 q h CD page 15 g STOP page 15 MUTING page 21 H BASS page 20 RE MASTER page 20 h REC page 24 SD HI SPEED CD q SD...

Page 14: ...lly and starts play One touch play 2 Open the CD lid 3 Insert disc page 8 4 Close the CD lid 5 Start play It may take some time for play to start but this is normal Playing discs 1 Label must face upward Tray number Disc tray q h SD q h CD VOLUME UP DOWN CD CHECK 1 q 5 q CD lid STOP g LIST SELECT e r OPEN CLOSE CHANGE Playing back ...

Page 15: ...ion Remote control Main unit Within 10 seconds Press CHANGE again to close the tray You can also remove a disc while another is playing Within 10 seconds This feature lets you check whether a disc is in a tray If a disc is being played the corresponding tray will not open Do not remove or insert discs during a disc check Do not push or pull out the trays during a disc check Tray number Press again...

Page 16: ...ct the title and press LIST ENTER First select the disc album or playlist title Select Track List to select a track from all the track titles on SD With HighMAT press e or r to select the method of play step 3 page 18 Main unit 1 Press LIST ENTER 2 Turn LIST SELECT e r control to select the title and press LIST ENTER To return to the previous display Press RETURN Note Up to 32 characters per title...

Page 17: ...t To cancel While stopped press PLAY MODE REPEAT to select 1 DISC ALL DISC 1 ALBUM or PLAY MODE OFF Note You cannot skip to tracks which have been played You can search forward or backward only within the current track Repeat play according to the current play mode During play Press and hold PLAY MODE REPEAT until REPEAT ON is displayed REP PGM in program play and RND in random play appears on the...

Page 18: ... control to select the disc and press LIST ENTER 3 Turn LIST SELECT e r control to select the method of play and press LIST ENTER 4 Turn LIST SELECT e r control to select the menu playlist or track and press LIST ENTER To return to the previous display Press RETURN To select a group Press ALBUM GROUP during play To cancel partway Press g STOP The original display appears Note You cannot use this f...

Page 19: ... a track and resumes play from there Each press increases the number of tracks skipped up to a maximum of 9 Side to be played back facing up Insert the cassette with the exposed tape facing you Remote control Main unit Remote control Main unit Remote control Main unit Remote control Main unit Playing back q TAPE LIST SELECT e r OPEN VOLUME UP DOWN Cassette lid STOP g Use normal position tapes High...

Page 20: ... H BASS during recording The effect may be less discernible with some sound sources Discs recorded at 32 kHz 44 1 kHz or 48 kHz This feature reproduces the frequencies lost during recording to give you a sound closer to the original During play Press RE MASTER Every time you press the button Note You cannot change RE MASTER during recording This does not work when playing WMA files recorded to a S...

Page 21: ...and TREBLE appear on the display 2 Press SOUND to select a setting BASS TREBLE 3 Press e or r while either BASS or TREBLE is flashing to change the level 4 to 4 and press LIST ENTER You cannot change SOUND Sound field and quality during recording Press MUTING Volume is reduced to minimum To cancel Press MUTING again or reduce the volume to minimum then raise it to the required level Muting is also...

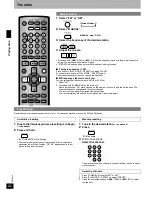
Page 22: ...anual presetting Selecting channels Playing back 1 Select FM or AM 2 Select MANUAL 3 Select the frequency of the desired station 4 Adjust the volume Press and hold u 2 REW or i 1 FF until the frequency starts scrolling to start automatic tuning Tuning stops when a station is found STEREO is displayed when a stereo FM broadcast is being received n If noise is excessive in FM Press and hold PLAY MOD...

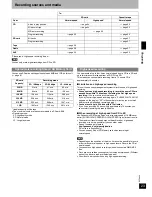
Page 23: ...e Panasonic SD Memory cards with a transfer speed of 10 MB sec or better SUPER HIGH SPEED PRO HIGH SPEED types for best results The maximum transfer speed may not be achieved or high speed recording may not be possible if you use other cards See our homepage for details http panasonic co jp pavc global cs This site is in English only You can use any kind of SD Memory card when recording at normal ...

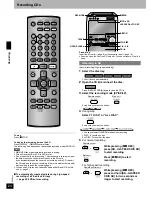
Page 24: ...eparation Insert the SD card page 8 or the cassette tape page 19 Securely close the lid of the SD card slot You cannot record if the lid is open Normal recording High speed recording 1 Select the disc tray The unit turns on automatically 2 Open the CD lid and insert the disc Press OPEN CLOSE again to close the CD lid 3 Select the recording mode XP SP LP Every time you press the button 4 During sto...

Page 25: ...Normal recording only Preparation Wind up the leader tape so recording can begin immediately 1 Select the disc tray The unit turns on automatically 2 Open the CD lid and insert the disc Press OPEN CLOSE again to close the CD lid 3 During stop Select 1 DISC or ALL DISC Every time you press the button You cannot select RANDOM modes when recording 1 DISC To record one disc ALL DISC To record all the ...

Page 26: ...he lid while recording This may cause recording to stop or the data may not be correctly recorded onto the SD card If you accidentally open the cover when recording from the radio recording stops To stop Press g STOP To pause While pressing h REC press SD HI SPEED CD q SD The SD pauses and the cassette tape or radio continues playing REC flashes on the display Press again to restart recording A tr...

Page 27: ...s g STOP To pause recording from the radio While pressing h REC press TAPE The cassette tape pauses and the radio continues playing REC flashes on the display Press again to restart recording Note Recording automatically stops when the end of the side of the tape being recorded to is reached To record the other side turn the tape over When recording an AM broadcast sound is momentarily interrupted...

Page 28: ...NTER Repeat this step to select other tracks up to 24 tracks During play the current track is selected 4 Press LIST ENTER When CARD Writing stops flashing editing is complete All the SD Audio tracks on the card are erased 1 During stop Select ALL ERASE Every time you press the button 2 Press LIST ENTER 3 Press LIST ENTER When CARD Writing stops flashing editing is complete If you erase all the tra...

Page 29: ...ht PL CREATE To create a new playlist PL CREATE right PL TITLE Entering a playlist title page 31 4 Press the numbered buttons to select the track Example To select 12 10 è 1 è 2 To select 123 10 è 10 è 1 è 2 è 3 Repeat this step to select other tracks up to 99 tracks 5 Press LIST ENTER 6 Enter the name page 30 and press LIST ENTER When CARD Writing stops flashing editing is complete To play a play...

Page 30: ...OUP to enter the character Repeat steps 1 through 3 to enter the title To move the cursor Press ALBUM GROUP To insert characters Press ALBUM GROUP to move the cursor and then enter the correct character To delete a character Move the cursor over the character and press DEL To stop partway Press g STOP To change a title Enter the title again from the beginning Entering characters Button Characters ...

Page 31: ...he lid is open 2 Press q h SD and then g STOP to select SD as the source 1 Press TITLE IN 2 Press u 2 REW i 1 FF to select the track number and press LIST ENTER 3 Enter the track title page 30 and press LIST ENTER 4 Enter the artist name page 30 and press LIST ENTER Repeat steps 2 through 4 as necessary 5 Press TITLE IN When CARD Writing stops flashing editing is complete To stop partway Press TIT...

Page 32: ... set this again When disc card or tape is selected as the source and the unit is stopped The unit turns off to save power if it is left unused for 10 minutes Press and hold SLEEP AUTO OFF until AUTO OFF is displayed Every time you press the button AUTO OFF v SCREEN SAVER Auto off cancel page 12 This function does not work if the source is tuner or AUX This timer turns the unit off after a set time...

Page 33: ...will start in the set condition at the set time with volume increasing gradually to the set level Record timer The unit comes on 30 seconds before the set time with the volume muted To cancel the timer Press z PLAY REC to select TIMER OFF The timer comes on as set if the timer is on To check the settings Press CLOCK TIMER while the unit is on to select z PLAY or z REC To check the settings while t...

Page 34: ...or Disconnect the FM indoor antenna The antenna should be installed by a competent technician Rework your outdoor antenna s 75 Ω coaxial cable as follows Run a piece of vinyl wire horizontally across a window or other convenient location Leave the loop antenna connected Note Disconnect the outdoor antenna when the unit is not in use Do not use the outdoor antenna during a lightning storm Using an ...

Page 35: ...ternal unit s operating instructions To change the input level Before recording external sources with low volume to a SD card or a cassette tape 1 Start play on the external source 2 Press TUNER AUX to select AUX 3 Press PLAY MODE REPEAT HIGH NORMAL Note There may be an error in the recording time depending on the sound source and the recording method When you have selected SYNCHRO recording pause...

Page 36: ...to record or use recorded music data Please note that Panasonic is in no way liable for any music data you lose or for any other direct or indirect damages SD Jukebox cannot work with MMC MultiMediaCard SD Jukebox can be found on the included CD ROM Follow these steps to install it 1 Turn on the computer and start Windows 2 Insert the included CD ROM into the CD ROM drive The installer program sta...

Page 37: ...e Disk icon for the SD Memory Card 3 Click Eject 4 Remove SD Memory Cards Note Do not remove SD Memory Cards during access by the SD Memory CARD Reader Writer Operation of SD Memory CARD Reader Writers is not ensured under the following conditions If the SD Memory CARD Reader Writer is equipped with an adaptor for other types of SD Memory Cards If connected via a USB hub or USB extension cord Usin...

Page 38: ...e prevention tabs have been removed cover the holes with adhesive tape page 25 The card s write protect switch has been moved to the LOCK position Unlock the switch when you want to record or edit page 7 There is skipping of sound or noise recorded during high speed recording to SD Cannot record from CD R RW There may be scratches or fingerprints on the CD Replace the CD if it is scratched These p...

Page 39: ...continues play PGM FULL You are trying to program more than 24 tracks PLAYBACK CARD You are trying to record or edit a play only SD card Replace it with a recordable card READ ERROR The unit was trying to play a WMA MP3 track but an error occurred It skips the track and continues play REMOTE MODE is either 1 or 2 The remote control and main unit are using different codes Change the remote control ...

Page 40: ...her business rental use of the product service by anyone other than a Factory Servicenter or other Authorized Servicer or damage that is attributable to acts of God THERE ARE NO EXPRESS WARRANTIES EXCEPT AS LISTED UNDER LIMITED WARRANTY COVERAGE THE WARRANTOR IS NOT LIABLE FOR INCIDENTAL OR CONSEQUENTIAL DAMAGES RESULTING FROM THE USE OF THIS PRODUCT OR ARISING OUT OF ANY BREACH OF THIS WARRANTY A...

Page 41: ...or other hazards 4 Safety check After repairs or service ask the servicer to perform safety checks to confirm that the unit is in proper working condition The servicer will require all components to service your system Therefore should service ever be necessary be sure to bring the entire system For product information or assistance with product operation In the U S A refer to Customer Services Di...

Page 42: ...isc CD MP3 WMA CD R RW and HighMAT 8 cm 12 cm Sampling frequency CD 44 1 kHz MP3 WMA 32 kHz 44 1 kHz 48 kHz Bit rate MP3 32 kbps to 320 kbps WMA 40 kbps to 192 kbps Decoding 16 bit linear Pickup Beam source Semiconductor laser Wavelength 780 nm Number of channels Stereo Frequency response 20 Hz to 20 kHz 1 2 dB Wow and flutter Below measurable limit Digital filter 8 fs D A converter MASH 1 bit DAC...

Page 43: ...2003 Gracenote This product and service may practice one or more of the following U S Patents 5 987 523 6 061 680 6 154 773 6 161 132 6 230 192 6 230 207 6 240 459 6 330 593 and other patents issued or pending Gracenote and CDDB are registered trademarks of GraceNote The Gracenote logo and logotype the Gracenote CDDB logo and logotype and the Powered by Gracenote logo are trademarks of Gracenote A...

Page 44: ...T 18 High speed recording 23 I Input level 35 M Manual EQ 21 Manual tuning 22 miniSD Card 8 MOVE 28 MP3 6 Music protection 6 Muting 21 O Outdoor antenna 34 P Play timer 33 PLAYLIST 29 Preset EQ 21 Preset tuning 22 Program play 17 Program recording 25 27 R Random play 17 Record timer 33 Recording method 26 35 Recording mode 23 Recording sources and media 23 Recording time on SD Memory Card 23 Re ma...

Reviews: