25
3.12.4 Brazing Procedure
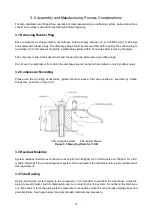
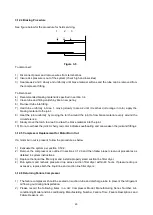
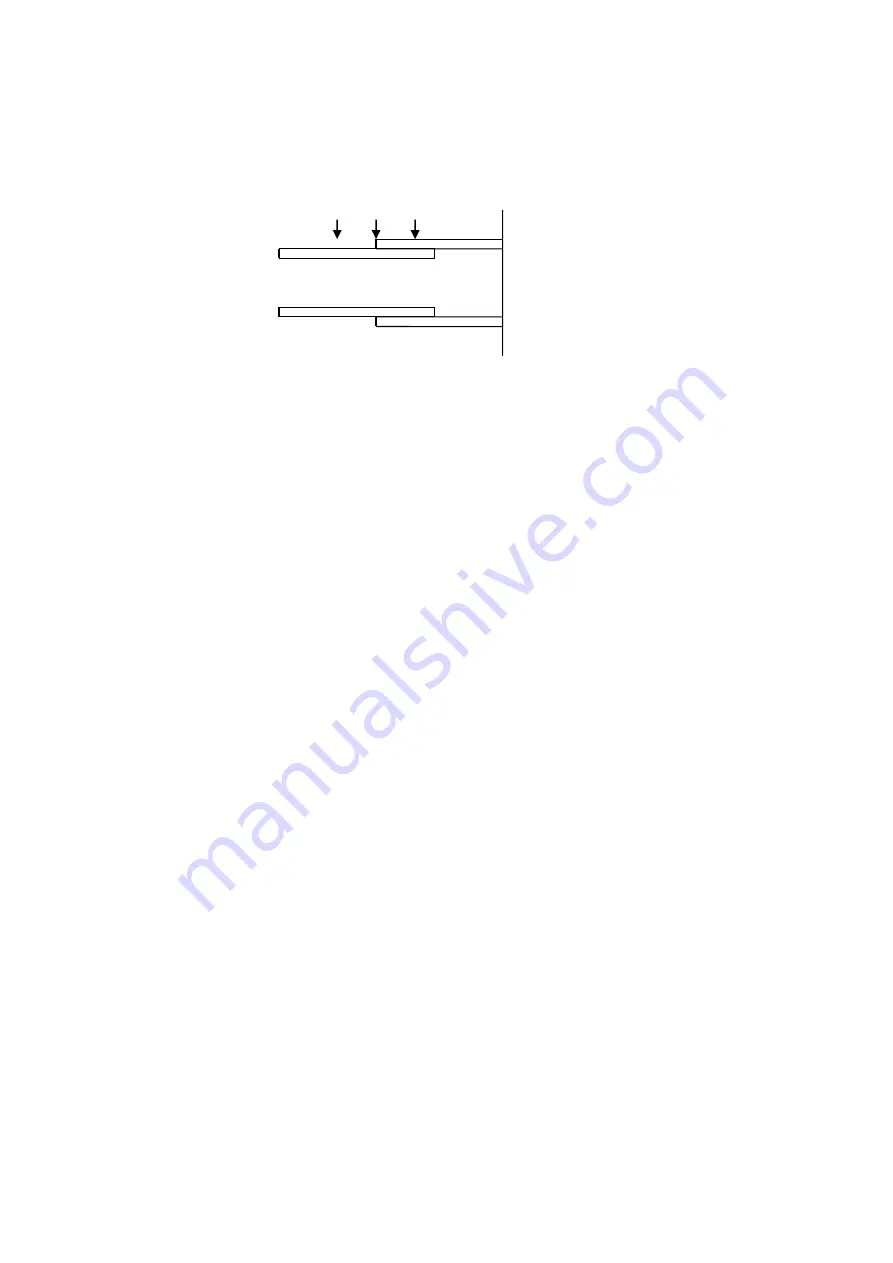
See figure below for the procedure for field servicing.
1 2 3
Figure 3-5
To disconnect:
1)
Disconnect power and remove wires from terminal box.
2)
Insure ALL pressure is out of the system (check high and low sides).
3)
Heat areas 2 and 3 slowly and uniformly until braze material softens and the tube can be removed from
the compressor fitting.
To Reconnect:
4)
Recommended brazing material is specified in section 3.4.
5)
Clean tube and fitting until shiny like a new penny.
6)
Re-insert tube into fitting.
7)
Heat tube uniformly in Area 1, moving slowly to area 2 until it reaches dull orange in color, apply the
brazing material to the joint.
8)
Heat the joint uniformly by moving the torch around the joint to flow braze material evenly around the
circumference.
9)
Slowly move the torch to area 3 to draw the braze material into the joint.
10)
Do not overheat the joint. A cherry red color indicates overheating and can weaken the joint and fittings.
3.12.5 Compressor Replacement for Motor Burn Out
If a motor burn out is present, follow the procedure as below :
1)
Evacuate the system per section 3.12.2.
2)
Remove the compressor as outlined in sections 3.12.3 and then follow proper clean-out procedures as
detailed in system instructions.
3)
Replace the liquid line filter dryer and install a properly sized suction line filter dryer.
4)
Run system and recheck pressure drop across suction filter dryer within 48 hours. If pressure drop is
excessive, replace both the liquid line and suction line filter dryers.
3.12.6 Returning Failure Compressor
1)
The failure compressor should be sealed on suction tube and discharge tube to prevent the refrigerant
oil flowing out during transportation.
2)
Please record the following items in a list: Compressor Model, Manufacturing Series Number, Air-
conditioning Model and Air-conditioning Manufacturing Number, Failure Time, Failure Descriptions and
Failure Reasons, etc.


