32
33
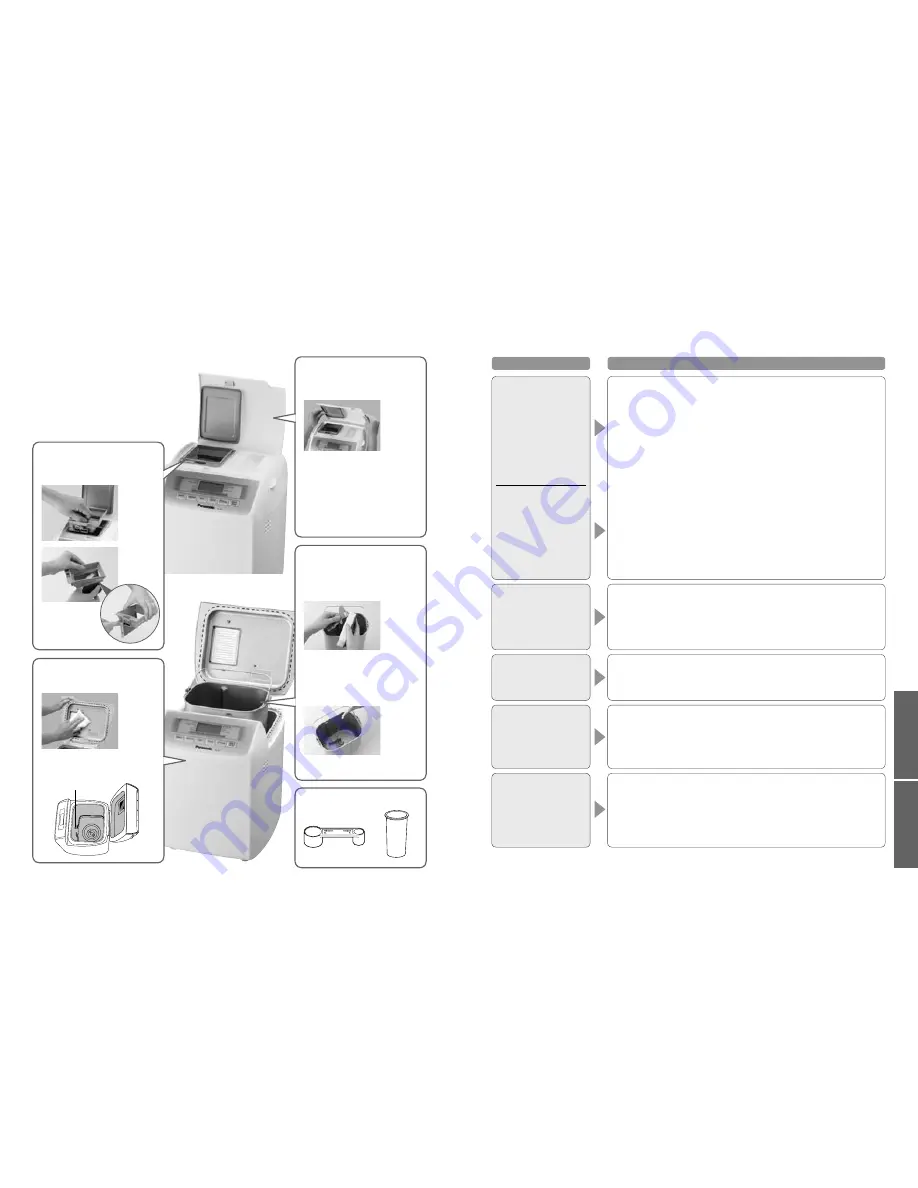
How to Clean
Troubleshooting
Before cleaning, unplug your breadmaker and allow it to cool down.
Care & Cleaning
Raisin nut dispenser
(SD-255 only)
Body and lid
Bread pan &
kneading blade
Measuring spoon & cup
•
The colour of the inside of the
unit may change with use.
●
Wash after
each use to
remove any
residue.
Temperature
sensor
Remove and wash with water.
Wipe with a damp cloth.
●
Wipe gently to avoid
damaging the temperature
sensor.
Dispenser lid
(SD-255 only)
●
Align the connections and
detach the lid. (Wait until the
machine has cooled down
first, because it will be very
hot immediately after use)
●
Take care not to damage
the seal. (Damage could
lead to leakage of steam,
condensation, or deformation)
Remove and wash with water.
●
Ensure the area around the
shaft is cleaned thoroughly.
●
If cannot remove the kneading
blade, soak in warm water for
5-10 minutes.
Wash the kneading blade in
warm soapy water.
Wash with water.
■
To avoid damaging your breadmaker...
●
Do not use anything abrasive!
(cleansers, scouring pads etc)
●
Do not wash any part of your
breadmaker in the dishwasher!
●
Do not use benzene, thinners, or alcohol!
●
Keep your breadmaker clean and dry.
●
Put water inside the pan only. Do
not submerge the pan in water.
●
Not dishwasher safe
Troubleshooting
Cause
➔
Action
Problem
Before calling for service, please check through this section.
●
You have used too much yeast.
➔
Check the recipe and measure out the correct amount using the
measuring spoon provided.
●
You have used too much liquid.
➔
Some types of flour absorb more water than others, so try using 10-20ml
less water.
My bread is full of air
holes.
●
The quality of your flour isn’t very good.
➔
Try using a different brand of flour.
●
You have used too much liquid.
➔
Try using 10-20ml less water.
My bread seems to
have collapsed after
rising.
●
You have used too much yeast/water.
➔
Check the recipe and measure out the correct amount using the
measuring spoon (yeast)/cup (water) provided.
➔
Check that excess water amount is not included in other ingredients.
●
You have not used enough flour.
➔
Carefully weigh the flour using scales.
My bread has risen
too much.
●
You are not using enough yeast, or your yeast is old.
➔
Use the measuring spoon provided. Check the yeast’s expiry date.
●
There has been a power failure, or the machine has been stopped during
breadmaking.
➔
The machine switches off if it is stopped for more than ten minutes. You
will need to remove the bread from the pan and start again with new
ingredients.
Why is my bread pale
and sticky?
●
The quality of the
gluten in your flour is poor, or you have not used strong
flour. (Gluten quality can vary depending on temperature, humidity, how the
flour is stored, and the season of harvest)
➔
Try another type, brand or another batch of flour.
●
The dough has become too firm because you haven’t used enough liquid.
➔
Stronger flour with higher protein content absorbs more water than
others, so try adding an extra 10-20ml of water.
●
You are not using the right type of yeast.
➔
Use a dry yeast from a sachet, which has ‘Easy Blend’, ‘Fast Action’ or
‘Easy Bake’ written on it.
This type does not require pre-fermentation.
●
You are not using enough yeast, or your yeast is old.
➔
Use the measuring spoon provided. Check the yeast’s expiry date.
●
The yeast has touched the liquid before kneading.
➔
Check that you have put in the ingredients in the correct order according
to the instructions, adding the water and liquids last of all. (P.8)
●
You have used too much salt, or not enough sugar.
➔
Check the recipe and measure out the correct amounts using the
measuring spoon provided.
➔
Check that salt and sugar is not included in other ingredients.
My bread does not
rise.
The top of my bread
is uneven.


