22
VQT2A17
23
VQT2A17
We recommend using Panasonic batteries. (VW-VBJ10)
If you use other batteries, we cannot guarantee the quality of this product.
CAUTION
Danger of explosion if battery is incorrectly replaced. Replace only with the
same or equivalent type recommended by the manufacturer. Dispose of used
batteries according to the manufacturer's instructions.
Do not heat or expose to flame.
Do not leave the battery in an automobile exposed to direct sunlight for a long
period of time with doors and windows closed.
●
●
3
Insert the battery.
Ensure that battery is oriented
correctly, and push it into the
compartment in the direction of the
[
▲
] until it snaps into place and it is
locked by the lever.
( To remove the battery,
press the lever downward.)
5
Connect the AC adaptor
(supplied).
Connect the AC cable to the AC
adaptor and then to an AC outlet.
Use only the AC adaptor supplied
with the unit.
●
To AC outlet
AC adaptor
AC cable
*
Insert the battery into the unit and charge it.
*
Do not use the AC cable and AC adaptor of this unit with other devices. Also, do not use
the AC cables and AC adaptors of other devices with this unit.
Setup
1
Charging
The battery is not charged at the time of purchase. Be sure to charge it
before use.
For charging time (P.24)
Lever
1
Set the mode dial to [OFF].
The unit runs on AC power (status indicator lit red) and
the battery cannot be charged when the mode dial is set
to any position other than [OFF].
2
Open the card/battery
door.
Lift the flap upright and turn it
counter-clockwise until it clicks for
unlocking and then open the door.
4
Close the card/battery
door.
Close the door and turn the flap
clockwise to the locking position and
then push the flap back flat.
If the status indicator does the following:
Does not flash:
Remove and reinsert the battery, and disconnect and reconnect the AC adaptor.
If the status indicator still does not flash, contact your dealer.
Flashes rapidly at approx. 0.25 seconds intervals:
The battery cannot be charged. Try doing the following:
Remove and reinsert the battery, and try recharging the battery.
The battery temperature or surrounding temperature is too high/low, therefore wait until
the unit and the battery are at suitable temperatures and try recharging the battery.
If battery charging still does not commence, contact your dealer.
Flashes slowly at approx. 3 seconds intervals:
Charging requires time for the following reasons:
The battery has been excessively discharged.
The battery temperature or ambient temperature is too high/low.
If power to the unit is activated while the battery is charging, the AC power
supply will be used and charging interrupted.
•
•
•
•
●
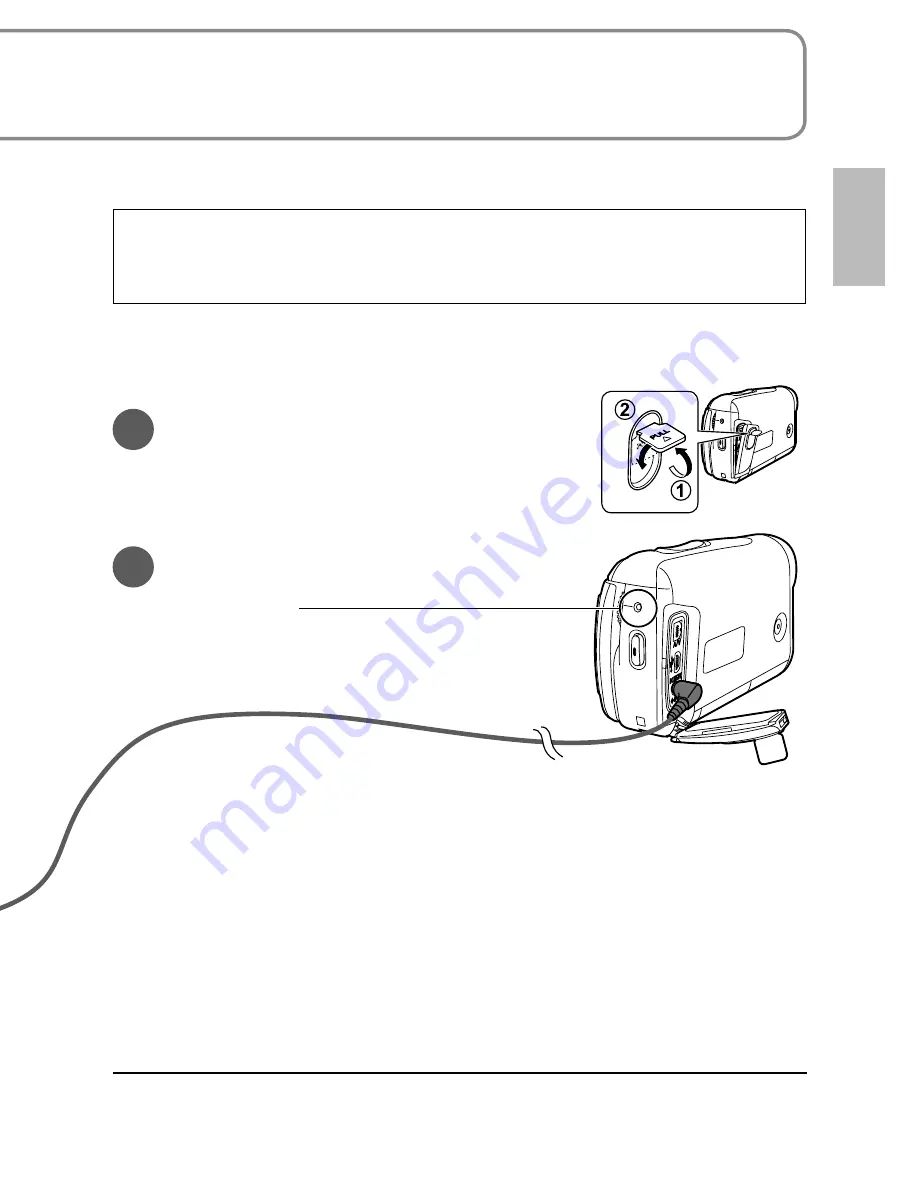
6
Open the terminal cover.
Lift the flap upright and turn it counter-
clockwise until it clicks for unlocking
and then open the cover.
7
Plug the DC plug into the DC
input terminal on the unit.
Status indicator
Flashing red at approx. 1 second intervals:
Charging in progress
Off: Charging complete
Small gap here.


