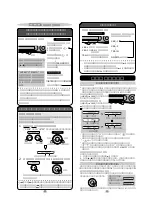
You can operate this function only with the remote control.
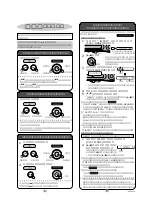
Press [PLAY MODE] when the player is stopped or playing.
Every time the button is pressed the mode changes and an indicator is shown on
the display in the following order.
1 track repeat (1-
`
)
v
All track repeat (
`
)
v
Random (RANDOM)
v
§
Intro-scan memory(INTRO or MEMO)
v
Normal (no indicator is shown)
§
“INTRO” and “MEMO” are only displayed while stopped.
≥
If you have selected the mode when the player was stopped, press [
1
/
∫
].
You can operate this function only with remote control.
Press [EQ/ MEMORY] when the player is stopped or playing.
Every time the button is pressed the mode changes and an indicator is shown on
the display in the following order.
XBS-1
Increases the power of
the bass sounds.
v
XBS-2
Increases the XBS-1 effect.
v
TRAIN
Reduces sounds that may annoy
others when you are using the player
in a public place.
v
NORMAL (cancel)
≥
You cannot change sound quality during intro-scan or while stopped while
“MEMO” is displayed.
Sound quality
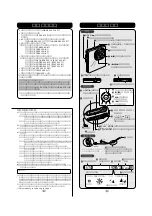
About the remote control
The display lights for about 5 seconds when an operation is done on the unit or
remote control. It remains lit for up to 20 seconds while a track or disc name is
scrolling on the display.
∫
Checking the display
Press [
$
LIGHT/
%
DISP
].
The display lights for 5 seconds.
∫
Adjusting the display’s contrast
When the unit is powered on
1. Put the main unit in hold. (See page 5 of the other manual.)
2. Press and hold [
1
/
∫
] on the main unit and press [
i
] or [
j
] on the remote
control to adjust the contrast.
i
: darker,
j
: lighter
∫
Changing the remote control’s display
Press and hold [
$
LIGHT/
%
DISP
].
Each time you press and hold the button:
The display changes to show the track title, the group title, the disc title, the
playing time of all tracks, total number of tracks, the track number and
elapsed playing time. “MEMO” is displayed instead of the elapsed play time
during program play.
∫
The operation tone
A tone sounds when you press a button on the remote control.
To turn the tone off, press and hold [
1
/
∫
] until “Beep OFF” appears. Press and
hold again to turn the tone on.
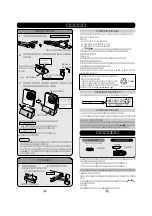
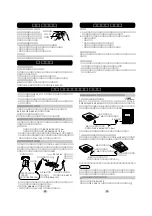
Refer to the illustration on page 11 of the other manual.
≥
Be sure to read the operating instructions of the items.
≥
To ensure correct operation, be sure to use the recommended accessories.
∫
Speakers
Disconnect the earphones from the remote control and connect the speakers.
RP-SP30 / RP-SP28 (internal amplifier)
Adjust the volume on the unit to an appropriate level.
∫
Listening and recording through other equipment
Disconnect the earphones from the remote control and connect the stereo equip-
ment with one of the following line cords.
If the amplifier's connection is ;
a line connection : RP-CAPM3G15
a mini–phone jack : RP-CAM3G15
≥
Either turn the remote controls tone off or perform the operations on the main
unit.
≥
Set the volume on this unit to between 20 and 23.
∫
Using this unit with MD Network equipment
≥
By connecting this unit to stereo equipment with MD Network capability, you
can operate this unit through the other equipment to make recordings between
MDs and to enter titles.
≥
By connecting this unit to a Visual/Title printer, you can print titles based on the
titles contained on your MDs.
≥
Play modes and programmed tracks are cleared when you connect stereo
equipment or a Visual/Title printer.
∫
Connection to a car stereo
For connection to the car audio system;
Car stereo cassette adaptor : SH-CDM10A
For connecting the power supply;
Car power adaptor : RP-AK15
≥
Connect the car stereo cassette adaptor to the earphone jack on the remote
control.
≥
Connect the remote control
’
s plug into the headphone jack on the player.
≥
Attach the DC IN plug adaptor (not included : RP-WA10) to the main unit then
connect the car power adaptor to the DC IN jack and cigarette lighter’s socket.
≥
Set sound quality to NORMAL.
≥
Set the volume on this unit to between 20 and 23.
(It may not be possible to use the car stereo cassette adaptor with some systems
because of its construction.)
∫
Replacement joint phones
Earphones :
RP-HJ535
Headphones :
RP-HT870
Optional accessories
Refer to the illustration on page 12, 13 of the other manual.
Repeat and random play
Selecting a group to play
When you have created groups on an MD with an MD recorder, you can start
play from a specified group. You cannot make groups with this unit.
1. Select a group by pressing and holding [
:
] or [
9
]while
stopped.
(Not possible while “MEMO” and “INTRO” is displayed.)
Forward :
9
Backward :
:
2. Press [
1
/
∫
] to start play.
Play starts from the selected group and plays through to the final track.
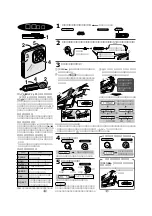
Refer to the illustration over the page.
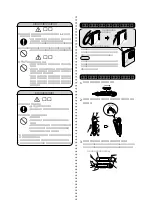
1. Move the remote control’s switch to HOLD.
2. While holding the main control section, pull on the cover’s
hook.
3. Attach the included extra panel.
Press the panel firmly into place. The buttons may be difficult to press if it is not
attached completely.
Intro-scan memory
Selecting a group to a play
You can operate this function only with remote control.
Scan the introductions of tracks and program a maximum of 24 tracks in the
order you want to hear them.
Program the tracks
1. While stopped, press [PLAY MODE] until
“
INTRO
”
appears.
The unit powers itself off in about 30 seconds if you do not perform another oper-
ation.
2. Press [
1
/
∫
].
The first 10 seconds of each track are played in order (intro-scan).
You can skip tracks during intro-scan.
3. Press [EQ/MEMORY] while the track number is flashing to pro-
gram the track.
When the introduction of the last track is played, intro-scan starts again from the
beginning. Tracks you have programmed are not played again.
4. Repeat step 3 to program all the tracks you want.
5. Press [
1
/
∫
] to finish programming.
You can start play of the program by pressing [
1
/
∫
] while “MEMO” is on the dis-
play (about 10 seconds).
∫
To make a new program –
While stopped and “MEMO” is on the display, press and hold [EQ/MEMORY] for
about 3 seconds.
“CLEAR” is displayed and all tracks are cleared. “INTRO” appears on the display
after this. Start from step 2.
∫
If “END” or “FULL” is displayed
You cannot program any more tracks.
END
: you have programmed all tracks on the disc
FULL
: you have programmed the maximum of 24 tracks
Programming ends 2 seconds after either of these is displayed.
∫
To cancel intro scan
Press [PLAY MODE] while stopped.
(“INTRO” disappears, the time information is shown, and normal play is re-
stored.)
Playing the program
If “MEMO” is on the display, start from step 2.
1. While stopped, press [PLAY MODE] until “MEMO” appears.
2. Press [
1
/
∫
].
The tracks are played in the programmed order.
During program play, “MEMO” is displayed after the track’s title.
∫
To stop play
Press [
1
/
∫
].
∫
To cancel program play
(The program is stored)
Press [PLAY MODE] while stopped or playing.
(“MEMO” disappears, the time information is shown, and normal play is re-
stored.)
∫
To program other tracks
Do the operation described above to
Clear all tracks
∫
The program is cleared in the following cases
≥
You
Clear all tracks
≥
The battery goes flat
≥
You open the disc lid
≥
You open the battery cover
Clear all tracks
Changing the remote control’s panel
RQCA0897


