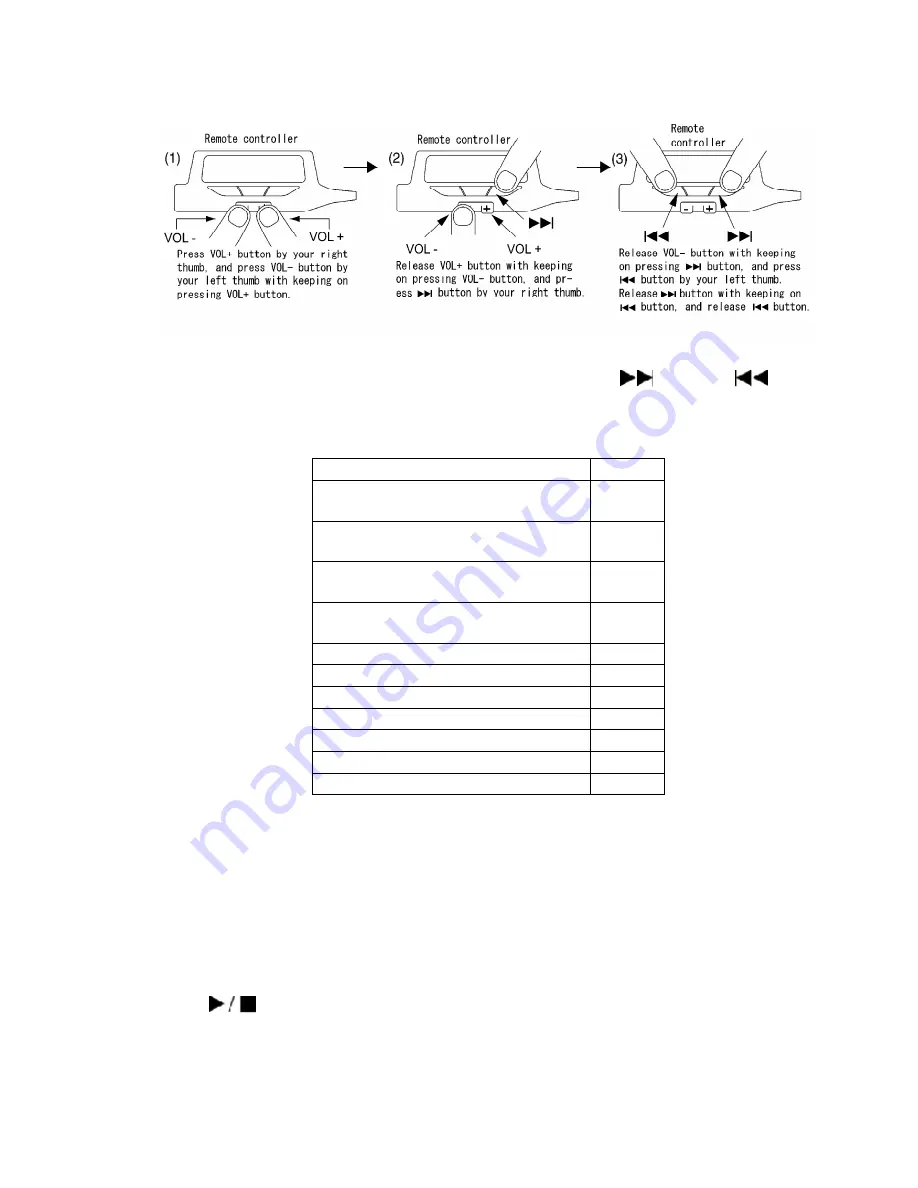
5. When the adjustment mode is activated, “TE” will be displayed. After “TE” is
displayed, select the desired adjustment item with the
button or
button.
Adjustment mode
Adjustment mode
Display
Playback-only disc automatic
adjustment
T1
Magneto-optical disc automatic
adjustment
T2
Playback-only disc automatic
adjustment value check
T3
Magneto-optical disc automatic
adjustment value check
T4
Laser power check
T5
EFM jitter measurement
T6
ADIP jitter measurement
T7
Error rate measurement
T8
Tilt measurement
T9
PWB inspection (audio test)
TA
EEPROM check
TE
*In the display of T1 ~ TE shown above, you must adjust T1 and T2.
6.1.4. Playback-only disc automatic adjustment
With the T1 displayed, set the test disc and press the PLAY key to active the
adjustment mode.
During the adjustment, “OADJ” will be displayed. If there are no abnormalities,
“OOK” will be displayed. (Note1)
If the
key is pressed while the “OOK” or “ONG” is being displayed, the
setting returns to the T1 display.
When finished, remove the disc.
33
Summary of Contents for SJ-MJ75
Page 9: ...9 ...
Page 10: ... Check the P C B A side as shown below 5 1 2 Checking for the P C B B side 10 ...
Page 11: ... To check the IC501 on side B of P C B refer to the table 1 and illustration below 11 ...
Page 12: ...12 ...
Page 13: ...5 2 Replacement for the intermediate cabinet Follow the Step 1 Step 3 of item 5 1 1 13 ...
Page 14: ...14 ...
Page 15: ...15 ...
Page 16: ...16 ...
Page 17: ...17 ...
Page 18: ...18 ...
Page 20: ...20 ...
Page 21: ...5 4 Replacement for the traverse motor Follow the Step 1 Step 3 of item 5 1 1 21 ...
Page 22: ...22 ...
Page 23: ...23 ...
Page 24: ...24 ...
Page 26: ...26 ...
Page 27: ...27 ...
Page 28: ...28 ...
Page 29: ...29 ...
Page 36: ...36 ...
Page 37: ...37 ...
Page 38: ...38 ...
Page 39: ...39 ...
Page 40: ...40 ...
Page 41: ...41 ...
Page 42: ...42 ...
Page 43: ...43 ...
Page 44: ...44 ...


