·
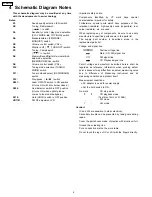
This schematic diagram may be modified at any time
with the development of new technology.
Notes:
S1:
Sound quality selection (EQ) switch
S2:
Tuning, R.skip/search
(
/ -) switch
S3:
Sensitivity control, play mode selection
(PLAY MODE
CITY/NOR) switch
S4:
Monaural/stereo (FM MODE/
MONO/ST) switch
S5:
Volume control switch (VOL+)
S6:
Stop/turn off (
,TURN OFF) switch
S7:
Tuning, F.skip/search
(
/ +) switch
S8:
Memory/Recall/Digital Re-master/Anti-
skip mode selection
(MEMORY/RECALL) switch
S9:
Volume control switch (VOL-)
S10:
Tuning mode selection (TUNING
MODE) switch
S11:
Tuner on/band select (RADIO/BAND)
switch
S12:
Play/pause (
) switch
S201:
Laser ON/OFF switch in ON position
(It turns ON with disc holder closed.)
S202:
Rest detector switch in OFF position
(It turns ON when optical pick-up
comes to innermost periphery.)
S310:
Hold (HOLD) switch in OFF position
VR1101:
FM RF adjustment VR
·
Important safety notice:
Components
identified
by
mark
have
special
characteristics important for safety.
Furthermore, special parts which have purposes of fire-
retardant (resistors), high-quality sound (capacitors), low-
noise (resistors), etc. are used.
When replacing any of components, be sure to use only
manufacturer’s specified parts shown in the parts list.
·
The supply part number is described alone in the
replacement parts list.
·
Voltage and signal line
: Positive voltage line
: Main (CD, FM) signal line
: FM signal line
: CD Playback signal line
·
Circuit voltage and waveform described herein shall be
regarded as reference information when probing defect
point, because it may differ from an actual measuring value
due to difference of Measuring instrument and its
measuring condition and product itself.
Measurement conditions:
−
−
−
−
AC adaptor is used for power supply.
−
−
−
−
Set the hold switch to ON.
No mark
: CD stop mode
: CD playback mode
(Test disc 1kHz, L+R, 0dB)
: FM mode
: AM mode
Caution!
IC and LSI are sensitive to static electricity.
Secondary trouble can be prevented by taking care during
repair.
Cover the parts boxes made of plastics with aluminum foil.
Ground the soldering iron.
Put a conductive mat on the work table.
Do not touch the legs of IC or LSI with the fingers directly.
4 Schematic Diagram Notes
4
SL-CT579VP
Summary of Contents for SL-CT579VP
Page 10: ...SL CT579VP 10 ...


