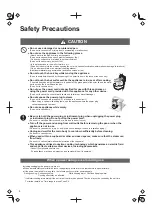
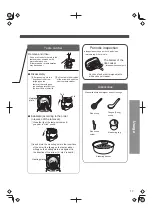
background image

5

Before use

About the main body

About the pan

Rim or bottom

(Pan)

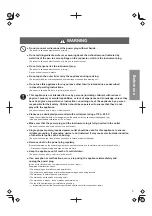
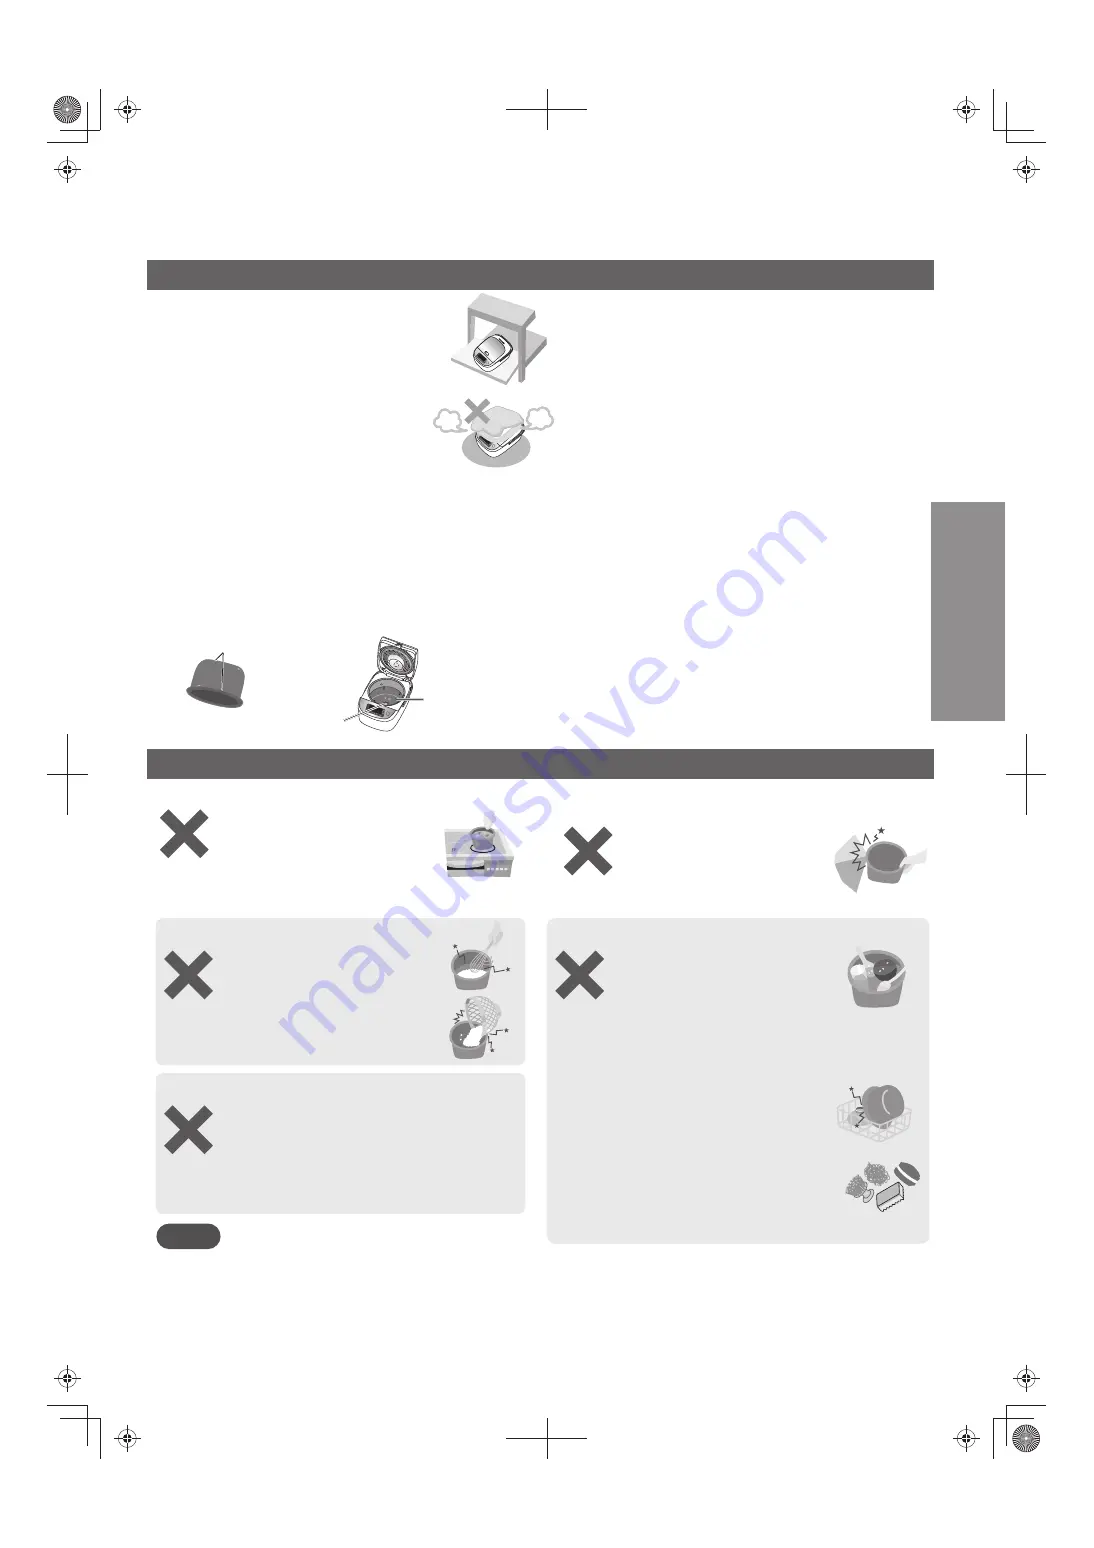
If the appliance is on the cabinet with sliding 

  table, make sure that the table is capable to 
  handle a load of 15 k

Min.

  (So as not to drop the appliance.)

(

)

Instructions for Use
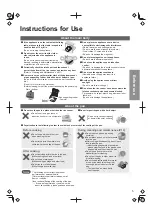
Do not cover the outer lid with cloth or 

  other objects when the appliance is 
 in 

use.

  (So as not to cause the steam from being
  blocked, resulting in deformation, discoloration 
  or malfunction of the outer lid.)

Remove rice or any other matter stuck at the bottom sensor, 

at pan supporting rubber, below the rim or bottom of pan. 

  (So as to avoid error display, or scorched rice, half cooked rice, 
 etc.)

Periodically check the intake port and the exhaust 

  port at the bottom of the rice cooker, and remove any dust.

  (Refer to “Cleaning and Maintenance” on P17)

Do not place the appliance near a device 

  susceptible to electromagnetic interference.


Radio, television, and hearing aids, etc.

  (So as to avoid noise or reduce the volume.)
 

Credit cards, IC cards, and the like.

  (So as not to damage the magnetic.)

Do not place magnets near the appliance.

  (So as to avoid abnormal operation.)

Do not use the appliance on an induction 

 cooker.

  (So as not to damage the induction cooker or cause 
  abnormal operation of the appliance.)

Do not use the appliance outdoors.

  (Unstable power supply may result in a 
 appliance 

failure.)

Avoid using the appliance under direct 

 sunlight.

  (So as to avoid color change.)

Do not use the rice cooker on surfaces where the 
intake or exhaust ports can become blocked.

 For example: on carpet, plastic bag, aluminum foil or 

fabric, etc.
(So as not to damage the appliance.)

Do not use the pan in a place other than the rice cooker.

Do not use it on a gas stove or 

  induction cooker or in a microwave.

Do not impact the pan with a hard object.

So as not to cause scratches 
or dents of the outer surface.

Pay attention to the following in order to avoid slash or scratch of the coating of the pan.

After cooking

Do not put vinegar into the rice in the pan.

  (While cooking sushi and other food)

Do not use a metal spoon. 

  (While cooking porridge and other food)

Do not touch or strike the pan. 

  (While filling a bowl with rice)

Do not tilt or overturn the main body.

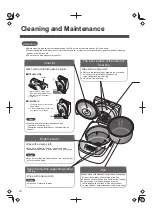
Before cleaning, turn off the product and unplug the power plug.

During cleaning and maintenance (P16)

Do not use the pan as a washing 

 container.

Do not place a spoon or other utensils 

  into the pan.

After cooking with seasoning, do not leave 

  food inside the pan.


After cooking casserole or mixed rice, 


please clear the food in the pan as soon 


as possible and then clean the pan.

Do not use a bowl dryer or dish 

  washer/dryer for cleaning.

Do not put the pan in other utensil to 

  dry after washing.

Do not use abrasive powder or metal 

  brush, nylon brush (with the grind), 

  scouring pad to clean or scrub the 

 pan.


To clean the pan, wash it with 


a soft sponge.

The following will not affect the product 
performance or personal health.
[Outer surface] superficial scratches, small 
dents or collision.
[Inner surface] flaking of the coating of the pan.
  

 If the pan is deformed or you are worried 


about its condition, please purchase a new pan.
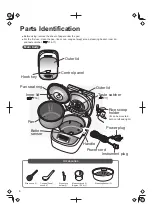
Notes

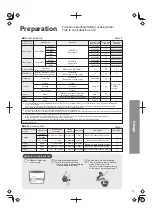
Pan supporting rubber
(3 points)

Bottom 

sensor

Before cooking

Do not let objects like metal sieve 

  contact with the coating of the pan.

Do not use a whisk or other tool 

  when washing the rice.

Summary of Contents for SR-AFM181

Page 1: ...ns for Use Parts Identification Adjusting the current time Wash rice and add water Function selecting Setting cooking time Tips to cook delicious rice Short Grain Long Grain Casserole Keep Warm Congee Porridge Grain Congee Soup Steam Cake Reheat Timer Model No 1 8 L 10 10 12 11 13 14 15 8 8 9 2 4 7 5 6 6 7 Reserve this Operating Instructions for later use Household Use only IH Electronic Rice Cook...

Page 2: ...nging on the corner placing heavy objects on it tying into bundles sandwiching pulling the power cord to move So as to avoid electric shock due to damaged power cord and plug or avoid fire due to short circuit Exhaust port Intake port Hole in the inner lid Do not insert any object into intake port exhaust port or gap Especially metal objects such as pins or wires So as not to cause an electric sho...

Page 3: ...not to cause an electric shock or fire due to heat Single phase bipolar grounded power outlet should be used for this appliance to ensure reliable grounding If grounding device is not installed it may cause electrostatic induction of other metal parts such as housing So as not to cause the risk of electric shock due to failure or electric leakage Remove dust on the power plug regularly Dust accumu...

Page 4: ... short circuit When using a cabinet with sliding table use the appliance where the power plug cannot be exposed to steam Do not use appliance while empty So as not to cause burn Be sure to hold the power plug or instrument plug when unplugging the power plug or instrument plug Do not pull on the power cord So as not to cause an electric shock or a fire due to a short circuit Turn off the power and...

Page 5: ...l or fabric etc So as not to damage the appliance Do not use the pan in a place other than the rice cooker Do not use it on a gas stove or induction cooker or in a microwave Do not impact the pan with a hard object So as not to cause scratches or dents of the outer surface Pay attention to the following in order to avoid slash or scratch of the coating of the pan After cooking Do not put vinegar i...

Page 6: ...P16 17 Accessories Rice scoop 1 Measuring cup 1 Approx 180 mL Steaming basket 1 Congee Soup scoop 1 Main body Parts Identification Rice scoop holder 1 P16 P17 Control panel Pan seal ring Inner lid Outer lid Outer lid Pan Hook key Bottom sensor Handle Rice scoop holder It can be mounted both on left and right Taste catcher Power cord Power plug Instrument plug ...

Page 7: ...sleep mode if no operation is made with the screen lit for about 30 seconds You can press any key to light it again SR AFM181 only As an aid for the visually impaired the Start and Cancel Off key have raised parts and SR AFY181 only Notes 7 Before use Adjusting the current time You can not adjust the time while the appliance is working Press and hold the or key to quickly add or subtract time The ...

Page 8: ...seconds You can press any key to light it again SR AFM181 only Put the pan into the body and close the outer lid When closing the outer lid please confirm that there is a click sound If the inner lid is not properly installed the outer lid can not be closed P16 Inner lid Make sure that the taste catcher is installed in place P17 Taste catcher Attention When using the steaming basket while cooking ...

Page 9: ...be automatically converted to keep warm But some functions with mark are not recommended to keep warm and please press the Cancel Off key as soon as possible after the end of the cooking 3 The functions of casserole steam soup and cake do not have timer When cooking glutinous rice and mixed rice do not use the function of timer to avoid food deterioration or performance influence When the preset t...

Page 10: ...nctions of Delicious Quick Sticky and Hard The functions mentioned above are only applicable to Short Grain and Long Grain And the functions of Sticky and Hard apply only to Short Grain For short grain you can choose Regular Delicious Quick Sticky Hard For long grain you can choose Regular Delicious Quick After the buzzer rings cooking finishes The function will automatically turn to keep warm sta...

Page 11: ... minute decrements Press key to set the cooking time Press key to start cooking When cooking congee for 2 hours Kind reminder Opening the outer lid while cooking will increase the amount of dew condensation Incorrect water quantity or rice quantity may lead to overflow of rice water from the steam vent When the congee is kept in keep warm function for an excessively long time it will get thicker S...

Page 12: ...refully After water boils remaining time is shown in 1 minute decrements Preparation Add suitable amount of water into the pan Put the steaming basket Put the foods to be steamed Close the outer lid Steaming basket Water Press key to start cooking Kind reminder If you wish to steam while cooking other recipe please make sure you choose rice cooking function For longer steaming time over 40 minutes...

Page 13: ...ining time is shown in 1 minute decrements When baking a cake with the function of Cake 50 minutes Every time the or key is pressed the cooking time will increase or decrease in 1 minute interval Press and hold the or key to quickly add or subtract time The cooking time for the last time can be memorized For the cooking time which can be set Table 3 on P9 3 Kind reminder Cake batter can not exceed...

Page 14: ...f cooled rice as shown in Table 4 It is recommended to reheat cooled rice for only once so as not to affect the taste of rice Do not reheat mixed rice and glutinous rice so as not to affect the taste Stir the cooled rice in the pan to make it even When reheating please refer to the following table of the amount of water to be added Cooled rice quantity Waterline Water volume measuring cup 2 3 4 5 ...

Page 15: ... key If you press the Timer key first you can press the Cooking Timer key to return to the cooking time setting mode You can set the timer when Timer is blinking on the screen When Cooking Timer is blinking you can set the cooking timer Every time the or key is pressed the preset time will increase or decrease in 10 minutes interval Press and hold the or key to quickly add or subtract time When th...

Page 16: ... Notes Notes Notes Pan Wash with a mild dishwashing liquid and soft sponge Wipe off any water on the outside of the pan Please do not use the pan as a container for cleaning Color change or stripes may appear on the fluoridized coating surface which will not affect human health or normal functions of the main body Cleaning and Maintenance The inner surface of the outer lid Seal ring Wipe with a da...

Page 17: ...therwise odor or deterioration may be caused Taste catcher After loosening it in the direction of the arrow align on the taste catcher with on the heating plate pull out the inner face of outer lid Pull the tab in the direction of the arrow and open the lid of the taste catcher Heating plate Lid Tab Close the lid of the taste catcher until you hear a click sound Insert it into the mounting hole in...

Page 18: ...ess the Start key Steps Ingredients Chicken wings 8 Onion 1 2 washed and sliced Shiitake mushrooms 9 Ginger The right amount Seasonings Shaoxing rice wine 20 mL Pepper oil 10 mL Soy sauce 20 mL Pepper The right amount Dark soy sauce 20 mL Sugar The right amount Sesame oil 10 mL 1 Wash chicken wings onion shiitake mushrooms slice onion and cut chicken wings twice in the front and back to make them ...

Page 19: ...l it is smooth without particles 4 Add the melted butter into the cake batter and stir until it is smooth without particles 5 Add the milk into the cake batter and stir until it is smooth without particles 6 Pour the cake batter into the pan and close the outer lid 7 Press the Menu Select key and select the Cake set the cooking time to 50 minutes and then press the Start key 8 When the buzzer soun...

Page 20: ...r May be extended up to 30 minutes Due to the different amounts of rice and water the remaining time display may be stopped for adjustment in the middle of cooking Is U12 or U15 displayed 22 When a power outage occurs during cooking End of cooking time may be delayed Depending on different outage duration delicious rice may sometimes not be cooked Cooking time is short Due to the different amounts...

Page 21: ...e film is a result of the dry starch dissolution and it is harmless the rice which is not washed cleanly is likely to generate such a thin film Cooked rice has bumpy surface Did you make the surface of rice smooth before cooking The powerful firepower of IH induction heating caused this This is not an anomaly Under the following circumstances rice tends to have uneven surface When rice has not bee...

Page 22: ...ized service center You can still cook without the taste catcher but Rice taste will deteriorate Rice will become dry during keep warm Water may overflow when boiled U15 may be displayed again when cooking is finished This may cause congee unable to be properly cooked 17 5 Is keep warm duration over 96 hours Press the Cancel Off key 10 Try to unplug the power plug and plug it in again If H still a...

Page 23: ... Quick of Short Grain and the selected function will blink Select Quick of Short Grain and the selected function will blink Select Quick of Short Grain and the selected function will blink To improve scorched rice 1 2 3 Setting is automatically done after 10 seconds 4 5 To eliminate the beep during cooking reheat end the beep 1 2 Press and hold for about 5 seconds This does not turn off the key to...

Page 24: ... Approx m Width Depth Height Cooking quantity Rice L Congee cooking volume rice quantity L 1 indicates the cooking capacity at the maximum waterline of Congee 2 indicates the product height when opening the outer lid 3 SR AFM181 only The power consumption is about 2 0 W in the standby mode Regular Delicious Quick Sticky Hard Regular Delicious Quick Short Grain Long Grain 220 V 50 Hz Specifications...

Page 25: ... Xác định bộ phận Điều chỉnh thời gian hiện tại Vo gạo và thêm nước Chọn chức năng Thiết lập thời gian nấu ăn Mẹo nấu cơm ngon Hạt Ngắn Hạt Dài Gạo thơm Giữ ấm Hấp Bánh Hâm nóng Hẹn giờ Số model 1 8 L 10 10 12 11 13 14 15 8 8 9 2 4 7 5 6 6 7 Lưu giữ Hướng Dẫn Sử Dụng này để tham khảo về sau Bảo hành đính kèm riêng Sử dụng trong gia đình IH Nồi cơm điện cao tần 18 Món ăn Lau chùi và bảo dưỡng 16 Th...

Page 26: ... cao dùng lực uốn xoắn kéo treo trên góc đặt vật nặng lên trên buộc thành bó kẹp vào kéo dây nguồn để di chuyển Để tránh điện giật do dây nguồn và phích cắm bị hỏng hoặc tránh cháy gây ra do đoản mạch Lỗ thoát khí Lỗ thoát hơi Lỗ thông hơi Lỗ nắp trong Không chèn bất kỳ vật gì vào lỗ thoát khí lỗ thoát hơi hoặc khe hở Đặc biệt là vật bằng kim loại như chốt hoặc dây dẫn Để không dẫn đến điện giật h...

Page 27: ...cắm hoàn toàn vào ổ cắm Để không bị điện giật hoặc cháy gây ra do nhiệt Nên sử dụng ổ cắm điện được nối đất lưỡng cực một pha cho thiết bị này để đảm bảo nối đất đáng tin cậy Nếu không lắp đặt thiết bị nối đất nó có thể gây cảm ứng tĩnh điện cho các bộ phận kim loại khác như nhà ở Để không gây nguy cơ điện giật do hư hỏng hoặc rò rỉ điện Thường xuyên loại bỏ bụi trên phích cắm điện Bụi tích lũy tr...

Page 28: ...sử dụng thiết bị sao cho phích cắm điện không thể tiếp xúc với hơi nước Không sử dụng thiết bị khi trống Để không dẫn đến bỏng Phải giữ phích cắm điện hoặc phích cắm thiết bị khi rút phích cắm điện hoặc phích cắm thiết bị Không kéo trên dây nguồn Để không bị điện giật hoặc cháy gây ra do đoản mạch Tắt nguồn và rút phích khỏi ổ cắm điện trên tường trước khi tháo nồi hoặc khi không sử dụng thiết bị ...

Page 29: ...hể dẫn đến hỏng thiết bị Tránh sử dụng thiết bị dưới ánh nắng trực tiếp Để tránh đổi màu Không sử dụng nồi cơm trên các mặt phẳng lỗ thoát hơi hoặc lỗ thoát khí có thể bị tắc nghẽn Ví dụ trên thảm túi nhựa nhôm lá hoặc vải v v Để không làm hỏng thiết bị Không sử dụng nồi tại nơi nào khác ngoài nồi cơm Không sử dụng nó trên bếp ga hoặc bếp điện từ hoặc trong lò vi sóng Không để vật cứng tác động và...

Page 30: ...Phụ kiện Muôi xới cơm 1 Cốc đong 1 Khoảng 180 mL Khay hấp 1 Muỗng xúc cháo Súp 1 Thân nồi Xác định bộ phận Giá cắm muôi cơm 1 T16 Bảng điều khiển Vòng làm kín của nồi Nắp trong Nắp ngoài Nắp ngoài Nồi Móc khóa Cảm biến đáy nồi Tay cầm Giá cắm muôi cơm Có thể cắm nó ở cả bên phải và bên trái Bộ phận kiểm soát nhiệt T17 Dây nguồn Phích cắm điện Phích cắm thiết bị ...

Page 31: ...t giữ ấm Nút Hủy Tắt Nút Nút này được sử dụng để điều chỉnh thời gian hiện tại đặt thời gian cài đặt sẵn và thời gian nấu Nhấn và giữ nút để thêm hoặc giảm thời gian nhanh Nhấn nút này để hẹn giờ Nút Hẹn giờ Nhấn nút này để xác nhận thời gian nấu trong trạng thái hẹn giờ Nút Hẹn giờ Nấu Nút này được sử dụng để chọn chức năng mong muốn Nhấn và giữ nút để chọn nhanh các chức năng Nút Chọn Menu Nhấn ...

Page 32: ... cắm an toàn Khi nồi cơm đang bật màn hình sẽ sáng để thao tác Màn hình sẽ vào chế độ ngủ nếu không thao tác với màn hình sáng khoảng 30 giây Bạn có thể nhấn bất kỳ nút nào để sáng lại Chỉ SR AFM181 Đặt nồi vào thân nồi và đóng nắp ngoài Khi đóng nắp ngoài vui lòng xác nhận đã có tiếng cách Nếu nắp trong lắp không đúng thì không thể đóng nắp ngoài Nắp trong T16 Đảm bảo bộ phận kiểm soát nhiệt được...

Page 33: ...m dẻo Hard Nấu cơm khô Regular Nấu thông thường Delicious Nấu ngon Quick Nấu nhanh 3 3 1 1 1 Thời gian nấu Khoảng phút 1 Thời gian cần để nấu lượng gạo trung bình 5 cốc ở điện áp 220 V nhiệt độ phòng 20 và nhiệt độ nước 20 để tham khảo Thời gian nấu thực tế sẽ thay đổi theo lượng gạo lượng nước điện áp nhiệt độ nhiệt độ nước và lượng gạo Thời gian nấu cơm trộn cơm nếp sẽ thay đổi theo các thành ph...

Page 34: ...cky Nấu cơm dẻo và Hard Nấu cơm khô Các chức năng nêu trên chỉ áp dụng đối với Short Grain Hạt Ngắn và Long Grain Hạt Dài Và chức năng Sticky Nấu cơm dẻo và Hard Nấu cơm khô chỉ áp dụng đối với Short Grain Hạt Ngắn Đối với hạt ngắn bạn có thể chọn Regular Nấu thông thường Delicious Nấu ngon Quick Nấu nhanh Sticky Nấu cơm dẻo Hard Nấu cơm khô Đối với hạt dài bạn có thể chọn Regular Nấu thông thường...

Page 35: ... lần Nhấn nút để đặt thời gian nấu Nhấn nút để bắt đầu nấu Khi nấu cháo trong 2 giờ Xin lưu ý Mở nắp ngoài trong khi nấu sẽ tăng lượng sương ngưng tụ Lượng nước hoặc lượng gạo không đúng có thể dẫn đến tràn nước gạo ra ngoài từ lỗ thông hơi Khi nấu cháo được giữ ở chức năng giữ ấm trong thời gian quá dài nấu cháo sẽ trở nên đặc hơn Súp có thể bị tràn nếu vượt quá mực nước tối đa của chế độ Congee ...

Page 36: ...ày khay hấp rất nóng hãy cẩn thận khi bỏ ra Sau khi nước sôi thời gian còn lại được hiển thị 1 phút mỗi lần Chuẩn bị Đổ lượng nước phù hợp vào nồi Đặt khay hấp Để thức ăn cần hấp vào Đóng nắp ngoài Khay hấp Nước Nhấn nút để bắt đầu nấu Xin lưu ý Nếu bạn muốn hấp khi nấu món khác đảm bảo phải chọn chức năng nấu cơm Khi thời gian hấp lâu hơn 40 phút đổ thêm nước để tránh bị khô Bảng 2 tại T9 Thời gi...

Page 37: ...i gian còn lại được hiển thị 1 phút mỗi lần Khi nướng bánh với chức năng Cake Bánh 50 phút Mỗi lần nhấn nút hoặc thời gian nấu sẽ tăng hoặc giảm 1 phút mỗi lần Nhấn và giữ nút hoặc để thêm hoặc giảm thời gian nhanh Thời gian nấu cho lần cuối có thể được ghi nhớ Để có thể cài đặt thời gian nấu Bảng 3 tại T9 3 Xin lưu ý Hỗn hợp bánh không thể vượt quá lượng tối đa như sau tổng lượng bột bánh sữa trứ...

Page 38: ...ơm nguội tối đa trình bày tại Bảng 4 Nên hâm nóng cơm nguội chỉ một lần để tránh không ảnh hưởng đến hương vị cơm Không hâm nóng cơm trộn và cơm nếp để tránh không ảnh hưởng đến hương vị Khuấy cơm nguội trong nồi để nó đều hơn Khi hâm nóng vui lòng tham khảo bảng sau về lượng nước được cho thêm Lượng cơm nguội Mức nước Dung tích nước cốc đong 2 3 4 5 1 Chuẩn bị Khi hâm nóng cơm nguội 1 2 1 2 1 2 1...

Page 39: ... bạn có thể nhấn nút Cooking Timer để quay về chế độ cài đặt thời gian nấu Bạn có thể cài đặt hẹn giờ khi Timer Hẹn giờ đang nhấp nháy trên màn hình Khi Cooking Timer Hẹn giờ Nấu đang nhấp nháy bạn có thể cài đặt hẹn giờ nấu Mỗi lần nhấn nút hoặc thời gian cài đặt sẵn sẽ tăng hoặc giảm 10 phút một Nhấn và giữ nút hoặc để thêm hoặc giảm thời gian nhanh Khi thời gian cài đặt sẵn ít hơn thời gian nấu...

Page 40: ...ôi thiu hoặc ăn mòn Lưu ý Lưu ý Lưu ý Nồi Rửa bằng dung dịch rửa chén nồng độ nhẹ và xốp mềm Lau hết nước bên ngoài nồi Vui lòng không sử dụng nồi làm đồ chứa để vệ sinh Có thể xuất hiện đổi màu hoặc vết sọc trên bề mặt lớp phủ florua điều này sẽ không ảnh hưởng đến sức khoẻ con người hoặc chức năng bình thường của thân nồi Lau chùi và bảo dưỡng Mặt trong của nắp ngoài Vòng làm kín Lau bằng vải ẩm...

Page 41: ... Nếu không có thể gây ra mùi hoặc ôi thiu Bộ phận kiểm soát nhiệt Sau khi nới lỏng theo hướng mũi tên căn chỉnh trên bộ phận kiểm soát nhiệt bằng trên tấm nhiệt kéo mặt trong của nắp ngoài Kéo thanh theo hướng mũi tên và mở nắp của bộ phận kiểm soát nhiệt Tấm nhiệt Nắp Thanh Đóng nắp của bộ phận kiểm soát nhiệt cho đến khi bạn nghe thấy tiếng cách Cho nó vào lỗ cố định trên mặt trong của nắp ngoài...

Page 42: ...à 20 phút sau đó nhấn nút Start Các bước Thành phần Cánh gà 8 Hành 1 2 washed and sliced Nấm hương 9 Gừng Lượng vừa phải Gia vị Rượu gạo Thiệu Hưng 20 mL Dầu ớt 10 mL Xì dầu 20 mL Hạt tiêu Lượng vừa phải Xì dầu đen 20 mL Đường Lượng vừa phải Dầu vừng 10 mL 1 Rửa cánh gà hành nấm hương thái lát hành và cắt cánh gà hai lần phía trước và phía sau để làm món ăn ngon hơn 2 Sau khi trộn đều các gia vị c...

Page 43: ...ứng vào phần lòng trắng trứng và khuấy đều 3 Thêm từng ít bột bánh trong bột ít gluten đã sàng khuấy đến khi hỗn hợp có hạt mịn 4 Thêm bơ mềm vào bột bánh và khuấy đều đến khi hỗn hợp có hạt mịn 5 Thêm sữa vào bột bánh và khấy đến khi hỗn hợp có hạt mịn 6 Đổ bột bánh vào nồi và đóng nắp ngoài lại 7 Nhấn nút Menu Select và chọn Cake Bánh đặt thời gian nấu là 50 phút sau đó nhấn nút Start 8 Khi có t...

Page 44: ... nấu lâu Nếu nấu liên tục thời gian nấu sẽ lâu hơn Có thể kéo dài tới 30 phút Do sự khác biệt về lượng gạo và nước nên thời gian hiển thị còn lại có thể bị dừng và điều chỉnh ở giữa quá trình nấu Hiển thị U12 hay U15 22 Mất điện khi đang nấu Có thể làm chậm thời gian nấu xong Tùy vào thời gian mất điện bao lâu đôi khi cơm nấu không được ngon Thời gian nấu ngắn Do sự khác biệt về lượng gạo và nước ...

Page 45: ...Có lớp màng mỏng tạo thành Có còn lại cám Lớp màng bột mỏng là do tinh bột phân hủy khô lại và không gây hỏng nồi gạo không được rửa sạch cẩn thận cũng có thể tạo ra lớp màng mỏng Bề mặt lớp cơm nấu mấp mô Bạn có san bằng bề mặt gạo trước khi nấu Do năng lượng nhiệt từ IH gia nhiệt cảm ứng từ gây ra Không phải dấu hiệu bất thường Trong những trường hợp sau cơm sau khi nấu có thể không có bề mặt bằ...

Page 46: ...n Nếu làm mất vui lòng liên hệ trung tâm dịch vụ ủy quyền của Panasonic Bạn vẫn có thể nấu mà không có bộ phận kiểm soát nhiệt tuy nhiên Cơm sẽ không giữ được vị Cơm sẽ bị khô khi ở chế độ giữ ấm Nước có thể tràn ra khi sôi Thông báo lỗi U15 có thể hiển thị khi nấu xong Có thể không nấu chín được nấu cháo 17 5 Giữ ấm trong thời gian quá 96 giờ Nhấn nút Cancel Off 10 Thử rút phích cắm điện và cắm l...

Page 47: ...Hạt Ngắn và chức năng được chọn sẽ nhấp nháy Chọn chế độ Quick Nấu nhanh cho Short Grain Hạt Ngắn và chức năng được chọn sẽ nhấp nháy Chọn chế độ Quick Nấu nhanh cho Short Grain Hạt Ngắn và chức năng được chọn sẽ nhấp nháy Để cải thiện tình trạng cơm cháy 1 2 3 Thiết lập sẽ tự động được hoàn thành sau 10 giây 4 5 Loại bỏ tiếng bíp khi nấu hâm nóng kết thúc tiếng bíp 1 2 Ấn và giữ trong khoảng 5 gi...

Page 48: ... mở nắp ngoài 3 Chỉ SR AFM181 Công suất điện tiêu thụ khoảng 2 0 W ở chế độ chờ Regular Nấu thông thường Delicious Nấu ngon Quick Nấu nhanh Sticky Nấu cơm dẻo Hard Nấu cơm khô Regular Nấu thông thường Delicious Nấu ngon Quick Nấu nhanh Short Grain Hạt Ngắn Long Grain Hạt Dài 220 V 50 Hz Thông số kỹ thuật Casserole Gạo thơm Congee Nấu cháo Porridge Nấu cháo đặc Grain Congee Nấu cháo ngũ cốc 3 Kích ...

Reviews: