10 Installation Instructions
Required tools for Installation Works
1.
Philips screw driver
5.
Spanner
9.
Gas leak detector
13. Multimeter
2.
Level gauge
6.
Pipe cutter
10. Measuring tape
14. Torque wrench
18 N.m (1.8 kgf.m)
42 N.m (4.2 kgf.m)
55 N.m (5.5 kgf.m)
3.
Electric drill, hole core drill
(ø70 mm)
7.
Reamer
11. Thermometer
15. Vacuum pump
4.
Hexagonal wrench (4 mm)
8.
Knife
12. Megameter
16. Gauge manifold
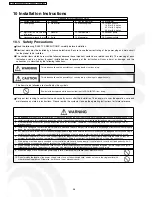
10.1. Safety Precautions
•
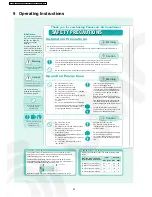
Read the following “SAFETY PRECAUTIONS” carefully before installation.
•
Electrical work must be installed by a licensed electrician. Be sure to use the correct rating of the power plug and main circuit
for the model to be installed.
•
The caution items stated here must be followed because these important contents are related to safety. The meaning of each
indication used is as below. Incorrect installation due to ignoring of the instruction will cause harm or damage, and the
seriousness is classified by the following indications.
This indication shows the possibility of causing death or serious injury.
This indication shows the possibility of causing injury or damage to properties only.
The items to be followed are classified by the symbols:
Symbol with background white denotes item that is PROHIBITED from doing.
•
Carry out test running to confirm that no abnormality occurs after the installation. Then, explain to user the operation, care and
maintenance as stated in instructions. Please remind the customer to keep the operating instructions for future reference.
1.
Engage dealer or specialist for installation. If installation done by the user is defective, it will cause water leakage, electrical shock or fire.
2.
Install according to this installation instruction strictly. If installation is defective, it will cause water leakage, electrical shock or fire.
3.
Use the attached accessories parts and specified parts for installation. Otherwise, it will cause the set to fall, water leakage, fire or
electrical shock.
4.
Install at a strong and firm location which is able to withstand the set’s weight. If the strength is not enough or installation is not properly
done, the set will drop and cause injury.
5.
For electrical work, follow the local national wiring standard, regulation and this installation instruction. An independent circuit and single
outlet must be used. If electrical circuit capacity is not enough or defect found in electrical work, it will cause electrical shock or fire.
6.
Use the specified cable (1.5 mm
2
) and connect tightly for indoor/outdoor connection. Connect tightly and clamp the cable so that no
external force will be acted on the terminal. If connection or fixing is not perfect, it will cause heat-up or fire at the connection.
7.
Wire routing must be properly arranged so that control board cover is fixed properly. If control board cover is not fixed perfectly, it will
cause heat-up at connection point of terminal, fire or electrical shock.
8.
When carrying out piping connection, take care not to let air substances other than the specified refrigerant go into refrigeration cycle.
Otherwise, it will cause lower capacity, abnormal high pressure in the refrigeration cycle, explosion and injury.
9.
Do not damage or use unspecified power supply cord. Otherwise, it will cause fire or electrical shock.
10. Do not modify the length of the power supply cord or use of the extension cord, and do not share the single outlet with
other electrical appliances. Otherwise, it will cause fire or electrical shock.
58
CS-XE9DKE CU-XE9DKE / CS-XE12DKE CU-XE12DKE
Summary of Contents for SUPER DELUXE CS-XE9DKE
Page 10: ...4 Dimensions 10 CS XE9DKE CU XE9DKE CS XE12DKE CU XE12DKE...
Page 11: ...11 CS XE9DKE CU XE9DKE CS XE12DKE CU XE12DKE...
Page 12: ...5 Refrigeration Cycle Diagram 12 CS XE9DKE CU XE9DKE CS XE12DKE CU XE12DKE...
Page 13: ...6 Block Diagram 13 CS XE9DKE CU XE9DKE CS XE12DKE CU XE12DKE...
Page 14: ...7 Wiring Diagram 14 CS XE9DKE CU XE9DKE CS XE12DKE CU XE12DKE...
Page 89: ...13 Technical Data 89 CS XE9DKE CU XE9DKE CS XE12DKE CU XE12DKE...
Page 90: ...90 CS XE9DKE CU XE9DKE CS XE12DKE CU XE12DKE...
Page 102: ...102 CS XE9DKE CU XE9DKE CS XE12DKE CU XE12DKE...
Page 103: ...How to use electronic circuit diagram 103 CS XE9DKE CU XE9DKE CS XE12DKE CU XE12DKE...
Page 104: ...18 1 Remote Control 104 CS XE9DKE CU XE9DKE CS XE12DKE CU XE12DKE...

