Audio Process Block Diagram
Audio Process Block Diagram
28
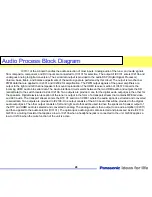
IC3101 of the A board handles the audio selection of most inputs. Analog audio of the tuner and audio signals
from composite, component, and DVI inputs are connected to IC3101 for selection. The output of IC3101 enters IC2106 and
undergoes analog to digital conversion. The serial data output is provided to the audio DSP (Digital Signal Processor).
Volume, bass, treble, and balance adjustments of the audio signal are performed by this circuit. The output is two channel
PWM data that are applied to IC2301 and IC2302 for amplification. The PWM output signals of the power amplifiers are
output to the right and left channel speakers for sound reproduction. The HDMI receiver section of IC4510 converts the
incoming HDMI audio into serial data. The Audio interface circuit selects between the two HDMI audio and outputs the SD
(serial Data) to the switch located inside IC2106. Two outputs are provided, one for the digital audio output jack, the other for
the speakers. Digital television reception of the tuner is output in the form of a transport stream that contains MPEG2 video
and AC3 audio. The transport stream enters the DTV I/F section of IC8001 where the audio signal is extracted and converted
to serial data. Two outputs are provided to IC2106. One output consists of the AC3 audio that will be provided to the digital
audio output jack. The other output consists of left and right audio that will be used to drive the speakers. Speaker output of
the DTV and HDMI audio is selected and converted to analog. The analog audio is then output to an audio amplifier (IC2011)
and then applied to the audio selector (IC3101). The optical jack audio signal is also selected and processed inside IC2106.
Q2303 is a muting transistor that applies a low to IC2106 when a headphone jack is connected to the unit. Q2302 applies a
low to IC2106 when the mute function of the unit is active.
Summary of Contents for TC-32LX85 Operating Manual (English
Page 6: ...Purposely Left Blank Purposely left blank 6 ...
Page 15: ...P Board P Board Main Power Board Main Power Board 15 T801 D821 ...
Page 17: ...Main MPU Power On Commands Main MPU Power On Commands 17 ...
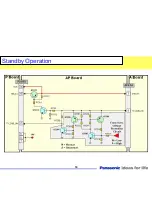
Page 19: ...Standby Operation Standby Operation 19 ...
Page 24: ...Purposely Left Blank Purposely left blank ...
Page 25: ...Video Process Block Diagram Video Process Block Diagram 25 ...
Page 27: ...Audio Process Block Diagram Audio Process Block Diagram 27 ...
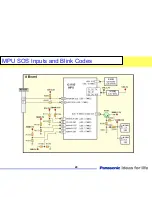
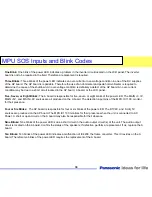
Page 29: ...MPU SOS Inputs and Blink Codes MPU SOS Inputs and Blink Codes 29 ...
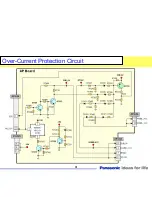
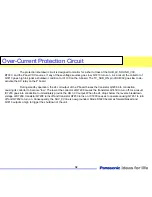
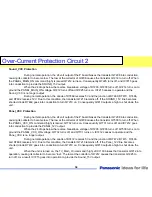
Page 31: ...Over Over Current Protection Circuit Current Protection Circuit 31 ...
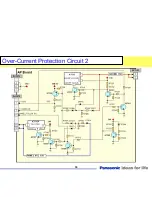
Page 33: ...Over Over Current Protection Circuit 2 Current Protection Circuit 2 33 ...
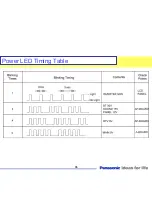
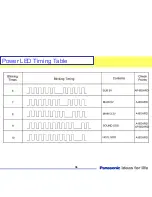
Page 35: ...35 Power LED Timing Table ...
Page 36: ...36 Power LED Timing Table ...
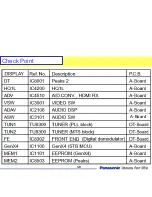
Page 39: ...39 Check Point A Board ...
Page 48: ...Purposely Left Blank Purposely left blank ...
Page 63: ...2008 LCD Television Models TC 37LZ85U TC32LX85 LCD Display Television Technical Guide 63 ...
Page 69: ...TC37LZ85 Signal Circuit Block Diagram TC37LZ85 Signal Circuit Block Diagram 69 ...
Page 71: ...TC32LX85 Signal Circuit Block Diagram TC32LX85 Signal Circuit Block Diagram 71 ...
Page 73: ...TC37LZ85 Audio Circuit Block Diagram TC37LZ85 Audio Circuit Block Diagram 73 ...
Page 75: ...TC32LX85 Audio Circuit Block Diagram TC32LX85 Audio Circuit Block Diagram 75 ...
Page 77: ...Power Supply Overview Power Supply Overview 77 ...
Page 78: ...TC TC 37LZ85 Power Supply Description 37LZ85 Power Supply Description 78 ...
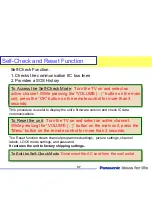
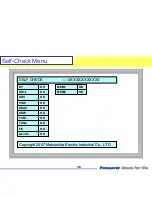
Page 80: ...Self Self Check and Reset Function Check and Reset Function 80 ...
Page 81: ...SOS and Power LED Indication SOS and Power LED Indication 81 ...
Page 106: ...Internal Pattern Generator 1 Internal Pattern Generator 1 106 ...
Page 107: ...Internal Pattern Generator 2 Internal Pattern Generator 2 107 ...
Page 108: ...Internal Pattern Generator 3 Internal Pattern Generator 3 108 ...
Page 109: ...Copy data to SD card 1 Copy data to SD card 1 109 ...
Page 110: ...Copy data to SD card 2 Copy data to SD card 2 110 ...
Page 111: ...Copy data to SD card 3 Copy data to SD card 3 111 ...
Page 112: ...Copy data to SD card 4 Copy data to SD card 4 112 ...
Page 113: ...Copy data to SD card 5 Copy data to SD card 5 113 ...
Page 114: ...Copy data to SD card 6 Copy data to SD card 6 114 ...
Page 115: ...Copy Data from the SD Card to the TV 1 Copy Data from the SD Card to the TV 1 115 ...
Page 116: ...Copy Data from the SD Card to the TV 2 Copy Data from the SD Card to the TV 2 116 ...
Page 117: ...Copy Self Check Data to the SD Card 1 Copy Self Check Data to the SD Card 1 117 ...
Page 118: ...Copy Self Check Data to the SD Card 2 Copy Self Check Data to the SD Card 2 118 ...
Page 119: ...Copy Self Check Data to the SD Card 3 Copy Self Check Data to the SD Card 3 119 ...
Page 120: ...Local Maintenance 1 Local Maintenance 1 120 ...
Page 121: ...Local Maintenance 2 Local Maintenance 2 121 ...
Page 122: ...Local Maintenance 3 Local Maintenance 3 122 ...
Page 123: ...Local Maintenance 4 Local Maintenance 4 123 ...
Page 124: ...Local Maintenance 5 Local Maintenance 5 124 ...
Page 125: ...Local Maintenance 6 Local Maintenance 6 125 ...
Page 126: ...Local Maintenance 7 Local Maintenance 7 126 ...
Page 127: ...Local Maintenance 8 Local Maintenance 8 127 ...
Page 128: ...Picture Refresh Mode Picture Refresh Mode 128 ...

