28
Basic Controls
Remote Control Transmitter
1
3
5
7
11
13
16
19
22
2
6
10
8
4
9
12
14
15
17
20
21
23
18
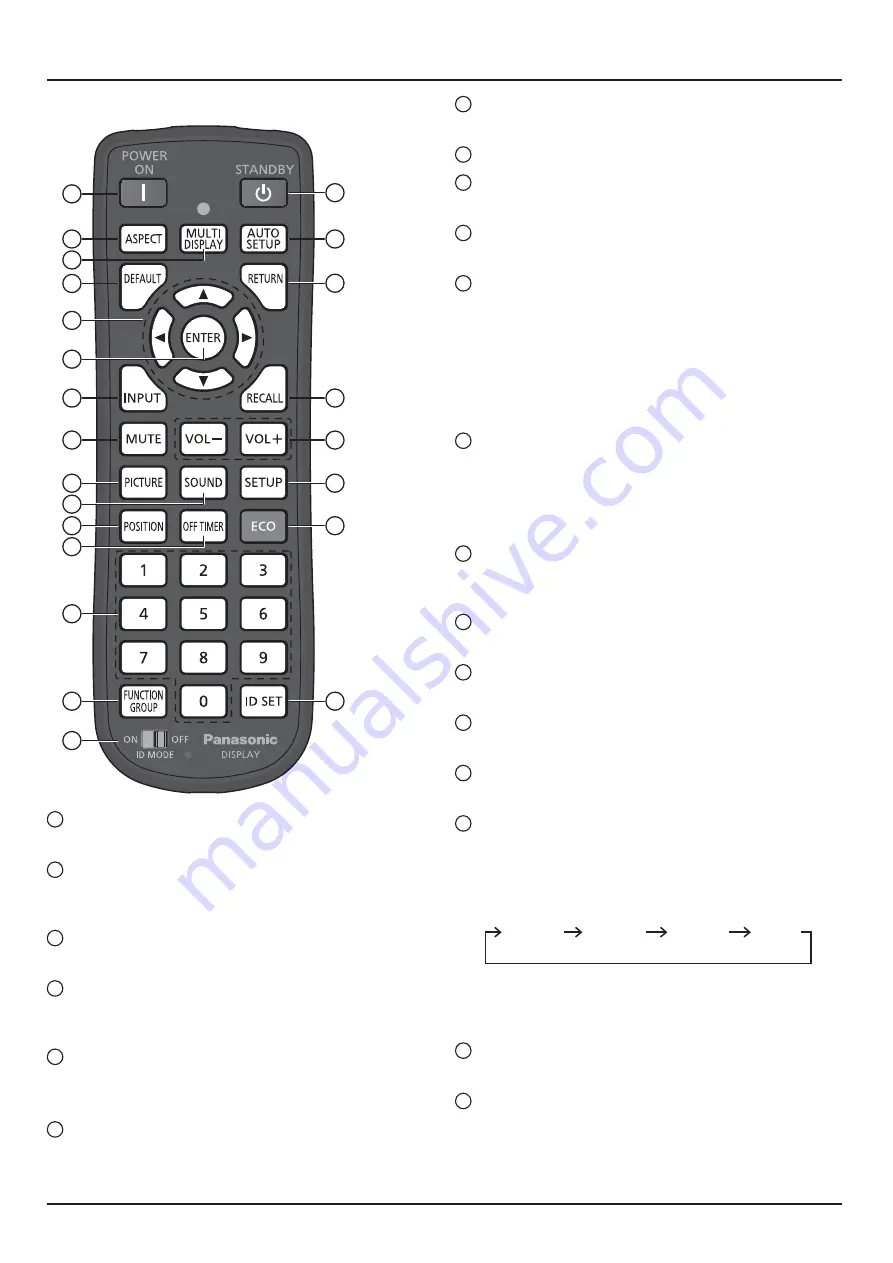
1
[POWER ON] button
Press to turn the Display on from standby mode.
2
[STANDBY ] button
Press to turn the Display off to Standby mode from
Power On mode.
3
[ASPECT ] button
Press to adjust the aspect.
4
[MULTI DISPLAY ] button
Press to change to enable or disable the Multi display
function.
5
[AUTO SETUP ] button
Automatically adjusts the position/size of the screen.
'Z
.
6
[DEFAULT ] button
Press to return the OSD menu item to factory default
value.
7
[RETURN ] button
Press to return to previous menu screen.
8
POSITION buttons
9
[ENTER ] button
Press to make selections.
10
[INPUT ] button
Press to select input signal sequentially.
11
[RECALL ] button
Press to display the current system status.
$ Input label
$ Aspect mode
$ Off timer (The off timer indicator is displayed only
when the off timer has been set)
$ Clock display (see page 69 )
12
[MUTE ] button
Press to mute the sound.
Press again to reactivate sound.
Sound is also reactivated when power is turned off or
volume is changed.
13
Volume adjustment
%K!%K!=
sound volume level.
14
[PICTURE ] button
Press to enter to PICTURE menu.
15
[SOUND ] button
Press to enter to SOUND menu.
16
[SETUP ] button
Press to enter to SETUP menu.
17
[POSITION ] button
Press to enter to POSITION menu.
18
[OFF TIMER ] button
The display can be preset to switch to stand-by after a
+ _:_:_
and 0 minute (cancelled) each time the button is
pressed.
30 MIN 60 MIN 90 MIN 0 MIN
:K~~*Z*"?
>+
The off timer is cancelled if a power interruption occurs.
19
ECO MODE (ECO)
Press to change the ECO MODE setup status.
20
Numeric buttons
If ID SET button is pressed before pressed Numeric
buttons, it will use to set the ID number.
If Numeric buttons are pressed separately, FUNCTION
ZK?J+


