background image

6

7

8

9

1

3

4

5

2

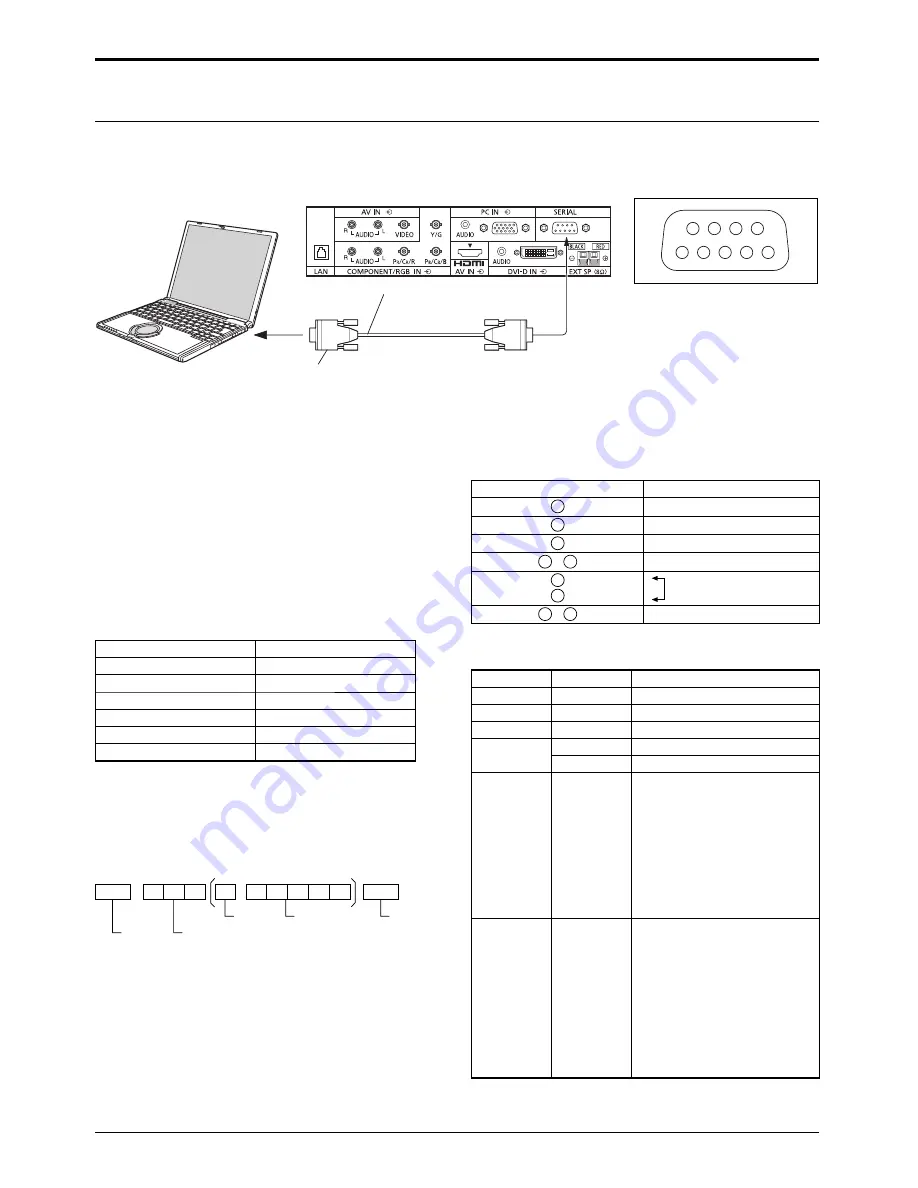
COMPUTER

RS-232C Straight cable

D-sub 9p

(Male)

(Female)

11

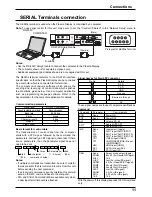
SERIAL Terminals connection

Notes:

•  Use the RS-232C straight cable to connect the computer to the Plasma Display.
•  The computer shown is for example purposes only.
•  Additional equipment and cables shown are not supplied with this set.

The SERIAL terminal conforms to the RS-232C interface 
speci

fi

 cation, so that the Plasma Display can be controlled 

by a computer which is connected to this terminal.
The computer will require software which allows the 
sending and receiving of control data which satisfies 
the conditions given below. Use a computer application 
such as programming language software. Refer to the 
documentation for the computer application for details.

The SERIAL terminal is used when the Plasma Display is controlled by a computer.

Pin layout for SERIAL Terminal

Basic format for control data

The transmission of control data from the computer 
starts with a STX signal, followed by the command, the 
parameters, and lastly an ETX signal in that order. If there 
are no parameters, then the parameter signal does not 
need to be sent.

STX

C1 C2 C3

P1 P2 P3 P4

:

P5

ETX

Start
(02h)

3-character
command (3 bytes)

Colon

Parameter(s)
(1 - 5 bytes)

End
(03h)

Notes:

•  If multiple commands are transmitted, be sure to wait for 

the response for the 

fi

 rst command to come from this unit 

before sending the next command.

•  If an incorrect command is sent by mistake, this unit will 

send an “ER401” command back to the computer.

•  S1A and S1B of Command IMS are available only when 

a dual input terminal board is attached.

Communication parameters

Signal level

RS-232C compliant

Synchronization method

Asynchronous

Baud rate

9600 bps

Parity

None

Character length

8 bits

Stop bit

1 bit

Flow control

-

Signal names for D-sub 9P connector

Pin No.

Details

2

R X D

3

T X D

5

GND

4  •  6

Non use

7
8

   (Shorted in this set)

1  •  9

NC

These signal names are those of computer speci

fi

 cations.

Connections

Command

Command

Parameter

Control details

PON

None

Power ON

POF

None

Power OFF

AVL

**

Volume 00 - 63

AMT

0

Audio MUTE OFF

1

Audio MUTE ON

IMS

None

SL1

S1A

S1B

VD1

YP1

HM1

DV1

PC1

Input select (toggle)

SLOT input (SLOT INPUT)

SLOT input (SLOT INPUT A)

SLOT input (SLOT INPUT B)

VIDEO input (VIDEO)

COMPONENT/RGB IN input 

(COMPONENT)

HDMI input (HDMI)

DVI-D IN input (DVI)

PC IN input (PC)

DAM

None

ZOOM

FULL

JUST

NORM

ZOM2

ZOM3

SJST

SNOM

SFUL

14:9

Screen mode select (toggle)

Zoom1 (For Video/SD/PC signal)

16:9

Just (For Video/SD signal)

4:3 (For Video/SD/PC signal)

Zoom2 (For HD signal)

Zoom3 (For HD signal)

Just (For HD signal)

4:3 (For HD signal)

4:3 Full (For HD signal)

14:9

With the power off, this display responds to PON command 
only.

Note: 

 To use serial control for this unit, make sure to set the “Control I/F Select” in the “Network Setup” menu to 
“RS-232C”.

Summary of Contents for TH-65PF20ER

Page 1: ...a computer equipped with a CD ROM drive and Adobe Reader Version 7 0 or later is recommended installed on your computer Depending on the operating system or settings on your computer the Operating Ins...

Page 2: ...ock ensure the earthing pin on the AC cord power plug is securely connected CAUTION This appliance is intended for use in environments which are relatively free of electromagnetic fields Using this ap...

Page 3: ...nward may cause damage to the internal circuitry Ventilation should not be impeded by covering the ventilation openings with items such as newspapers table cloths and curtains For sufficient ventilati...

Page 4: ...electric shocks Do not do anything that may damage the power cable When disconnecting the power cable pull on the plug body not the cable Do not damage the cable make any modifications to it place hea...

Page 5: ...from direct or reflected light from your Plasma Display Cleaning and maintenance The front of the display panel has been specially treated Wipe the panel surface gently using only a cleaning cloth or...

Page 6: ...onger life Precaution on battery use Incorrect installation can cause battery leakage and corrosion that will damage the remote control transmitter Disposal of batteries should be in an environment fr...

Page 7: ...cord plug at the socket outlet first While pressing the lever insert the core wire hole To loosen hooks To remove from the unit Insert the clamper in a hole Bundle the cables snaps Keep pushing both s...

Page 8: ...page 9 DVI D IN DVI D Input Terminal see page 9 Connect to video equipment such as VCR or DVD player PC IN PC Input Terminal Connect to video terminal of PC or equipment with Y PB CB and PR CR output...

Page 9: ...ame Pin No Signal Name 1 T M D S data 2 13 2 T M D S data 2 14 5 V DC 3 T M D S data 2 shield 15 Ground 4 16 Hot plug detect 5 17 T M D S data 0 6 DDC clock 18 T M D S data 0 7 DDC data 19 T M D S dat...

Page 10: ...S V compatible Mini D sub 15P terminal The computer shown in the illustration is for example purposes only Additional equipment and cables shown are not supplied with this set Do not set the horizonta...

Page 11: ...t for the response for the first command to come from this unit before sending the next command If an incorrect command is sent by mistake this unit will send an ER401 command back to the computer S1A...

Page 12: ...he Plasma Display is on or in standby mode Note During operation of the power management function the power indicator turns orange in the power off state Connecting the plug to the Wall Outlet Notes M...

Page 13: ...on the unit Following screen will be displayed when the unit is turned on for the first time Select the items with the remote control Unit buttons are invalid OSD Language PRESENT TIME Setup Display...

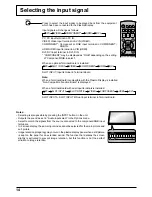
Page 14: ...lect the input signal to be played back from the equipment which has been connected to the Plasma Display Input signals will change as follows PC COMPONENT DVI HDMI VIDEO PC PC input terminal in PC IN...

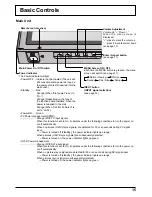
Page 15: ...ower is supplied to the slot Orange When Control I F Select is set to LAN Power ON Green PC Power management DPMS Orange With PC input signal When this function is set to On it operates under the foll...

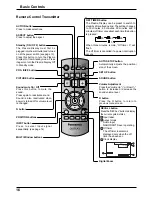
Page 16: ...l Zoom AUTO SETUP button Automatically adjusts the position size of the screen SET UP button SOUND button Volume Adjustment Press the Volume Up or Down button to increase or decrease the sound volume...

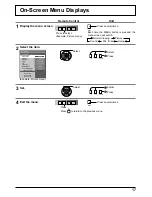
Page 17: ...Viewing Picture Sound Pos Size Setup 2 Select the item 25 0 0 0 5 Picture Normal Normalise Normal Brightness Sharpness Picture Mode Colour Contrast Hue Colour Management Advanced settings Memory save...

Page 18: ...0 0 0 0 0 Off 2 2 Sound Out Left Channel Right Channel Channel 1 Channel 1 Off Level Meter Off SDI Sound Output Sound Normal Normalise Normal 0 0 0 Off Treble 0 Mid Sound Mode Balance Bass Surround Ma...

Page 19: ...LAN cable Touching the LAN terminal with a statically charged hand body may cause damage due to its discharge Do not touch the LAN terminal or a metal part of the LAN cable For instructions on how to...

Page 20: ...DIO L R BNC RCA Pin jack 2 1 0 Vp p 75 0 5 Vrms HDMI TYPE A Connector COMPONENT RGB IN Y G PB CB B PR CR R AUDIO L R BNC BNC BNC RCA Pin jack 2 with sync 1 0 Vp p 75 0 7 Vp p 75 0 7 Vp p 75 0 5 Vrms D...

Page 21: ...Memo 21...

Page 22: ...Memo 22...

Page 23: ...Memo 23...

Page 24: ...ns are stated Copyright 1980 1986 1993 The Regents of the University of California All rights reserved Redistribution and use in source and binary forms with or without modification are permitted prov...

Reviews: