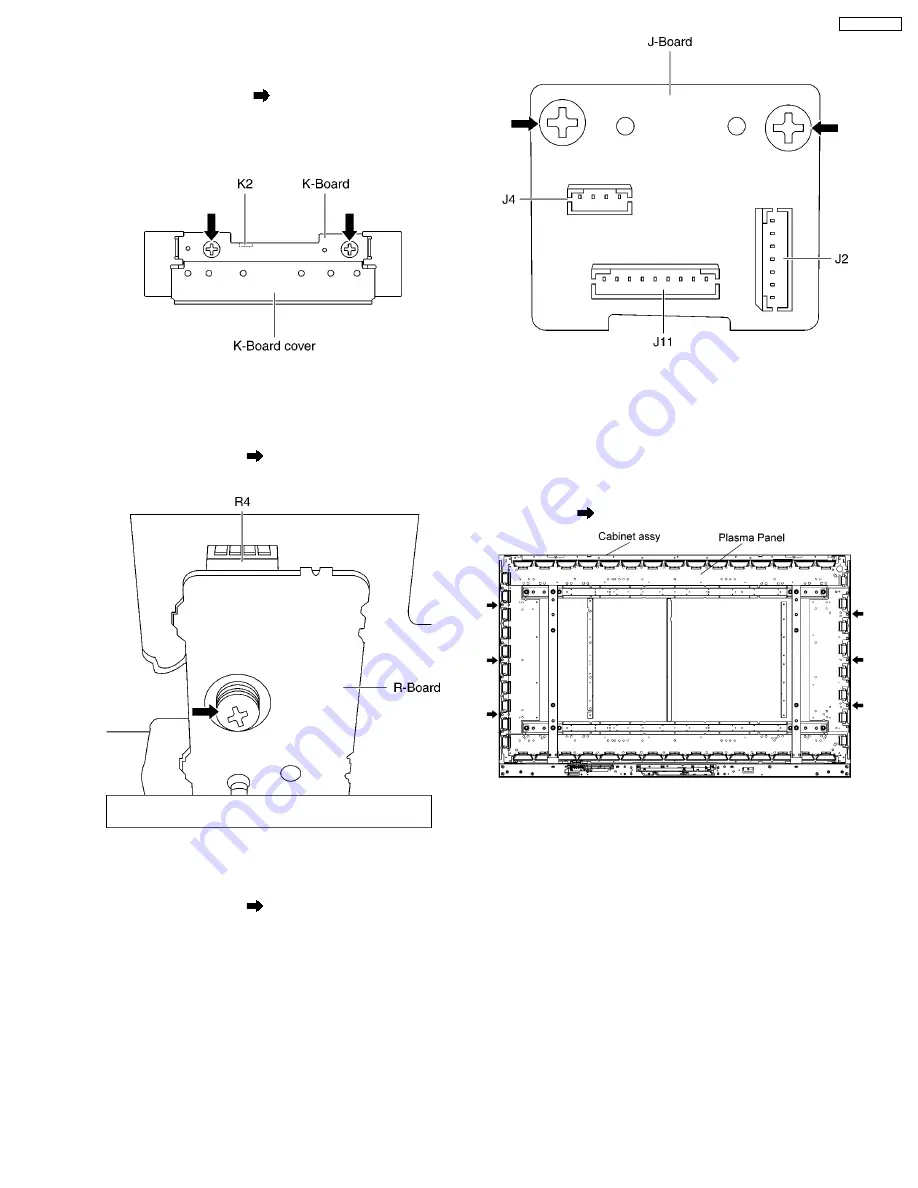
6.39. Remove the K-Board
1. Unlock the cable clampers to free the cable.
2. Remove the screws (×2
).
3. Disconnect the connector (K2) and remove the K-Board
cover.
4. Remove the K-Board.
6.40. Remove the R-Board
1. Unlock the cable clampers to free the cable.
2. Remove the Speaker box assy (L).(See section 6.8.)
3. Remove the screw (×1
).
4. Disconnect the coupler (R4) and remove the R-Board.
6.41. Remove the J-Board
1. Remove the Speaker box assy (L).(See section 6.8.)
2. Remove the screw (×2
).
3. Disconnect the connectors(J2,J4, and J11) and remove the
J-Board.
6.42. Remove the Plasma panel
section from the Cabinet assy
(glass)
1. Remove the Cabinet-fixing metal (A) and (B). (See section
6.21.,6.22.,6.30. and 6.31.)
2. Remove the Cabinet assy and the plasma panel fastening
screws (×6
).
3. For leaving the plasma panel from the front frame, pull the
bottom of the front frame forward, lift, and remove.
21
TH-65PZ750U
Summary of Contents for TH-65PZ750U
Page 5: ...1 Applicable signals 5 TH 65PZ750U ...
Page 24: ...8 Location of Lead Wiring 8 1 Lead of Wiring 1 24 TH 65PZ750U ...
Page 25: ...8 2 Lead of Wiring 2 25 TH 65PZ750U ...
Page 26: ...8 3 Lead of Wiring 3 26 TH 65PZ750U ...
Page 27: ...8 4 Lead of Wiring 4 27 TH 65PZ750U ...
Page 28: ...8 5 Lead of Wiring 5 28 TH 65PZ750U ...
Page 32: ...9 4 No Picture 32 TH 65PZ750U ...
Page 39: ...11 4 Adjustment Volume Location 11 5 Test Point Location 39 TH 65PZ750U ...
Page 41: ...41 TH 65PZ750U ...
Page 77: ...15 Schematic and Block Diagram 15 1 Schematic Diagram Note TH 65PZ750U 77 ...
Page 157: ...16 Exploded Views Replacement Parts List 16 1 Exploded Views 157 TH 65PZ750U ...
Page 158: ...16 2 Packing Exploded Views Accessories 158 TH 65PZ750U ...
Page 159: ...16 3 Replacement Parts List Notes 159 TH 65PZ750U ...


