16
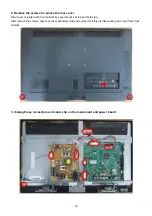
2. Remove the screws to remove the rear cover.
Rear cover is jointed with front cabinet by several hooks at top and both side.
After remove the screws, take rear cover at bottom side and pull up it forcibly just like tearing rear cover from front
cabinet.
3. Unplug these connectors and cable clip on the main board and power board.
Summary of Contents for TH-L24X5D
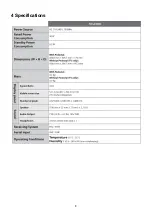
Page 8: ...8 4 Specifications...
Page 9: ...9 Note...
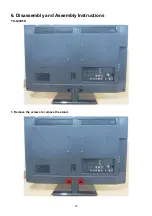
Page 15: ...15 6 Disassembly and Assembly Instructions TH L24X5D 1 Remove the screws to remove the stand...
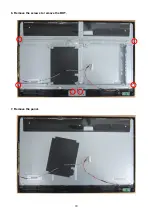
Page 17: ...17 4 Remove the Speakers 5 Remove the screws to remove the Main Board and Power Board...
Page 18: ...18 6 Remove the screws to remove the BKT 7 Remove the panel...
Page 19: ...19 8 Remove the Key board and IR board...
Page 20: ...20 7 Block Diagram Main Board Power Board...
Page 22: ...22 9 Exploded View and Replacement Parts List 9 1 Exploded View...

