nts.
to
ch).
ice
er
o
ght
l.
rity
even
15
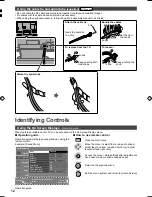
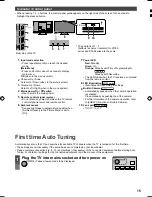
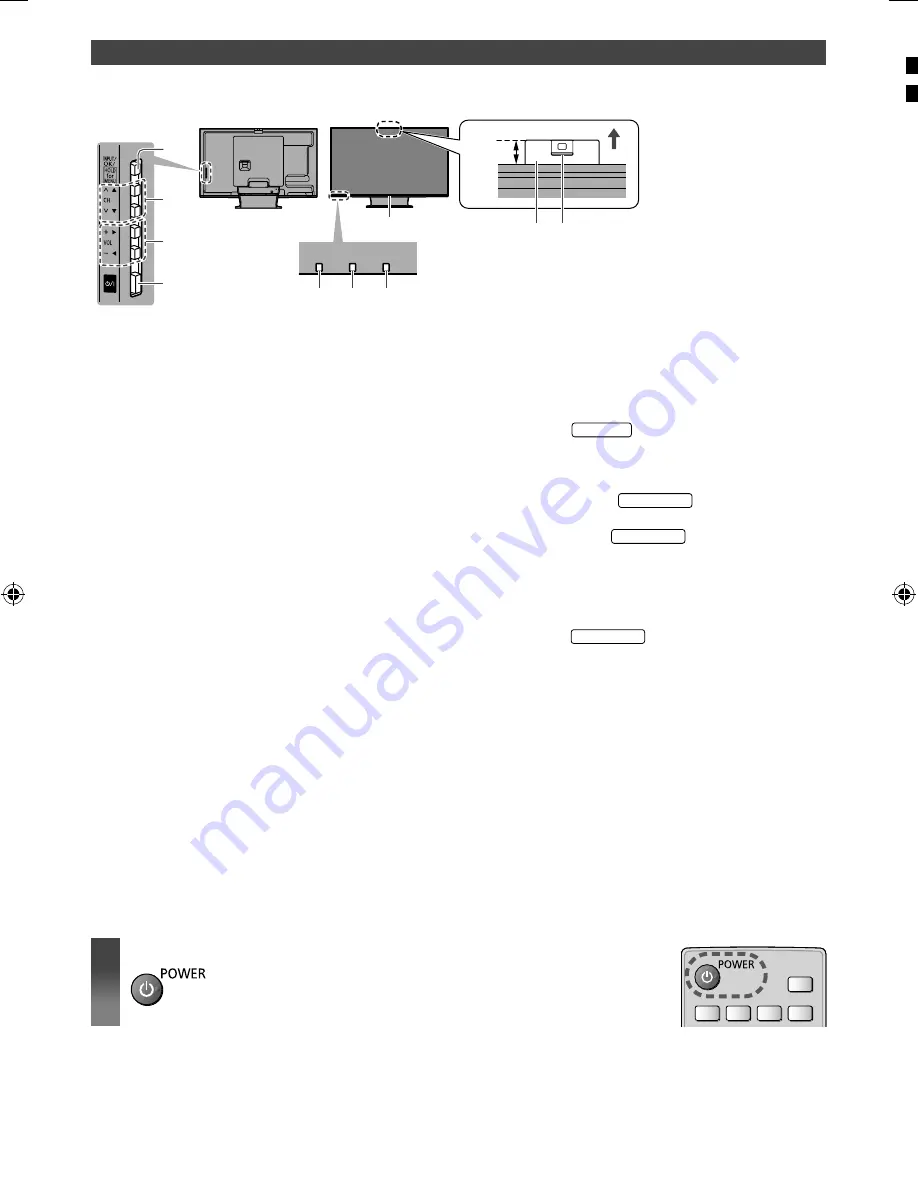
Indicator / Control panel
Ɣ
When pressing 1, 2, 3 buttons, the control panel guide appears on the right side of the screen for 3 seconds to
highlight the pressed button.
1
Input mode selection
Ɣ
Press repeatedly until you reach the desired
mode.
[Main Menu]
Ɣ
Press and hold for about 3 seconds to display
main menu.
OK
(when in the menu system)
2
Channel Up / Down
Cursor Up / Down (when in the menu system)
3
Volume Up / Down
Cursor Left / Right (when in the menu system)
4
Mains power On / Off switch
Ɣ
Use to switch the mains power.
5
Remote control signal receiver
Ɣ
Do not place any objects between the TV remote
control signal receiver and remote control.
6
Ambient sensor
Ɣ
Senses brightness to adjust picture quality when
[Ambient Sensor] in the Picture Menu is set to
[On].
7
Power LED
Red:
Standby
Green:
On
Orange:
Standby with Timer Programming On
Australia
Standby with Recording
Ɣ
The LED blinks when the TV receives a command
from the remote control.
8
LED illumination
WT60 series
Ɣ
Illuminates LED according to settings.
9
Built-in Camera
WT60 series
Ɣ
Automatically pops up when the camera operation
is activated.
Close manually by pushing top of the camera.
Ɣ
For the information of the camera operation, refer
to [eHELP] (Functions > Built-in Camera).
10
Lens part
WT60 series
Ɣ
Tilt: -17° to +17°
Rear side of the TV
3
1
4
2
5
6
7
8
20 mm
9 10
*
The positons of 1 - 7
(buttons / sensors / indicator) for WT60
series and DT60 series are the same.
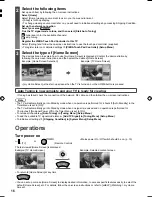
First time Auto Tuning
Automatically sets up the TV and searches for available TV channels when the TV is turned on for the first time.
Ɣ
These steps are not necessary if the setup has been completed by your local dealer.
Ɣ
Please complete connections (p. 8 - 12) and settings (if necessary) of the connected equipment before starting Auto
Tuning. For details of settings for the connected equipment, read the manual of the equipment.
1
Plug the TV into mains socket and turn power on
Ɣ
Takes a few seconds to be displayed.
TH-L47_50_55_60DT_WT60AZ_EN TEMP.indd 15
TH-L47_50_55_60DT_WT60AZ_EN TEMP.indd 15
3/26/2013 9:38:29 AM
3/26/2013 9:38:29 AM

