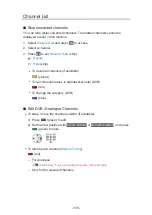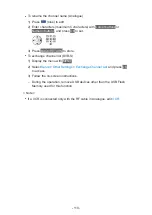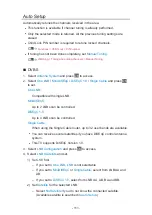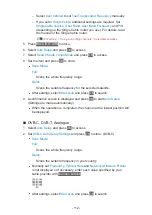
3. A confirmation screen is displayed and press
OK
to start
Auto Setup
.
(Settings are made automatically.)
●
When the operation is completed, the channel at the lowest position will
be displayed.
■
DVB-via-IP
●
Ensure the network connections and network settings are completed.
Functions > DVB-via-IP > DVB-via-IP client connection
1. Select
Auto Setup
and press
OK
to access.
2. A confirmation screen is displayed and press
OK
to access.
3. Select a server from
Server List
.
1) Select a server and press
OK
to set.
2) Select
Search Channels
and press
OK
to access.
4. Select a search mode and press
OK
to access.
5. Set
Client Settings
.
1) Select
Client Settings
and press
OK
to access.
2) Select
Unicast Environment
/
Multicast Environment
and press
OK
to
set.
●
Select
Unicast Environment
to use in a home network.
●
Select
Multicast Environment
to use in multi family housing units,
hotel, hospital, etc. (All servers are selected automatically.)
3) Select
Server List
and press
OK
to access.
6. Select
Search Channels
and press
OK
to access.
7. Set
DVB-via-IP Search Mode
and press
OK
to start
Auto Setup
. (Settings
are made automatically.)
●
Set
DVB-via-IP Satellite Configuration
to tune DVB-S channels.
●
When the operation is completed, the channel at the lowest position will
be displayed.
- 113 -
Summary of Contents for TX-40CXW704
Page 1: ...TX 40CXW704 TX 50CXW704 TX 55CXW704 TX 65CXW704 eHELP English ...
Page 136: ... For details of supported file formats Media Player Technical information 136 ...
Page 277: ...Reset to Defaults Resets the current Picture Viewing Mode to the default settings 277 ...
Page 284: ...Reset to Defaults Resets the current Sound Mode to the default settings 284 ...
Page 288: ...VIERA Name Sets your favourite name for this TV Network Network settings VIERA Name 288 ...
Page 298: ...Time Zone Adjusts the time data Watching Basic Adjusting time 298 ...
Page 339: ...Ver 1 03 ...

