DVB-via-IP Server Selection
■
Preparations
●
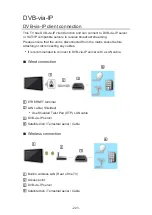
Ensure the network connections and network settings are completed.
Functions > DVB-via-IP > DVB-via-IP client connection
●
Ensure the server settings are completed. For details, read the manual of
DVB-via-IP server.
■
DVB-via-IP Server Selection
1. Display the menu with
MENU
.
2. Select
Setup
>
Tuning Menu
>
Add TV Signal
and press
OK
to access.
3. Select
DVB-via-IP
and press
OK
to access.
4. Select
Start Auto Setup
and press
OK
to access.
5. Select a server from
Server List
and press
OK
to set.
6. Select
Client Settings
and press
OK
to access.
1) Select
Unicast Environment
/
Multicast Environment
and press
OK
to
set.
●
Select
Unicast Environment
to use in a home network.
●
Select
Multicast Environment
to use in multi family housing units,
hotel, hospital, etc. (All servers are selected automatically.)
2) Select
Server List
and press
OK
to access.
7. Select
Search Channels
and press
OK
to access.
8. Select a search mode and press
OK
to access.
9. Set
DVB-via-IP Search Mode
and press
OK
to start
Auto Setup
. (Settings
are made automatically.)
●
Depending on the server capability (tuner types), you may have to
– Set
DVB-via-IP Satellite Configuration
to tune DVB-S channels.
– Set DVB-via-IP configuration to tune DVB-C or DVB-T channels.
●
When the operation is completed, the channel at the lowest position will
be displayed.
- 223 -
Summary of Contents for TX-40DX600E
Page 267: ...Reset to Defaults Resets the current Picture Viewing Mode to the default settings 267 ...
Page 275: ...Reset to Defaults Resets the current Sound Mode to the default settings 275 ...
Page 279: ...VIERA Name Sets your favourite name for this TV Network Network settings VIERA Name 279 ...
Page 289: ...Time Zone Adjusts the time data Watching Basic Adjusting time 289 ...
Page 326: ...v 3 200 ...


