background image

English

   - 2 -

Safety Information

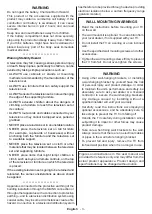
CAUTION

RISK OF ELECTRIC SHOCK

DO NOT OPEN

CAUTION: 

TO REDUCE THE RISK OF ELECTRIC SHOCK DO 

NOT REMOVE COVER (OR BACK). 

NO USER-SERVICEABLE PARTS INSIDE. REFER 

SERVICING TO QUALIFIED SERVICE PERSONNEL.

Note:

 Follow the on screen instructions for operating the related 

features.

In extreme weather (storms, lightning) and long inactivity 

periods (going on holiday) disconnect the TV set from the 

mains.
The mains plug is used to disconnect TV set from the mains 

and therefore it must remain readily operable. If the TV set is 

not disconnected electrically from the mains, the device will 

still draw power for all situations even if the TV is in standby 

mode or switched off.

IMPORTANT - Please read these instructions 

fully before installing or operating

WARNING: This device is intended to be used 

by persons (including children) who are 

capable / experienced of operating such a device 

unsupervised, unless they have been given 

supervision or instruction concerning the use of 

the device by a person responsible for their safety.

•  Use this TV set at an altitude of less than 2000 meters 

above the sea level, in dry locations and in regions 

with moderate or tropical climates.

•  The TV set is intended for household and similar 

general use but may also be used in public places. 

•  For ventilation purposes, leave at least 5cm of free 

space around the TV.

•  The ventilation should not be impeded by covering 

or blocking the ventilation openings with items, such 

as newspapers, table-cloths, curtains, etc.

•  The power cord plug should be easily accessible. Do 

not place the TV, furniture, etc. on the power cord. 

A damaged power cord/plug can cause fire or give 

you an electric shock. Handle the power cord by the 

plug, do not unplug the TV by pulling the power cord. 

Never touch the power cord/plug with wet hands as 

this could cause a short circuit or electric shock. 

Never make a knot in the power cord or tie it with 

other cords. When damaged it must be replaced, this 

should only be done by qualified personnel.

•  Do not expose the TV to dripping or splashing of 

liquids and do not place objects filled with liquids, 

such as vases, cups, etc. on or over the TV (e.g., 

on shelves above the unit).

•  Do not expose the TV to direct sunlight or do not 

place open flames such as lit candles on the top of 

or near the TV.

•  Do not place any heat sources such as electric 

heaters, radiators, etc. near the TV set.

•  Do not place the TV on the floor and inclined 

surfaces.

•  To avoid danger of suffocation, keep plastic bags 

out of the reach of the babies, children and domestic 

animals.

•  Carefully attach the stand to the TV. If the stand is 

provided with screws, tighten the screws firmly to 

prevent the TV from tilting. Do not over-tighten the 

screws and mount the stand rubbers properly.

•  Do not dispose of the batteries in fire or with 

hazardous or flammable materials.

WARNING

 - Batteries must not be exposed to 

excessive heat such as sunshine, fire or the like.

WARNING

 - Excessive sound pressure from earphones 

or headphones can cause hearing loss.

ABOVE ALL - NEVER let anyone, especially 

children, push or hit the screen, push anything 

into holes, slots or any other openings in the case.


Caution

Serious injury or death risk


Risk of electric shock Dangerous voltage risk

 Maintenance

Important maintenance 

component 

Markings on the Product

The following symbols are used on the product as 

a marker for restrictions and precautions and safety 

instructions. Each explanation shall be considered 

where the product bears related marking only. Note 

such information for security reasons.

Class II Equipment:

 This appliance is 

designed in such a way that it does not require 

a safety connection to electrical earth.

Hazardous Live Terminal:

 The marked 

terminal(s) is/are hazardous live under normal 

operating conditions.

i

Caution, See Operating Instructions:

 The 

marked area(s) contain(s) user replaceable 

coin or button cell batteries.

CLASS 1

LASER PRODUCT 

Class 1 Laser Product: 

This 

product contains Class 1 

laser source that is safe under 

reasonably foreseeable 

conditions of operation.

Summary of Contents for TX-43HX600B

Page 1: ...600BZ TX 55HX600B TX 55HX600BZ TX 65HX600B TX 65HX600BZ LED TV You can find instructions for your TV s features in the E Manual To access the E Manual enter Settings menu select Manuals and press OK For quick access press Home Menu button and then Info button e MANUAL ...

Page 2: ...nstallation 15 Media Playback via USB Input 16 Media Browser 16 CEC 17 Settings Menu Content 18 General TV Operation 23 Using the Channel List 23 Configuring Parental Settings 23 Electronic Programme Guide 23 Teletext Services where available 24 MHEG Teletext 24 BBC Red Button RB 24 Software Upgrade 24 Troubleshooting Tips 25 PC Input Typical Display Modes 25 AV and HDMI Signal Compatibility 26 Su...

Page 3: ...er cords When damaged it must be replaced this should only be done by qualified personnel Do not expose the TV to dripping or splashing of liquids and do not place objects filled with liquids such as vases cups etc on or over the TV e g on shelves above the unit Do not expose the TV to direct sunlight or do not place open flames such as lit candles on the top of or near the TV Do not place any hea...

Page 4: ...relocated the same considerations as above should be applied Apparatus connected to the protective earthing of the building installation through the MAINS connection or through other apparatus with a connection to protective earthing and to a television distribution system using coaxial cable may in some circumstances create a fire hazard Connection to a television distribution system has therefor...

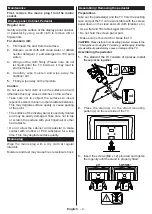
Page 5: ...tly wipe the surface of the display panel cabinet or pedestal by using a soft cloth to remove dirt or fingerprints For stubborn dirt 1 First clean the dust from the surface 2 Dampen a soft cloth with clean water or diluted neutral detergent 1 part detergent to 100 parts water 3 Wring out the cloth firmly Please note do not let liquid enter the TV inside as it may lead to product failure 4 Carefull...

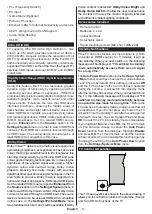
Page 6: ...een Off option is not available if the Mode is set to Game When the TV is not in use please switch off or disconnect the TV from the mains plug This will also reduce or stop the energy consumption Features Remote controlled colour TV Fully integrated digital terrestrial cable satellite TV DVB T T2 C S S2 HDMI inputs to connect other devices with HDMI sockets USB input OSD menu system Stereo sound ...

Page 7: ...ated HDMI source input as Enhanced from the Sources option in the Settings System menu in order to watch Dolby Vision content if the Dolby Vision content is received through an HDMI input The source device should also be at least HDMI 2 0a compatible in this case In the Settings Picture Mode menu two predefined picture modes will be available if Dolby Vision content is detected Dolby Vision Bright...

Page 8: ... as desired using the Left Right directional buttons When finished press OK or Back Return button to exit Press Exit button to close the main menu 1 Home When main menu is opened Home menu bar will be highlighted The content of the Home menu can be customised by adding options from other menus Just highlight an option and press the Down direction button on the remote If you see Add to Home option ...

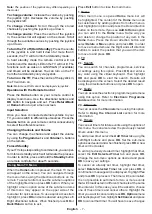
Page 9: ...size AA batteries Make sure the and signs match observe correct polarity Do not mix old and new batteries Replace only with same or equivalent type Place the cover back on A message will be displayed on the screen when the batteries are low and must be replaced Note that when the batteries are low the performance of the remote control may be impaired Batteries should not be exposed to excessive he...

Page 10: ...ay require you to upgrade PlayReady to access their content If you decline an upgrade you will not be able to access content that requires the upgrade The CI Plus Logo is a trademark of CI Plus LLP This product is protected by certain intellectual property rights of Microsoft Corporation Use or distribution of such technology outside of this product is prohibited without a license from Microsoft o...

Page 11: ... UK 0344 844 3899 For customers within Ireland 01289 8333 Monday Friday 9 00am 5 00pm Excluding public holidays For further support on your product please visit our website www panasonic co uk Direct Sales at Panasonic UK Order accessory and consumable items for your product with ease and confidence by phoning our Customer Comminications Centre Monday Friday 9 00am 5 00pm Excluding public holidays...

Page 12: ...i stereo jack Networked Standby Power Consumption W 2 TX 43HX600B TX 43HX600BZ TX 50HX600B TX 50HX600BZ TX 55HX600B TX 55HX600BZ TX 65HX600B TX 65HX600BZ Audio Output Power WRMS 10 THD 2 x 10 W 2 x 10 W 2 x 10 W 2 x 12 W Power Consumption W 120 W 135 W 140 W 200 W Weight kg 11 Kg 14 Kg 17 Kg 20 5 Kg TV Dimensions DxLxH with stand mm 221 x 964 x 614 221 x 1119 x 704 221 x 1233 x 769 251 x 1452 x 89...

Page 13: ...is TV is designed to meet the standards as of August 2019 of DVB T T2 MPEG2 MPEG4 AVC H 264 and HEVC H 265 digital terrestrial services DVB C MPEG2 MPEG4 AVC H 264 and HEVC H 265 digital cable services and DVB S MPEG2 MPEG4 AVC H 264 and HEVC H 265 digital satellite services Consult your local dealer for availability of DVB T T2 or DVB S services in your area Consult your cable service provider fo...

Page 14: ...w the on screen instruc tions for coloured button functions 9 Volume 10 Mute Completely turns off the volume of the TV 11 Numeric buttons Switches the channel enters a number or a letter in the text box on the screen switches the TV on when in standby mode 12 Language Switches among sound modes an alogue TV displays and changes audio subtitle language and turns subtitles on or off digital TV where...

Page 15: ...en using the wall mounting kit available from a third party in the market if not supplied we recommend that you plug all your cables into the back of the TV before mounting on the wall Insert or remove the CI module only when the TV is SWITCHED OFF You should refer to the module instruction manual for details of the settings The Each USB input of your TV supports devices up to 500mA Connecting dev...

Page 16: ...the entire text You will be able to change your preferences at any time later from the Settings System Privacy menu If the Internet Connection option is disabled Network Internet Settings screen will be skipped and not displayed If you have any questions complaints or comments regarding this privacy policy or its enforcement please contact by email at smarttvsecurity vosshub com Highlight Next and...

Page 17: ...available Note Do not turn off the TV while initializing first time installation Note that some options may not be available depending on the country selection Media Playback via USB Input You can connect 2 5 and 3 5 inch HDD with external power supply external hard disk drives or USB memory stick to your TV by using the USB inputs of the TV IMPORTANT Back up the files on your storage devices befo...

Page 18: ...c The TV remote is automatically able to perform the main functions after the connected HDMI source has been selected To terminate this operation and control the TV via the remote again press and hold the 0 Zero button on the remote control for 3 seconds You can disable the CEC functionality by setting the related option under the Settings System Device Settings menu accordingly The TV supports AR...

Page 19: ...ssing Left or Right buttons Vivid Blue White colour enhancement function that makes white colour more cooler in order to make more bright picture Set as On to enable Vivid Dimming Low Medium High and Off options are available While Vivid Dimming is active it will enhance contrast locally for each defined zone Noise Reduction If the signal is weak and the picture is noisy use the Noise Reduction se...

Page 20: ...DMI ARC Headphone Only and Lineout options will be available There will be no sound output except through the selected option and the headphone jack Note that if this option is set as Headphone Only TV speakers will be muted when headphone set is plugged in When you connect an external amplifier to your TV using the headphone jack you can select this option as Lineout If you have connected headpho...

Page 21: ...stations Satellite Searches and stores satellite stations Manual channel scan This feature can be used for direct broadcast entry Network channel scan Searches for the linked channels in the broadcast system D Aerial Searches for aerial network channels D Cable Searches for cable network channels Satellite Searches for satellite network channels Analogue fine tune You can use this setting for fine...

Page 22: ... see all available Audio Description menu options This feature is available only if the broadcaster supports it Dialogue Enhancement This feature provides sound postprocessing options for speech gated dialogue enhancement Off Low Medium and High options will be available Set according your preference Note This feature has an effect only if input audio format is AC 4 and this effect only applies to...

Page 23: ... automatically go into standby mode when not being operated This option can be set from 1 to 8 hours in steps of 1 hour You can also disable this option by setting as Off Biss Key Biss is a satellite signal scrambling system that is used for some broadcasts If you need to enter Biss key on a broadcast you can use this setting Highlight Biss Key and press OK to enter keys on the desired broadcast S...

Page 24: ...et Lock If this option is set to ON the internet using applications will be disabled Set to OFF to release these applications again This feature may not be available depending on the model of your TV and the selected country in the First Time Installation Set PIN Defines a new PIN number Default CICAM PIN This option will appear as greyed out if no CI module is inserted into the CI slot of the TV ...

Page 25: ...een Digital Teletext Press the Text button to view digital teletext information Operate it with the coloured buttons cursor buttons and the OK button The operation method may differ depending on the contents of the digital teletext Follow the instructions displayed on the digital teletext screen When the Text button is pressed again the TV returns to television broadcast MHEG Teletext With digital...

Page 26: ...put source It is possible that no device is connected Check the AV cables and connections from your device Check the device is switched on The Image is not centered in VGA source To have your TV automatically center the image enter the PC Position menu in Picture menu highlight Autoposition and press OK Wait for it to finish In order to set the position of the image manually you can use H Position...

Page 27: ... 720p 50Hz 60Hz O 1080i 50Hz 60Hz O 1080p 24Hz 25Hz 30Hz 50Hz 60Hz O 3840x2160p 24Hz 25Hz 30Hz 50Hz 60Hz O 4096x2160p 24Hz 25Hz 30Hz 50Hz 60Hz O X Not Available O Available In some cases a signal on the TV may not be displayed properly The problem may be an inconsistency with standards from the source equipment DVD Set top box etc If you do experience such a problem please contact your dealer and ...

Page 28: ...EVC H 265 MPEG Layer 1 2 3 AAC AC3 flv Sorenson Spark MPEG4 H 264 MPEG Layer 3 ADPCM AAC LC ogm ogg MPEG1 2 MPEG4 MP3 Vorbis asf wmv MPEG4 WMV3 VC1 WMA AMR NB rm rmvb RV30 RV40 COOK AAC LC HE AA webm VP9 VP8 OPUS Vorbis Picture File Formats File Extension Format jpg jpeg JPEG PJPEG bmp BMP gif GIF png PNG tiff tif TIFF webp Webp Audio File Formats File Extension Format Video Codec Audio mp3 mp3 ac...

Page 29: ...EXT dat mpg mpeg vob DVD Subtitle mp4 DVD Subtitle TEXT Supported DVI Resolutions When connecting devices to your TV s connectors by using DVI converter cable DVI to HDMI cable not supplied you can refer to the following resolution information 56Hz 60Hz 66Hz 70Hz 72Hz 75Hz 640x480 x x 800x600 x x x 1024x768 x x x 1280x768 x x 1280x960 x 1360x768 x 1366x768 x 1280x1024 x x x 1400x1050 x 1600x900 x ...

Page 30: ... DNS settings of the TV Highlight the desired one and press Left or Right button to change the setting from Automatic to Manual Now you can enter the Manual IP and or Manual DNS values Select the related item in the drop down menu and enter the new values using the numeric buttons of the remote Highlight Save and press the OK button to save settings when complete Wireless Connectivity To Connect t...

Page 31: ...tion speed Highlight Advanced Settings and press the OK button to open the advanced setting menu Use directional and numeric buttons to set Highlight Save and press the OK button to save settings when complete Other Information The status of the connection will be displayed as Connected or Not Connected and the current IP address if a connection is established Connecting to your mobile device via ...

Page 32: ...e from microwave ovens mobile telephones bluetooth devices or any other WLAN compatible devices Try changing the active channel on the WLAN router Internet Connection Not Available Audio Video Sharing Not Working If the MAC address a unique identifier number of your PC or modem has been permanently registered it is possible that your TV might not connect to the internet In such a case the MAC addr...

Page 33: ...ion Highlight Yes and press OK on the remote to confirm and proceed Integrated TV Player applications will be displayed Select one and press the OK button Then select a content that you want to play back and press the OK button to watch Catch up contents can also be accessed and played back directly from the TV Guide Refer to the section Electronic Programme Guide for more information Requirements...

Page 34: ...ollowing scenarios can occur The application can continue running The application can be terminated The application can be terminated and another autostart red button application can be launched HbbTV allows the applications to be retrieved both from broadband or broadcast The broadcaster may enable both ways or one of them If the platform does not have an operational broadband connection the plat...

Page 35: ... Room TV etc Choose an easy to say name You will say this name to tellAlexa which TV to control When you are done highlight OK and press OK Examples about the use of the feature will be displayed on the next screen Press OK to finish the setup If you carried out the setup after the first time instal lation you will return to the first screen of the setup wizard when you press OK In that case press...

Page 36: ...with Google Assistant Note Make sure that the devices are connected to the internet You can link only one TV to your account Example Commands Here are some voice commands that you can use to control the functions of your TV with Google Assistant Command Function turn on FN Powers on the TV turn off FN Powers off the TV pause on FN Pauses media playback resume on FN Resumes media playback stop on F...

Page 37: ...e terminal which is marked with the letter E or by the earth symbol or coloured green or green and yellow The wire which is coloured blue or black must be connected to the terminal which is marked with the letter N or coloured Black The wire which is coloured brown or red must be connected to the terminal which is marked with the letter L or coloured Red For continued protection against risk of fi...

Page 38: ......

Reviews: