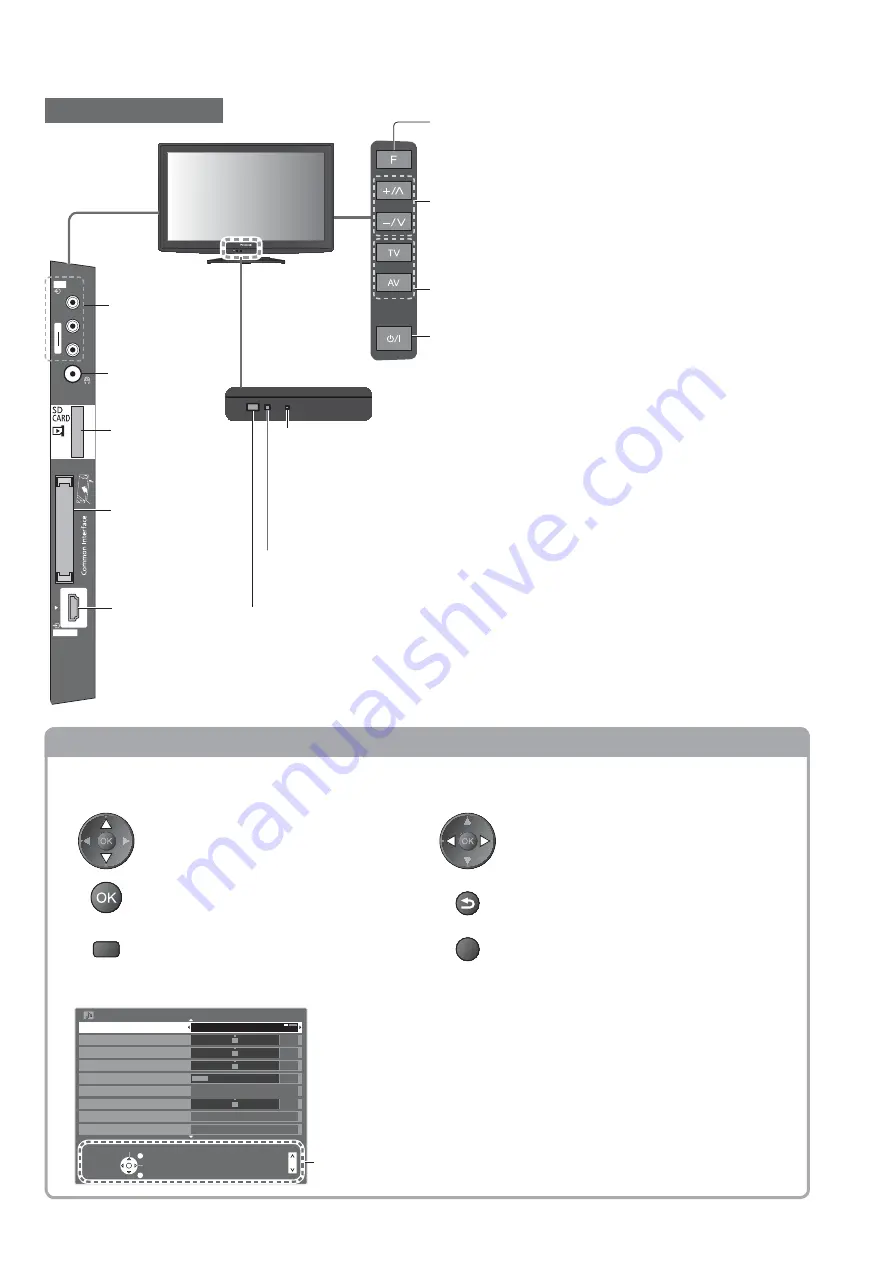
Identifying Controls
7
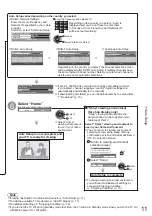
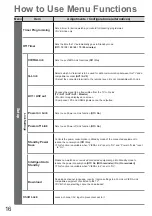
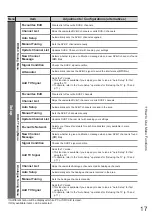
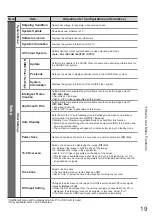
Using the On Screen Displays
Many features available on this TV can be accessed via the On Screen Display menu.
How to use remote control
Move the cursor / select the menu item
Move the cursor / adjust levels / select from
a range of options
Access the menu / store settings after
adjustments have been made or options
have been set
RETURN
Return to the previous menu
MENU
Open the main menu
EXIT
Exit the menu system and return to the
normal viewing screen
ON SCREEN HELP Instructions box - Operation guide
Example (Sound Menu):
Select
EXIT
Change
RETURN
Page up
Page down
Sound Menu
1/2
Mode
Music
Bass
Treble
Balance
Headphone Volume
Off
Surround
Volume Correction
Speaker Distance to Wall
Over 30cm
MPX
Stereo
0
11
0
0
0
Operation guide will help you.
AV3
R
L
V
HDMI 3
Changes the input mode
Headphones
jack
CI Slot
HDMI3 terminal
TV
C.A.T.S. (Contrast Automatic Tracking System) sensor
Senses brightness to adjust picture quality when “Eco Mode” in the Picture Menu is set
to “On” (p. 14)
Mains power On / Off switch
Switch On to turn on the TV or turn the TV to
Standby mode by the remote control
Increases or decreases the channel position by one.
When a function is already displayed, press to increase
or decrease the selected function.
When in Standby mode, switches TV On (Press for
about 1 second).
Function select
Volume / Contrast / Brightness / Colour / Sharpness /
Tint (NTSC signal) / Bass (“Music” or “Speech” mode in the
Sound Menu) / Treble (“Music” or “Speech” mode in the
Sound Menu) / Balance / Auto Setup
SD Card slot
AV3 terminals
Power and Timer LED
Standby: red
On: green
Timer Programming On: orange
Timer Programming or Direct TV Recording is in progress: orange (flash)
Standby with Timer Programming On or Direct TV Recording: red with orange flash
When using the remote control, indicates the TV has received a command.
Remote control signal receiver
Do not place any objects between the TV remote control signal receiver and remote control.


