


1
Precautions with regard to setting up
3
2
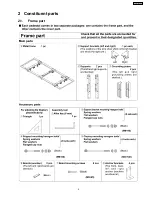
Constituent parts
5
2.1.
Frame part
5
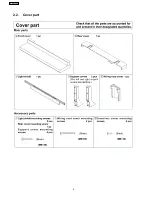
2.2.
Cover part
6
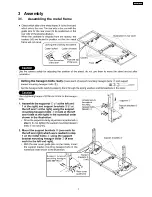
3
Assembly
7
3.1.
Assembling the metal frame
7
3.2.
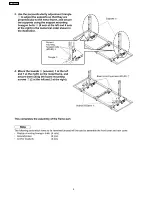
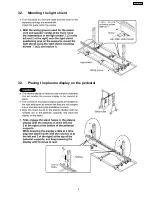
Mounting the light shield
9
3.3.
Placing the plasma display on the pedestal
9
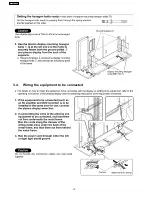
3.4.
Wiring the equipment to be connected
10
3.5.
Mounting the rear cover and wiring cord cover
11
3.6.
Mounting the support covers
11
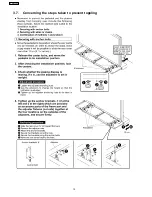
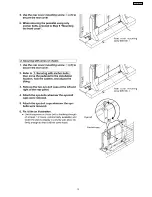
3.7.
Concerning the steps taken to prevent toppling
12
3.8.
Mounting the front cover
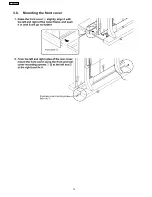
14
4
Replacement Parts List
15
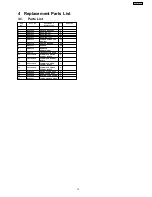
4.1.
Parts List
15
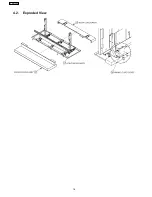
4.2.
Exploded View
16
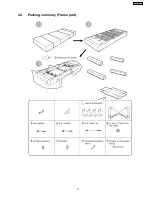
4.3.
Packing summary (Frame part)
17
4.4.
Packing summary (Cover part)
18
5
External dimensions drawing
19
CONTENTS
Page
Page
2
TY-ST103PF9
Summary of Contents for TY-ST103PF9
Page 3: ...1 Precautions with regard to setting up 3 TY ST103PF9 ...
Page 4: ...4 TY ST103PF9 ...
Page 5: ...2 Constituent parts 2 1 Frame part 5 TY ST103PF9 ...
Page 6: ...2 2 Cover part 6 TY ST103PF9 ...
Page 7: ...3 Assembly 3 1 Assembling the metal frame 7 TY ST103PF9 ...
Page 8: ...8 TY ST103PF9 ...
Page 9: ...3 2 Mounting the light shield 3 3 Placing the plasma display on the pedestal 9 TY ST103PF9 ...
Page 10: ...3 4 Wiring the equipment to be connected 10 TY ST103PF9 ...
Page 12: ...3 7 Concerning the steps taken to prevent toppling 12 TY ST103PF9 ...
Page 13: ...13 TY ST103PF9 ...
Page 14: ...3 8 Mounting the front cover 14 TY ST103PF9 ...
Page 16: ...4 2 Exploded View 16 TY ST103PF9 ...
Page 17: ...4 3 Packing summary Frame part 17 TY ST103PF9 ...
Page 18: ...4 4 Packing summary Cover part 18 TY ST103PF9 ...
Page 19: ...5 External dimensions drawing 19 TY ST103PF9 ...


