3
- 33
2WAY SYSTEM
Outdoor Unit Repair Procedures
3
9. Compressor
9-3. Removing Compressors
When removing and installing compressors, use sufficient caution to ensure that moisture or other substances
do not enter the refrigerant tubing system.
9-3-1. Removing Compressors (for all models)
(1) After retrieving refrigerant from the system, perform nitrogen gas
replacement on the service port of the gas side service valve.
(2) Remove the insulator that the compressor is surrounded.
(3) Remove the lid on the compressor terminal plate.
Then disconnect the power cablel and discharge sensor.
(4) Remove the cap at the compressor terminal plate. Disconnect the power cable.
(5) Remove the bolts (3 locations) on the foot of the compressor.
Then remove the washers and rubber spacers.
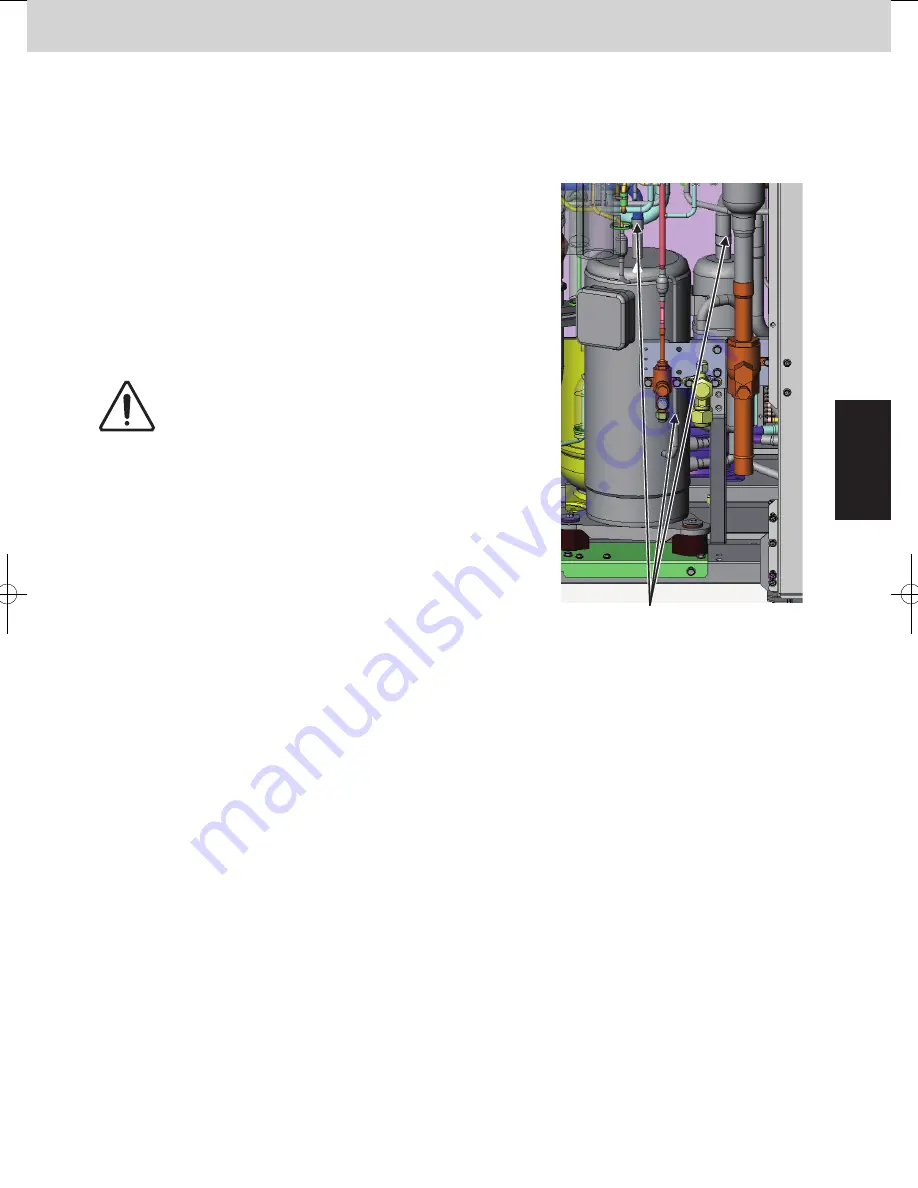
(6) Remove the welded parts (3 locations) as shown in the figure.
(7) Pull the compressor toward you.
INV compressor
Welded parts (3 locations)
(4) Remove the crankcase heater.
(6) Disconnect the tube-with-flare-nut using wrenches. At this time, cover the tube in place with waste cloth while
watching out for oil leaks.Then cap the disconnected tube and mount the flare nut on the compressor. Tighten
the flare nut with a seal bonnet(1/4") in it.
Oil may flow out. Attach the caps
promptly after removing the flare nuts.
Attach the caps to prevent oil from
flowing out after removing the flare nuts.
Protect the sensors and the surrounding
plates, rubber, lead wires, clamps, and
other items.
CAUTION
SM830204-05_2WAY SYS_new.indb 33
15/01/05 15:31:41
Summary of Contents for U-20ME1E81
Page 54: ... MEMO 1 46 ...
Page 102: ... MEMO 3 36 ...
Page 116: ... MEMO 4 14 ...
Page 177: ...201502 ...


