24
3.6.
Wall Mounting Construction
3.6.1.
Checking the wall
When mounting on a wall, consult with your building’s owner, caretaker or construction manager to determine if the wall strength is
sufficient to install this unit. For safety, install this unit only after thoroughly understanding the type of walls, the appropriate types of
screws and the construction method.
Caution:
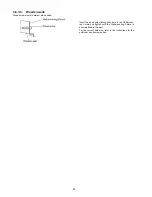
Do not attach the electronic board to mortared walls. Accidental electric leakage from the Wall-mounting Fixture screws to metal
laths or wire laths can cause heat, smoke or fire.
3.6.1.1.
Necessary Tools and Parts (not included with the product)
(1) Drill
(2) Screwdriver
(3) Measuring tape
(4) Level
(5) 8 screws (M6 size)
3.6.1.2.
Before Starting
1. Make sure that the wall is strong enough to support the following weight.
For UB-5838C: 1,373 N [140 kgf (309 lbf)]
For UB-5338C: 1,275 N [130 kgf (287 lbf)]
Note:
If necessary, reinforce the wall so that it is strong enough to support the unit.
2. Make sure that the location is large enough to accommodate the unit.
For UB-5838C: 1,125 mm (H)
×
1,998 mm (W) [3' 8 19/64" (H)
×
6' 6 43/64" (W)]
For UB-5338C: 1,125 mm (H)
×
1,636 mm (W) [3' 8 19/64" (H)
×
5' 4 27/64" (W)]
3. Make sure that the AC outlet is within 3 m (9' 10 1/8") of where the unit will be mounted and that it will not be behind the unit.
Summary of Contents for UB-5338C
Page 9: ...9 2 3 External View ...
Page 10: ...10 2 4 Control Panel Operation ...
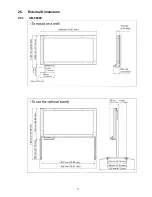
Page 11: ...11 2 5 External Dimensions 2 5 1 UB 5838C ...
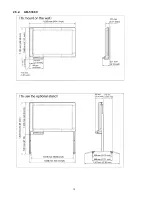
Page 12: ...12 2 5 2 UB 5338C ...
Page 101: ...101 13 Exploded View and Replacement Parts List ...
Page 102: ...102 13 1 Framework of Projected Diagram ...
Page 103: ...103 13 2 Cabinet Unit ...
Page 105: ...105 13 3 Motor Drive Unit Sensor Unit ...
Page 107: ...107 13 4 Control Box Unit ...
Page 109: ...109 13 5 Screen Feed Roller Unit ...
Page 111: ...111 13 6 Scanner Unit ...
Page 113: ...113 13 7 Panel Unit ...
Page 115: ...115 13 8 Frame Unit ...
Page 117: ...117 13 9 Rear Cover Unit ...
Page 119: ...119 13 10 Packing ...


