background image

28

Appendix

Replacing the Battery in the 
Electronic Pen (Optional 
Device)

When the electronic pen battery is low, the 
electronic pen status LED blinks green.


Continued 

use of the electronic pen can lead to poor 
performance. Replace the battery as soon as 
possible.

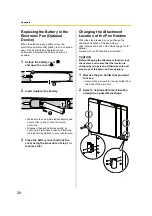
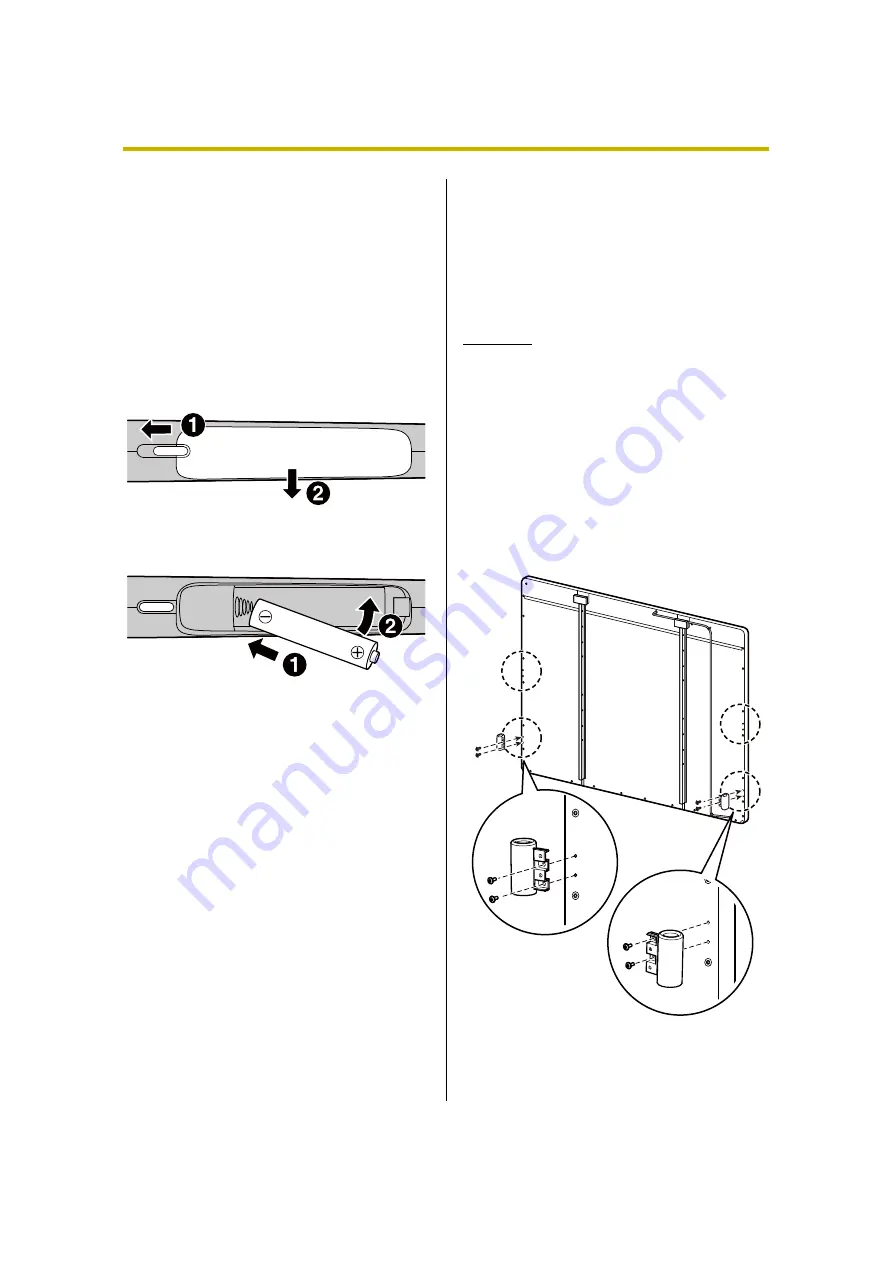
1

Unlock the battery cover (

1

), 

and open the cover (

2

).

2

Insert (replace) the battery.

Make sure to use a AAA alkaline battery, and 
ensure that 

+

 and 

-

 face the correct 

directions.

Dispose of expired batteries quickly, by 
covering the terminals in tape and following 
the disposal regulations in your country/area.

3

Close the battery cover and lock the 
cover using the procedure of step 1 in 
reverse order.

Changing the Attachment 
Location of the Pen Holders

When the stand is used, you can change the 
attachment location of the pen holders.
[See “Names and Uses of the Parts (page 13) for 
details.]
Necessary Tool: Phillips-head screwdriver

CAUTION

Before changing the attachment location, lock 
the casters, and ensure that the location is 
changed by two persons. Otherwise, this unit 
may move or fall down, and cause injury.

1

Remove the pen holder that you want 
to move.

Remove the 2 screws for the pen holder from 
the back of the main unit.

2

Select a desired attachment location 
among the 4 possible locations.

Summary of Contents for UB-T580

Page 1: ...refully and keep them for future reference Please refer to attached Installation Manual Installation performed by non authorized individuals could cause safety related problems with the operation of this equipment For U S A only To locate the closest authorized dealer in your area please call 1 800 449 8989 Stand and electronic pen are optional devices ...

Page 2: ...pplies to the stylus pen operation Electronic Pen Optional Device Use the electronic pen to draw or erase lines on the computer screen and to select line colors and other options Manipulate objects on the computer screen remotely by using the up and down buttons on the electronic pen Usage Scenarios For Education The elite Panaboard makes it easy to use teaching materials efficiently since it allo...

Page 3: ...e either registered trademarks or trademarks of Microsoft Corporation in the United States and or other countries IBM is a trademark of International Business Machines Corporation in the United States other countries or both Intel and Pentium are trademarks of Intel Corporation in the U S and other countries Adobe Reader and Flash are either registered trademarks or trademarks of Adobe Systems Inc...

Page 4: ...ications Operation of this equipment in a residential area is likely to cause harmful interference in which case the user will be required to correct the interference at his own expense Operating Instructions this document Safety precautions operating procedures and information on after sales service are provided Installation Manual for qualified service personnel Safety precautions on assembly as...

Page 5: ...l aging of the building or similar phenomena When the system storage device or any of its optional storage device is adversely effected by operational errors static electricity electrical noise vibration dust or when the power has been cut off due to malfunction repair or inadvertently the memory contents may be lost or changed Before operating the system make a point of reading the precautionary ...

Page 6: ...n Hazardous Substances in Electrical and Electronic Equipment adopted by Order 1057 of Cabinet of Ministers of Ukraine The Product is in conformity with the requirements of Technical Regulation on the Restriction Of the use of certain Hazardous Substances in electrical and electronic equipment TR on RoHS The content of hazardous substance with the exemption of the applications listed in the Annex ...

Page 7: ...ter Positioning the System Calibration 22 Viewing the Help of the Software 25 Uninstalling the Software 26 Uninstalling Panasonic Software Update Manager 26 Download the Latest Software 26 Appendix 27 Daily Care 27 Cleaning the elite Panaboard 27 Replacing the Penpoint of the Electronic Pen Optional Device 27 Replacing the Battery in the Electronic Pen Optional Device 28 Changing the Attachment Lo...

Page 8: ...ymbol is used to alert operators to a specific operating procedure that must be emphasized in order to operate the unit safely WARNING CAUTION Stop operation immediately if the unit emits smoke excessive heat abnormal smell or unusual noise These conditions can cause fire or electric shock Immediately unplug the USB cable and contact your dealer for service During thunderstorms do not touch the un...

Page 9: ...e lens In addition turn the projector off and unplug the power cord when you are away from the projector Use only the specified type of battery Using the incorrect type of battery can result in overheating burning or leakage of battery acid Make sure that the battery is installed with the correct polarity as indicated on the battery holder Incorrectly installed batteries may burst or leak resultin...

Page 10: ...wise this unit may fall down and cause injury After installing or moving the unit lock the casters and set the fall prevention extension legs CAUTION Locking the casters Push to lock If the unit falls down or gets damaged unplug the USB cable Otherwise it may cause fire or electric shock Do not lean against the unit even if the unit is mounted on the wall When using the stand be sure to watch your...

Page 11: ...esignated box for collection Contacting with other metals or batteries may cause the battery to leak generate heat rupture or ignite Figure 1 Figure 1 How to isolate a battery Do not disassemble remove the battery involucre or deform with pressure Gas generated from the battery may irritate the throat distort the battery seals or cause a short circuit which may lead to leakage heat generation rupt...

Page 12: ... country area Stand and electronic pen are optional devices page 33 Replacement penpoints for the electronic pen are optional devices page 33 About Using the DVD ROM Software DVD ROM 1 Stylus Pen 1 Operating Instructions this document 1 Warranty 1 Installation Manual 1 Cable Holder 3 Wall Mounting Plate 1 each Pen Holder 2 Screw 7 Cable Clamp 1 Flat Washer 4 To prevent damage to the DVD ROM Do not...

Page 13: ...ons Ask the qualified service personnel at the time of installation For details of the attachment location refer to Changing the Attachment Location of the Pen Holders page 28 Status LED Lights green when the power is on Lights red when an error occurs Undetectable Area The position of your finger or the electronic pen in this area cannot be detected Make sure that the projected image does not ove...

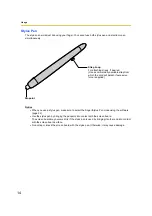
Page 14: ...Use the stylus pen by bringing the penpoint into contact with the screen board The screen board may become dirty if the stylus pen is used by bringing its other end into contact with the screen board surface Do not tap or knock the screen board with the stylus pen Otherwise it may cause damage Strap Loop For attaching straps if desired Use a commercially available strap from which the cord will de...

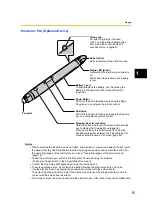
Page 15: ...act with the screen board surface Do not tap or knock the screen board with the electronic pen Otherwise it may cause malfunction Strap Loop For attaching straps if desired Use a commercially available strap from which the cord will detach if excessive force is applied Status LED green Lights when the electronic pen power is on Blinks when the electronic pen battery is low Down Button Performs the...

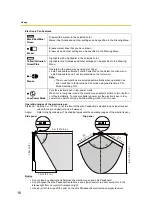
Page 16: ... lines that you have drawn Eraser size and other settings can be specified in the Drawing Menu Yellow Yellowish Green Pink Highlights with a highlighter in the selected color Highlighter line thickness and other settings can be specified in the Drawing Menu Mouse Operates in the same way as using your finger elite Panaboard software Function selected on the Select Function menu elite Panaboard boo...

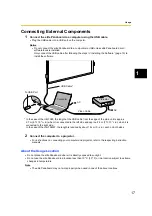
Page 17: ...g instruction manuals About the Usage Location Do not place the elite Panaboard where it is directly exposed to sunlight Do not use the elite Panaboard in a location less than 10 C 50 F or in a location subject to extreme changes in temperature Note The elite Panaboard may not work properly when used in one of the above locations USB Cable To USB Port Video Cable Projector Computer AC AC In the ca...

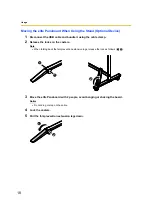
Page 18: ...able clamp 2 Release the locks on the casters Note When folding back the fall prevention extension legs release the lock as follows 1 2 3 Move the elite Panaboard with 2 people avoid banging or shaking the board Notice Do not drag or step on the cable 4 Lock the casters 5 Pull the fall prevention extension legs down 1 1 2 2 1 ...

Page 19: ...isplayed make sure that your computer meets the requirements 5 Click Install elite Panaboard on the Menu screen 6 If you agree to the terms in the END USER LICENSE AGREEMENT select I accept the terms in the license agreement and then click Next In Windows Vista if the User Account Control window is displayed click Continue to continue with the installation In Windows 7 if the User Account Control ...

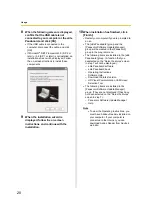
Page 20: ...ard group and the Panasonic Software Update Manager group will be created in the Panasonic group in the program menu The following items are installed in the elite Panaboard group A function that you deselected on the Select Features screen in step 7 will not be displayed elite Panaboard software elite Panaboard book Operating Instructions Software Help Download the latest version HD Visual Commun...

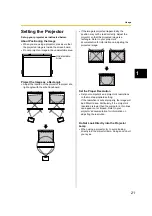
Page 21: ...so that the projected image is a rectangle Refer to your projector s documentation for information on adjusting the projected image Set the Proper Resolution Set your computer s and projector s resolutions to the most appropriate setting If the resolution is not set properly the image will be difficult to see Particularly if the projector s resolution is lower than the computer s thin lines can ap...

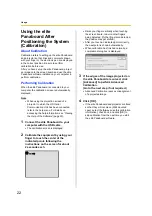
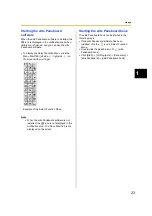
Page 22: ...nnect the elite Panaboard to your computer with the USB cable The calibration screen is displayed 2 Calibrate the equipment by using your finger to touch the center of the indicated points following the instructions on the screen for about 2 seconds each Raise your finger vertically when touching the screen board to avoid other fingers being detected If other fingers are detected the position may ...

Page 23: ...h your finger Note When the elite Panaboard software is not installed the icon is not displayed in the notification area The Menu Start Tab is not displayed on the screen Starting the elite Panaboard book The elite Panaboard book can be started in the following ways If the elite Panaboard software has been installed click the icon in Select Function Menu Double click the desktop icon of elite Pana...

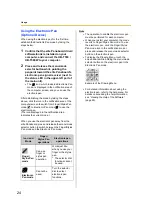
Page 24: ...pen away from the elite Panaboard press and release the menu mode selector button to switch between the Finger Stylus Pen mode and the Electronic Pen mode Note The operation to enable the electronic pen must be performed for each computer When you restart your computer the mode reverts to Finger Stylus Pen mode To use the electronic pen click the Finger Stylus Pen mode icon in the notification are...

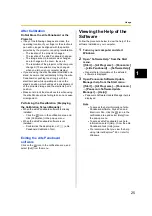
Page 25: ...ually When the elite Panaboard software is already installed Click the icon in the notification area and click Calibration in the pop up menu When the elite Panaboard software is not installed Double click the desktop icon of elite Panaboard Calibration Tool Exiting the elite Panaboard software Click on the icon in the notification area and select Exit from the menu Viewing the Help of the Softwar...

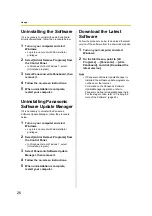
Page 26: ...n account with Administrator privileges 2 Select Add or Remove Programs from the Control Panel In Windows Vista or Windows 7 select Uninstall a program 3 Select Panasonic Software Update Manager then remove it 4 Follow the on screen instructions 5 When uninstallation is complete restart your computer Download the Latest Software Follow the procedure below to download the latest version of the soft...

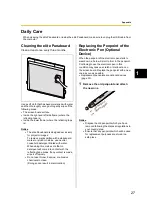
Page 27: ...his make sure that no detergent will come into contact with the reflecting tape areas If any contact is made wipe it off quickly Do not use thinner benzine or abrasive chemicals to clean Doing so can result in discoloration Replacing the Penpoint of the Electronic Pen Optional Device When the penpoint of the electronic pen starts to wear down a hole will start to form in the penpoint Continuing to...

Page 28: ...osal regulations in your country area 3 Close the battery cover and lock the cover using the procedure of step 1 in reverse order Changing the Attachment Location of the Pen Holders When the stand is used you can change the attachment location of the pen holders See Names and Uses of the Parts page 13 for details Necessary Tool Phillips head screwdriver CAUTION Before changing the attachment locat...

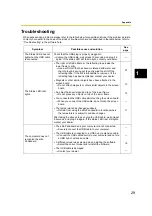
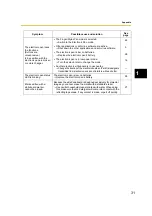
Page 29: ... other similar objects have been attached to the screen board Do not attach magnets or other similar objects to the screen board 13 An object has been placed on top of the lower frame Do not place any objects on top of the lower frame 13 You connected the USB cable while touching the screen board When you connect the USB cable do not touch the screen board The temperature has changed suddenly Refr...

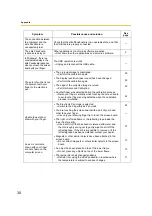
Page 30: ...ically when touching the screen board to avoid other fingers being detected when the calibration process is initiated 22 Unable to operate or draw with your finger The Electronic Pen mode is selected Switch to the Finger Stylus Pen mode 24 You are touching the screen board with a part of your hand other than your finger Use only your drawing finger tip to touch the screen board The right or left s...

Page 31: ...lector dial to change the mode 16 Another electronic whiteboard is in use nearby Change the location of the electronic board so that infrared signals transmitted from electronic pens do not interfere with each other The electronic pen status LED is blinking The electronic pen is low on batteries Replace the electronic pen s battery 28 Marks written with a whiteboard marker cannot be erased Because...

Page 32: ...pen holders have been attached on both sides of the main unit 1 352 mm 1 713 mm 74 mm 4 ft 5 1 4 in 5 ft 7 7 16 in 2 15 16 in Weight 23 kg 50 7 lbs Input Unit Screen Board Size Height Width 1 175 mm 1 582 mm 3 ft 10 1 4 in 5 ft 2 5 16 in Interactive Features Effective Area Display aspect ratio Height Width 3 4 1 175 mm 1 567 mm 3 ft 10 1 4 in 5 ft 1 11 16 in 77 in diagonal Model Number UB T580W Ge...

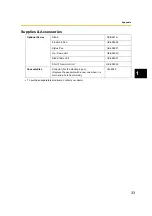
Page 33: ...er Optional Device Stand KX B061 A Electronic Pen UE 608020 Stylus Pen UE 608021 Up Down Unit UE 608030 Stand Table Unit UE 608031 Short Throw Arm Unit UE 608032 Consumables Penpoint For the electronic pen Replace the penpoint with a new one when it is worn and a hole has formed UG 6020 ...

Page 34: ...e where you purchased the items Penalties may be applicable for incorrect disposal of this waste in accordance with national legislation For business users in the European Union If you wish to discard electrical and electronic equipment please contact your dealer or supplier for further information Information on Disposal in other Countries outside the European Union These symbols are only valid i...

Reviews: