


Troubleshooting
142
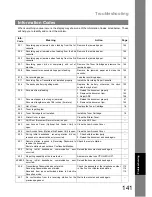
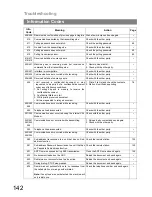
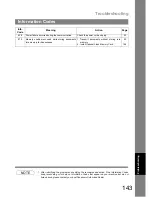
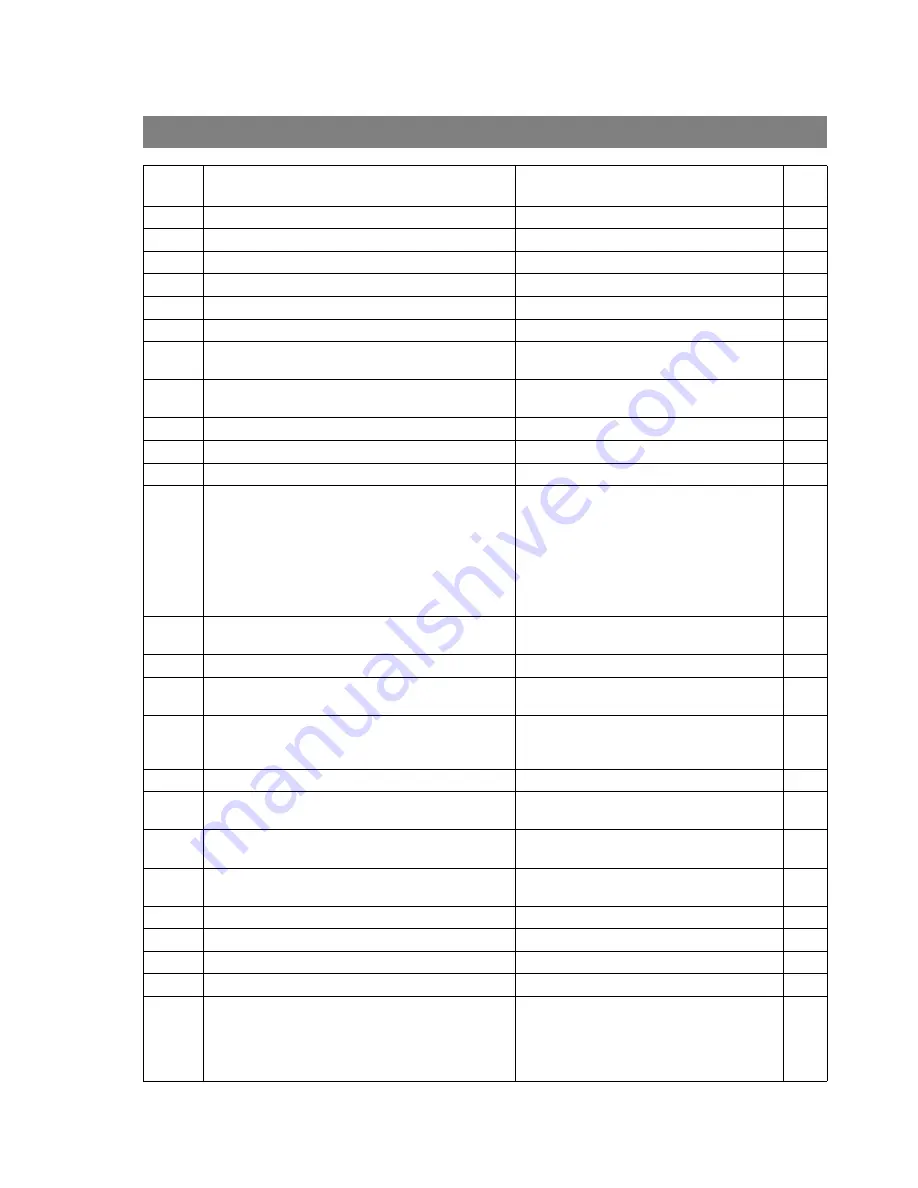
Information Codes
408/409 Remote side confirmation of previous page is illegible. Wait a few minutes and send again.
--
410
Communication aborted by the transmitting side.
Check with the other party.
--
411
Polling password does not match.
Check the polling password.
69
412
No data from the transmitting side.
Check with the other party.
--
414
Polling password does not match.
Check the polling password.
69
415
Polling transmission error.
Check the polling password.
69
416/417
418/419
Received data has too many errors.
Check with the other party.
--
420/421 Machine goes to receiving mode, but receives no
command from the transmitting side.
1. Remote side misdial.
2. Check with the other party.
--
422/427 Interface is incompatible.
Check with the other party.
--
430/434 Communication error occurred while receiving.
Check with the other party.
--
436/490 Received data has too many errors.
Check with the other party.
--
456
• Unit received a confidential document or was
requested to be polled of a confidential document
under any of following conditions.
1. Not enough space in memory to receive the
confidential document.
2. Confidential Mailbox is full.
3. While printing received document.
• Unit was requested to relay a document.
1. Print a File List and check the contents.
2. Wait until unit finishes printing.
78
492/493
494
Communication error occurred while receiving.
Check with the other party.
--
495
Telephone line disconnected.
Check with the other party.
--
501/502 Communication error occurred using the internal V.34
Modem.
Check with the other party.
--
540/541
542/543
544
Communication error occurred while transmitting.
1. Reload the document and send again.
2. Check with the other party.
--
550
Telephone line disconnected.
Check with the other party.
--
552/553
554/555
Communication error occurred while receiving.
Check with the other party.
--
580
Sub-address transmission to a unit that has no Sub-
address function.
Check the remote station.
125
581
Sub-address Password transmission to a unit that has
no Password Sub-address function.
Check the remote station.
125
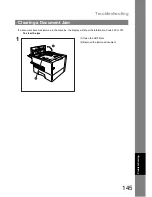
601
ADF Door was opened during ADF transmission.
Close the ADF Door and send again.
145
623
No document loaded on the ADF.
Reload the document and send again.
--
630
Redial was not successful due to a busy line.
Reload the document and send again.
--
631
During dialing, STOP was pressed.
Reload the document and send again.
--
634
Redial was not successful due to no response from
the called station or wrong number dialed.
Note:
If busy tone was not detected, the machine will
only redial once.
Check the telephone number and send again.
--
Info.
Code
Meaning
Action
Page
Summary of Contents for UF-890/990
Page 8: ...memo 8 ...
Page 169: ...169 memo ...


