background image

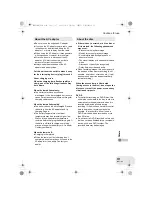
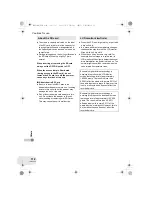
Indications

Oth

er

s

100

LSQT1180

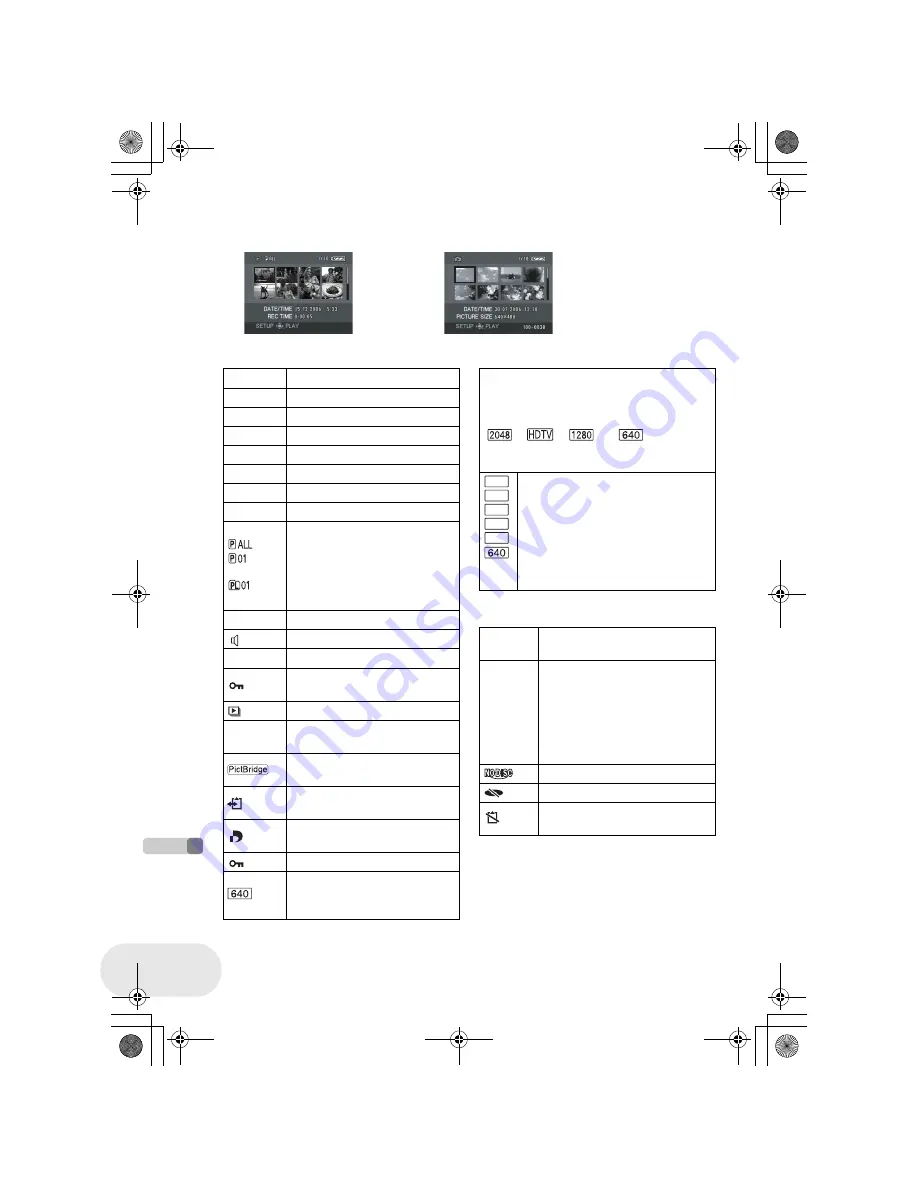
Playback indications

Confirmatory indications

Motion picture playback

Still picture playback

1

Playback

;

Pause

5

/

6

Cue/Review playback

7

/

8

Last/first scene paused

9

/

:

Skip playback

D

/

E

Slow motion playback

;1

/

2;

Frame-by-frame playback

0h00m00s

Motion picture playback time

Play mode
All scenes on the disc displayed
Scenes recorded on the selected 
date displayed
Scenes in the selected playlist 
displayed

No.10

Scene number

Volume adjustment

R

Resume playback

Contents that have been 
protected on another device.

Slide show playback

100-0001

Still picture folder/file number 
display

When a printer compatible with 
PictBridge is connected

Accessing the card (When 
connected to a computer)

1

DPOF already set 
(to more than 1)

Locked still pictures

Number of recording pixels for 
still pictures
640

k

480

For pictures not recorded with this unit, the 
size display is determined as follows 
according to the number of horizontal pixels. If 
this number is 2048, 1920, 1280 or 640, then 
[

],  [

],  [

]  or  [

]  will  be 

displayed respectively regardless of the 
number of vertical pixels.

2048 pixels or more
1600 or more, less than 2048 pixels
1280 or more, less than 1600 pixels
1024 or more, less than 1280 pixels
800 or more, less than 1024 pixels
640 or more, less than 800 pixels
(The size is not displayed at under 
640 pixels.)

0

 or

––

The built-in battery is low. (

l

38)

°

The warning/alarm indication 
appears when LCD monitor is 
rotated towards the lens side. 
Return the direction of the LCD 
monitor to normal position and 
check the warning/alarm 
indication.

No disc is inserted.

Unusable disc

No SD card is inserted/unusable 
card.

QXGA
UXGA
SXGA

XGA

SVGA

LSQT1180(ENG).book  100 ページ  2007年1月29日 月曜日 午後3時25分

Summary of Contents for VDR-D160EB

Page 1: ...Cover Operating Instructions DVD Video Camera Model No VDR D160EB Before use please read these instructions completely LSQT1180 A LSQT1180 ENG book 1 ページ 2007年1月29日 月曜日 午後3時25分 ...

Page 2: ...Blue The wire which is coloured Brown must be connected to the terminal which is marked with the letter L or coloured Brown or Red WARNING DO NOT CONNECT EITHER WIRE TO THE EARTH TERMINAL WHICH IS MARKED WITH THE LETTER E BY THE EARTH SYMBOL Ó OR COLOURED GREEN OR GREEN YELLOW THIS PLUG IS NOT WATERPROOF KEEP DRY Before use Remove the connector cover How to replace the Fuse The location of the fus...

Page 3: ...TRIC SHOCK OR FIRE HAZARD DUE TO OVERHEATING ENSURE THAT CURTAINS AND ANY OTHER MATERIALS DO NOT OBSTRUCT THE VENTILATION VENTS DO NOT OBSTRUCT THE UNIT S VENTILATION OPENINGS WITH NEWSPAPERS TABLECLOTHS CURTAINS AND SIMILAR ITEMS DO NOT PLACE SOURCES OF NAKED FLAMES SUCH AS LIGHTED CANDLES ON THE UNIT DISPOSE OF BATTERIES IN AN ENVIRONMENTALLY FRIENDLY MANNER The socket outlet shall be installed ...

Page 4: ...aluable resources and prevent any potential negative effects on human health and the environment which could otherwise arise from inappropriate waste handling Please contact your local authority for further details of your nearest designated collection point Penalties may be applicable for incorrect disposal of this waste in accordance with national legislation For business users in the European U...

Page 5: ...emark miniSD Logo is a trademark The Movie Camera uses copyright protected technologies and is protected by the patented technologies and intellectual properties of Japan and the U S To use these copyright protected technologies authorization of the Macrovision Company is required It is prohibited to disassemble or modify the Movie Camera Manufactured under license from Dolby Laboratories Dolby an...

Page 6: ...5 Setting date and time 37 Adjusting LCD monitor viewfinder 39 Recording Before recording 40 Recording motion pictures 41 Changing the recording mode of the motion picture 43 Recording still pictures 44 Various recording functions 46 Zoom in out function 46 Recording yourself 47 Soft skin mode 48 Fade in fade out function 49 Backlight compensation function 51 Self timer recording 52 Wind noise red...

Page 7: ...otecting a disc 87 Displaying disc information 88 With other products With a TV 89 Playback on TV 89 With a DVD recorder player 90 Playback on a DVD recorder DVD player computer etc 90 Copying recordings onto a DVD recorder s hard disk 91 With a VCR 92 Dubbing images onto other video devices 92 With a printer PictBridge 93 Others Menus 96 Menu list 96 Setup menu 98 Indications 99 Indications 99 Me...

Page 8: ...need to search for the recording start position The new recording will not overwrite any previously recorded scene Easy playback l 61 Recorded scenes are displayed as thumbnails You can easily search for the scenes you want to watch LSQT1180 ENG book 8 ページ 2007年1月29日 月曜日 午後3時25分 ...

Page 9: ...le with 8 cm discs to play back the scenes recorded with this unit on it If you have a DVD recorder with hard disk you can dub scenes recorded on DVD RAM or DVD RW VR format with this unit to the hard disk If you insert a DVD RW or a DVD R recorded on this unit that has not been finalized in another device such as a DVD recorder or a computer the disc may become unusable Be sure to finalize the di...

Page 10: ... Centre Monday Thursday 9 00 a m 5 30 p m Friday 9 30 a m 5 30 p m Excluding public holidays Or go on line through our Internet Accessory ordering application at www panasonic co uk Most major credit and debit cards accepted All enquiries transactions and distribution facilities are provided directly by Panasonic UK Ltd It couldn t be simpler Also available through our Internet is direct shopping ...

Page 11: ...C00015 AC cable K2CT3CA00004 RJA0053 3X Optional accessories AC adaptor VW AD11EB Tripod VW CT45E Battery pack lithium CGA DU12 1150 mAh 8 cm DVD RAM disc single sided LM AF30E Battery pack lithium CGA DU14 1360 mAh 8 cm DVD RAM disc double sided LM AF60E Battery pack lithium CGA DU21 2040 mAh 8 cm DVD RW disc single sided LM RW30E Wide conversion lens VW LW3007E 8 cm DVD RW disc double sided LM R...

Page 12: ... Status indicator l 25 13 Mode dial l 29 14 Joystick l 30 Move up down left or right to select items Press the centre to enter the selection 15 Delete button l 66 77 79 16 Menu button MENU l 35 17 Battery holder l 22 18 Eyepiece corrector knob l 39 19 Zoom lever W T l 46 Volume lever sVOLr l 62 20 Photo shot button l 44 21 Card access lamp l 28 22 Card slot cover l 28 23 Card slot l 28 24 Tripod r...

Page 13: ...t l 26 33 Grip belt l below Adjust the belt length so it fits your hand Adjust the belt length and the pad position 1 Flip the belt 2 Adjust the length 3 Fix the belt Due to limitations in LCD production technology there may be some tiny bright or dark spots on the LCD monitor screen However this is not a malfunction and does not affect the recorded picture 26 28 27 29 30 31 32 33 Using grip belt ...

Page 14: ... cap press the knobs firmly If the lens cap cord has come off Pass the end of the lens cap cord through the attached eye on the lens cap Then pass the lens cap through the loop made by itself and pull tight This is a hole for attaching the unit to the optional tripod Please carefully read the operating instructions for how to attach the tripod to the unit When the tripod is used the card slot cove...

Page 15: ...r preference It can rotate up to 180o A towards the lens or 90o B towards the viewfinder The brightness and colour level of the LCD monitor can be adjusted from the menu l 39 If it is forcibly opened or rotated the unit may be damaged or fail When the LCD monitor is rotated by 180o towards the lens when recording yourself the LCD monitor and the viewfinder will be simultaneously activated Pull out...

Page 16: ...haracteristic Rewritable disc Rewritable disc One time recording disc 1 1 By formatting the disc it can be used repeatedly l 83 One time recording disc Display on the screen Indication in these instructions RAM RW VR RW V R Functions Editing on this unit Playback on other products 2 2 DVD players and DVD recorders that support 8 cm discs 3 3 Playback is possible on compatible products 4 4 Must be ...

Page 17: ...corded on this unit may not be playable on other products Recording on DVD R in DVD Video Recording format is not supported When using DVD RW or DVD R do not perform the following as doing so may make the disc unusable Record on a disc with other products after recording on it with this unit Record on a disc with this unit after recording on it with other products Insert an un finalized disc in an...

Page 18: ...his unit the screen on the right appears Select YES then press the joystick 2 Select format type then press the joystick 3 When the confirm screen appears select YES then press the joystick To change the format type format the disc again l 83 If the disc is formatted then all the data recorded on the disc will be erased When using brand new DVD RW VIDEO DVD Video format VR DVD Video Recording form...

Page 19: ...able to use the SD card l 84 We recommend that you use a Panasonic brand SD card When the write protect switch A on SD card is locked no recording deletion or editing will be possible on the card Keep the Memory Card out of reach of children to prevent swallowing A MultiMediaCard cannot be used on this unit Cards that you can use with this unit Card type SD Memory Card SDHC Memory Card Capacity 8 ...

Page 20: ...ful about scratches and dirt Do not attach labels or stickers to discs This may cause disc warping and un balanced rotation rendering it unusable Write on the label side of the disc only with a soft oil based felt pen Do not use ballpoint pens or other hard writing implements Do not use record cleaning sprays benzine thinner static electricity prevention liquids or any other solvent Do not use scr...

Page 21: ...p Charging Goes off Charging completed Flashing The battery is over discharged discharged excessively In a while the lamp will light up and normal charging will start When the battery temperature is excessively high or low the CHARGE lamp flashes and the charging time will be longer than normal Battery charging time l 23 We recommend using Panasonic batteries l 11 If you use other batteries we can...

Page 22: ...e to turn off the power on this unit and check that the status indicator and the access lamp are both off before removing the battery Fitting the battery Removing the battery CAUTION Danger of explosion if battery is incorrectly replaced Replace only with the same or equivalent type recommended by the manufacturer Dispose of used batteries according to the manufacturer s instructions LSQT1180 ENG ...

Page 23: ...own in the table are approximations Charging time and recordable time Battery model number Voltage capacity Charging time Supplied battery CGA DU12 optional 7 2 V 1150 mAh 2 h 25 min CGA DU14 optional 7 2 V 1360 mAh 2 h 45 min CGA DU21 optional 7 2 V 2040 mAh 3 h 55 min Battery model number Voltage capacity Recording mode Maximum continuously recordable time Intermittent recordable time Supplied b...

Page 24: ...r in low temperatures We recommend charging a spare battery for use when recording The unit is in the standby condition when the AC adaptor is connected The primary circuit is always live as long as the AC adaptor is connected to an electrical outlet 1 Connect the AC cable to the AC adaptor and the AC outlet 2 Connect the DC cable to the AC adaptor 3 Connect the DC cable to this unit Do not use th...

Page 25: ... How to turn off the power A B When the power is turned on for the first time after changing the disc or battery the unit carries out a recognition procedure to check that there are no problems with the disc This takes approximately 25 seconds with DVD RAM If you want to start using the unit as soon as you turn on the power do the following 1 Turn on the power 2 After READING DISC disappears from ...

Page 26: ...s after the ACCESS PC lamp blinks the cover of the disc compartment will open slightly 2 Open the cover of the disc compartment by hand and insert remove the disc Inserting disc Fit the disc onto the spindle in the centre A Recording playback side B Pickup lens Removing disc While pressing down on the spindle grasp the edge of the disc and gently lift it out 3 Push the section marked PUSH CLOSE on...

Page 27: ... playback side facing the inside Do not allow the recording playback side to become dirty or scratched Do not remove the battery pack or disconnect the AC adaptor while removing the disc or until power is completely turned off If you do the cover will not open If this happens reattach the battery pack or reconnect the AC adaptor slide the DISC EJECT lever once and then release it A repair disc mes...

Page 28: ...ard press the centre of the SD card and then pull it straight out 3 Securely close the card slot cover Concerning the SD card Electrical noise static electricity or failure of this unit or the SD card may damage or erase the data stored on the SD card We recommend saving important data on a computer Card access lamp When this unit accesses the SD card reading recording playback erasing etc the acc...

Page 29: ...and set the desired mode pictograph to the position shown in the illustration Disc recording mode l 41 Use this to record motion pictures on a disc Disc playback mode l 61 Use this to play back motion pictures on a disc Card recording mode l 44 Use this to record still pictures on an SD card Card playback mode l 64 Use this to play back still pictures on an SD card LSQT1180 ENG book 29 ページ 2007年1月...

Page 30: ...stick and icons will be displayed on the screen Each press switches the display as follows depending on the mode In the disc playback mode or the card playback mode the icons will be automatically displayed on the screen Basic operations 1 Select by moving up 2 Select by moving down 3 Select by moving left 4 Select by moving right 5 Press the joystick to select the item Joystick and screen display...

Page 31: ...t mode is selected 59 4 White balance 58 Shutter speed 60 Iris or gain value 60 s r 21 White balance mode selection manual adjustments 57 58 60 Disc playback mode A The operation icon is off Icon Direction Function Page 1 3 Playback pause 61 4 Stop playback and show thumbnails 61 2 Rewind skip during playback 61 2 Reverse slow frame playback during pause 62 9 1 Fast forward skip during playback 61...

Page 32: ... mode AUTO MANUAL FOCUS switch is set to MANUAL A The operation icon is off Icon Direction Function Page 1 2 4 Soft skin mode 48 Ø 2 Self timer 52 ª 1 Backlight compensation 51 2 2 3 Manual white balance set Only when manual white balance adjustment mode is selected 59 4 White balance 58 Shutter speed 60 Iris or gain value 60 s r 21 White balance mode selection manual adjustments 57 58 60 A A LSQT...

Page 33: ...s 64 E 2 Playback previous picture 64 D 1 Playback next picture 64 Card playback mode When SLIDE SHOW is selected A The operation icon is off Icon Direction Function Page 1 3 Slide show start pause 65 4 Stop playback and show thumbnails 64 E 2 Playback previous picture during pause 64 D 1 Playback next picture during pause 64 A A LSQT1180 ENG book 33 ページ 2007年1月29日 月曜日 午後3時25分 ...

Page 34: ...itching the language You can switch the language on the screen display or the menu screen 1 Press the MENU button then select LANGUAGE and press the joystick 2 Select English and press the joystick LSQT1180 ENG book 34 ページ 2007年1月29日 月曜日 午後3時25分 ...

Page 35: ...ng on the position of the mode dial Do not switch the mode dial when the menu is displayed 2 Move the joystick up or down in order to select the desired top menu A 3 Move the joystick right or press the joystick The submenu B is displayed 4 Move the joystick up or down in order to select the submenu item C Current settings on menus MENU A B C LSQT1180 ENG book 35 ページ 2007年1月29日 月曜日 午後3時25分 ...

Page 36: ...he desired item 7 Press the joystick to enter the selection To get back to the previous screen Move the joystick left To exit the menu screen Press the MENU button The menu screen does not appear during recording or playing You cannot start other operations while the menu screen appears MENU LSQT1180 ENG book 36 ページ 2007年1月29日 月曜日 午後3時25分 ...

Page 37: ... Move the joystick left or right to select the item to be set Then move the joystick up or down to set the desired value The year will change as follows 2000 2001 2099 2000 The 24 hour system is used to display the time 3 Press the joystick to enter the selection After pressing the MENU button to finish the setting check the date and time display The clock function starts at 00 seconds LSQT1180 EN...

Page 38: ...uilt in lithium battery runs down After charging the battery using the steps below set the clock Connect the AC adaptor to this unit or place the battery on this unit and the built in lithium battery will be recharged Leave this unit as is for approx 24 hours and the battery will save the date and time for approx 6 months Even if the OFF ON switch is set to OFF the battery is still being recharged...

Page 39: ...the LCD monitor EVF SET Brightness of the viewfinder In order to adjust the brightness of the viewfinder close the LCD monitor and the viewfinder will be activated When the LCD monitor is rotated by 180 towards the lens the brightness of the LCD monitor cannot be adjusted These settings will not affect the images actually recorded Adjust the focus by sliding the eyepiece corrector knob You can adj...

Page 40: ...hands 4 Keep your arms near your body 5 Slightly open your legs When you are outdoors record pictures with the sunlight behind you If the subject is backlit it will become dark in the recording When recording make sure your footing is stable and there is no danger of colliding with another person a ball etc Basic camera positioning 4 5 1 2 3 LSQT1180 ENG book 40 ページ 2007年1月29日 月曜日 午後3時25分 ...
Page 41: ...ording To end the recording Press the recording start stop button again to pause recording and are red during recording Do not move this unit until is green The images recorded between pressing the recording start stop button to start recording and pressing it again to pause recording become one scene When about 5 minutes has passed without any operation this unit automatically turns off to preven...

Page 42: ...o 0h00m00s A Remaining time left for recording When the remaining time is less than 1 minute R 0h00m flashes red B Recording mode C Recording time elapsed While motion picture recording is in progress do not disconnect the battery or AC adaptor If you do a repair disc message may be displayed when the power is turned back on l 102 About recovery Screen indications in the disc recording mode R 0h02...

Page 43: ...ttern noise may appear on a playback image in the following cases When there is a complicated pattern in the background When the unit is moved too much or too fast When a subject with sharp movements has been recorded Particularly if REC MODE was set to during recording Changing the recording mode of the motion picture Recording modes and recordable time available for the motion picture Recording ...

Page 44: ...D card is set to LOCK it cannot be used for recording If set PICT QUALITY mosaic pattern noise may appear on a playback image depending on the picture content While the card access lamp is lit do not perform the following as doing so may damage the SD card or the data on the card Turn the unit off Insert or remove the SD card Operate the mode dial Another product may degrade or not play back still...

Page 45: ... BASIC PICT QUALITY desired item and press the joystick Still pictures with a high picture quality are recorded Priority is given to the number of still pictures recorded Still pictures are recorded in normal picture quality You can add a shutter operation simulating sound Press the MENU button then select ADVANCED SHTR EFFECT ON and press the joystick This function s default setting is ON Screen ...

Page 46: ...om speed is high the subject may not be focused easily RAM RW VR RW V R If the zoom magnification exceeds 30k then the digital zoom function will be activated The maximum magnification provided by the digital zoom can be switched Rotate the mode dial to select Press the MENU button then select ADVANCED D ZOOM desired item and press the joystick The larger the digital zoom magnification the more th...

Page 47: ...d as if you see a mirror image However the image recorded is the same as a normal recording Rotate the mode dial to select or Rotate the LCD monitor towards the lens side When the LCD monitor is opened the viewfinder automatically turns off However if the LCD monitor is then rotated towards the lens side the viewfinder is activated When the LCD monitor is rotated towards the lens side the icon wil...

Page 48: ...el the soft skin mode Select again If the background or anything else in the scene has colours similar to the skin colour they will also be smoothed If the brightness is insufficient the effect may not be clear You may not be able to see the face clearly when recording a distant person In this case cancel soft skin mode or zoom in on the face Soft skin mode This makes skin colours appear softer fo...

Page 49: ...lect 3 Press the recording start stop button Start recording Fade in When you start recording the image audio disappears completely and the image audio gradually appears To fade out 1 During recording press the joystick to display the icon shown in the illustration Fade in fade out function Fade in The image and audio gradually appear Fade out The image and audio gradually disappear LSQT1180 ENG b...

Page 50: ...t The colour which appears in fading pictures can be selected Press the MENU button then select ADVANCED FADE COLOUR WHITE or BLACK and press the joystick By operating the OFF ON switch the fade in fade out function is cancelled While the fade in fade out function is selected it takes several seconds to display the image when you start recording It also takes several seconds to pause recording The...

Page 51: ...joystick to display the icon shown in the illustration 2 Move the joystick right to select ª The image on the screen will become brighter To return to normal recording Select ª again By operating the OFF ON switch or mode dial the backlight compensation function is cancelled Backlight compensation function This is for protecting a backlit subject from being darkened LSQT1180 ENG book 51 ページ 2007年1...

Page 52: ...l be recorded After recording the self timer is cancelled To stop the timer midway through Press the MENU button The self timer setting is cancelled By operating the OFF ON switch the self timer standby mode is cancelled Depending on the time taken to bring the subject into focus the recording may take longer than set to start Setting the self timer to Ø2 is a good way to prevent image shake when ...

Page 53: ...ke theatre movies Rotate the mode dial to select Press the MENU button then select BASIC CINEMA ON and press the joystick To cancel the cinema mode Press the MENU button then select BASIC CINEMA OFF and press the joystick Images played back vary depending on the TV connected Please refer to the operating instructions for your TV When images are played back on a TV screen the date display may be er...

Page 54: ... 25k longer than usual so that dark scenes invisible to the naked eye can be recorded brightly For this reason bright dots that are usually invisible may be seen but this is not a malfunction By operating the OFF ON switch or mode dial the Night view function is cancelled If set in a bright place the screen may become whitish for a while RAM RW VR RW V R Reduces the image shaking due to hand movem...

Page 55: ...ter speeds and apertures Rotate the mode dial to select or 1 Set the AUTO MANUAL FOCUS switch to MANUAL 2 Press the MENU button then select BASIC SCENE MODE desired item and press the joystick Scene mode This is for recording in various situations Display Mode Recording conditions 5 Sports To record sports scenes or scenes where there are quick motions Portrait To make people stand out against the...

Page 56: ...image may change If you record a subject illuminated with strong light or a highly reflective subject vertical lines of light may appear If the brightness is insufficient the sports mode does not function The 5 display flashes If this mode is used indoors the screen may flicker Portrait mode If this mode is used indoors the screen may flicker If so change the scene mode setting to OFF Low light mo...

Page 57: ...ocus indication 1MF is displayed 3 Move the joystick left or right to bring the subject into focus When focused with a wide angle the subject may not be in focus when zoomed in First zoom in on the subject and then focus on it To restore to the automatic adjustment Press the AUTO MANUAL FOCUS switch down again to the FOCUS position You can also restore the auto focusing by setting the AUTO MANUAL ...

Page 58: ... select the white balance mode To restore to the automatic adjustment Set the white balance mode to You can also restore the automatic adjustment by setting the AUTO MANUAL FOCUS switch to AUTO White balance This is for recording in natural colours MNL MNL AWB MNL Display Mode Recording conditions Auto white balance adjustment Indoor mode for recording under incandescent lamps Incandescent lights ...

Page 59: ...of light source during recording Do not cover the white balance sensor during recording or it may not function properly When the display flashes white the manual white balance previously adjusted is stored Whenever recording conditions change re set the white balance for correct adjustment When the unit is turned on with the lens cap fitted the automatic white balance adjustment may not function p...

Page 60: ...r fluorescent light mercury light or sodium light because the colour and brightness of the playback image may change If you increase the shutter speed manually the sensitivity lowers and accordingly the gain value increases automatically which may increase the noises on the screen You may see vertical lines of light in the playback image of a brightly shining subject or highly reflective subject b...

Page 61: ...so release the joystick when you have arrived at the page with the scene you want to display 3 Press the joystick The selected scene is played back on the full screen The operation icon is automatically displayed on the screen 4 Move the joystick to operate No sound will be heard except during normal playback If pause play is continued for 5 minutes the screen returns to the thumbnails When the am...

Page 62: ...d one frame at a time 1 Move the joystick up during playback to pause the playback 2 Move the joystick right The frames will be advanced one at a time in the reverse direction when you move the joystick left Normal playback is restored when you move the joystick up Adjust the speaker volume during playback Move the volume lever to change the volume level The further the indicator moves to the righ...

Page 63: ...parately in the following cases When the number of scenes exceeds 99 RAM RW VR RW V R When the disc is removed RW V R When the disc is repaired RW V R When the mode dial is switched R When the power is turned off R Press the MENU button then select PLAY SETUP RESUME PLAY ON and press the joystick If playback of a motion picture is stopped R appears on the thumbnail view of the stopped scene If pla...

Page 64: ...down you can advance 8 files at a time The screen will not change at this time but the file numbers and scroll bar display will change so release the joystick when you have arrived at the page with the file you want to display 3 Press the joystick The selected file is played back on the full screen The operation icon is automatically displayed on the screen 4 Move the joystick to operate A B 1 Sli...

Page 65: ... or created on another product and another product may degrade or not play back data recorded on this unit Do not operate the mode dial during the slide show When the access lamp is lit do not insert or remove an SD card It takes time to display the file depending on the number of pixels of the file If you attempt to play back file recorded in a different format or file data is defective the whole...

Page 66: ...W Video format and DVD R cannot be deleted Rotate the mode dial to select 1 Press the button during playback 2 When the confirmation message appears select YES then press the joystick Deleting scenes This is for deleting scenes recorded on discs Deleting scenes one at a time LSQT1180 ENG book 66 ページ 2007年1月29日 月曜日 午後3時25分 ...
Page 67: ...e set in succession 3 Only when SELECT is selected in step 1 Press the button 4 When the confirmation message appears select YES then press the joystick Only when SELECT is selected in step 1 To continue deleting other scenes Repeat steps 2 4 To complete editing Press the MENU button To delete an unwanted part of a scene divide the scene first and then delete the unnecessary part l 68 In case of A...

Page 68: ...ne is played back 3 When you reach the area where you want to divide the scene move the joystick down to set the dividing point Using slow motion playback or frame by frame playback makes it easy to search for the point where you want to divide the scene l 62 4 When the confirmation message appears select YES then press the joystick To continue dividing other scenes Repeat steps 2 4 To complete ed...

Page 69: ...ish to combine scenes that are not next to each other or scenes with different recording dates first create a playlist and then combine the scenes on the playlist l 71 76 3 When the confirmation message appears select YES then press the joystick To continue combining other scenes Repeat steps 2 3 To complete editing Press the MENU button Combining scenes This function is only for combining two con...

Page 70: ...y making a playlist If you create or delete playlists the original scenes will not be modified Editing scenes on a playlist will not affect the original scenes The maximum number of items on a disc per side Playlists 99 Playlist scenes 999 If original scenes are deleted the portion of playlists created with these scenes is also deleted What is a playlist Recorded scenes Playlist LSQT1180 ENG book ...

Page 71: ...ncelled Up to 8 scenes can be set in succession The scenes are registered in the playlist in the order that they were selected After creating a playlist the order of the scenes in it can be changed by MOVE function l 74 4 Press the MENU button 5 When the confirmation message appears select YES then press the joystick The thumbnail view screen of the created playlist is displayed To add another sce...

Page 72: ...displayed as thumbnails 3 Select the scene to start playback then press the joystick To select a different playlist When the first scene is selected in the playlist thumbnail view screen move the joystick left The screen returns to the PLAYLIST VIEW step 2 To return to showing the original scenes Press the MENU button then select PLAY SETUP PLAY MODE VIEW ALL or BY DATE and press the joystick Play...

Page 73: ... a yellow frame When the joystick is pressed again the selected scene will be cancelled Up to 8 scenes can be set in succession The scenes are added to the playlist in the order that they were selected The order of the scenes in the playlist can be changed by MOVE function l 74 5 Press the MENU button 6 When the confirmation message appears select YES then press the joystick The thumbnail view scr...

Page 74: ...e joystick 3 Select MOVE then press the joystick 4 Select the scene to be moved then press the joystick The selected scene is encircled by a yellow frame and the position to insert is shown by a red bar 5 Select the position to insert the scene then press the joystick To continue moving other scenes in the playlist Repeat steps 4 5 To complete editing Press the MENU button Moving scenes LSQT1180 E...

Page 75: ...ct the scene to be divided then press the joystick The selected scene is played back 5 When you reach the area where you want to divide the scene move the joystick down to set the dividing point Using slow motion playback or frame by frame playback makes it easy to search for the point where you want to divide the scene l 62 6 When the confirmation message appears select YES then press the joystic...

Page 76: ...stick 2 Select the playlist to be edited then press the joystick 3 Select COMBINE then press the joystick 4 Select the scene to be combined then press the joystick The selected scene and the next scene are combined 5 When the confirmation message appears select YES then press the joystick To continue combining other scenes Repeat steps 4 5 To complete editing Press the MENU button Combining scenes...

Page 77: ... the button during playback 2 When the confirmation message appears select YES then press the joystick Deleting multiple scenes from the thumbnail display Select playlist playback mode l 72 steps 1 and 2 1 Press the MENU button then select EDIT and press the joystick 2 Select the playlist to be edited then press the joystick Deleting scenes LSQT1180 ENG book 77 ページ 2007年1月29日 月曜日 午後3時25分 ...
Page 78: ... when SELECT is selected in step 3 Press the button 6 When the confirmation message appears select YES then press the joystick Only when SELECT is selected in step 3 To continue deleting other scenes Repeat steps 4 6 To complete editing Press the MENU button Deleting scenes on a playlist will not increase the remaining capacity for recording The playlist itself is deleted if you delete all the sce...

Page 79: ...d Rotate the mode dial to select 1 Press the button during playback 2 When the confirmation message appears select YES then press the joystick Deleting still pictures This is for deleting still picture files recorded on SD cards Deleting files one at a time LSQT1180 ENG book 79 ページ 2007年1月29日 月曜日 午後3時25分 ...
Page 80: ...onfirmation message appears select YES then press the joystick Only when SELECT is selected in step 1 To continue deleting other files Repeat steps 2 4 To complete editing Press the MENU button Deleting still picture files recorded on an SD card by other products A still picture file other than JPEG that cannot be played back on this unit may be erased In case of ALL the deletion may take time if ...

Page 81: ...elect 1 Press the MENU button then select PLAY SETUP LOCK YES and press the joystick 2 Select the file to be protected then press the joystick display appears and the selected file is locked Press the joystick again to release the lock setting To lock other files repeat step 2 To complete the settings Press the MENU button Locking still pictures This is for preventing still picture files from bein...

Page 82: ...o set other files repeat steps 2 3 To complete the settings Press the MENU button To cancel all DPOF settings Press the MENU button then select PLAY SETUP DPOF SET CANCEL ALL and press the joystick When the confirmation message appears select YES then press the joystick What is DPOF DPOF stands for Digital Print Order Format This enables picture printing information to be written onto an SD card s...

Page 83: ...ge appears select YES then press the joystick When formatting is complete press the MENU button to exit the message screen During formatting do not turn this unit off When you format the disc use a battery with sufficient battery power or the AC adaptor In the case of a double sided disc format each side It may not be possible to format a disc with many scratches or dirt Such discs cannot be used ...

Page 84: ...matting is complete press the MENU button to exit the message screen During formatting do not turn this unit off When you format the SD card use a battery with sufficient battery power or the AC adaptor Use this unit to format SD cards If an SD card is formatted on other products such as a computer the time spent for recording may become longer and you may not be able to use the SD card Depending ...

Page 85: ... when PLAY MODE is set to BY DATE to view scenes by recording date some scenes recorded on the same date may be separated l 63 These scenes will be displayed as separate titles on the top menu Depending on the condition of the disc the time it takes for finalizing will differ It may take up to 15 minutes If this unit becomes hot or is shaken strongly or impacted while finalizing the finalization w...

Page 86: ...ess the MENU button to exit the message screen When you un finalize the disc use a battery with sufficient battery power or the AC adaptor DVD RW VR format cannot be un finalized DVD RW VR format after finalization can be recorded and edited in the same way as DVD RW VR format before finalization DVD R cannot be un finalized Un finalizing a DVD RW This is for un finalizing a DVD RW Video format so...

Page 87: ...ETUP DISC PROTECT and press the joystick 2 When the confirmation message appears select YES then press the joystick To release disc protection 1 Press the MENU button then select SETUP DISC PROTECT and press the joystick 2 When the confirmation message appears select YES then press the joystick If the disc has been protected on another device it may not be possible to release the protection on thi...

Page 88: ...s the number of recorded scenes the remaining space and whether or not the disc is finalized or protected is displayed Rotate the mode dial to select Press the MENU button then select SETUP INFORMATION YES and press the joystick To exit the information screen Press the MENU button LSQT1180 ENG book 88 ページ 2007年1月29日 月曜日 午後3時25分 ...
Page 89: ...t is connected 4 Start playback on this unit The image and audio are output on the TV If the image or audio from this unit is not output on the TV Check that the plugs are inserted as far as they go Check the connected terminal Check the TV s input setting input switch For more information please read the operating instructions for the TV Playback on TV A AV S cable supplied Insert the plugs as fa...

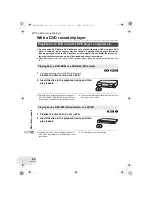
Page 90: ...format Finalize the disc on this unit l 85 2 Insert the disc in the playback device and then play it back Playback is only possible on devices that support 8 cm DVD RAM or DVD RW VR format Refer to the operating instructions of the playback device You cannot record images that allow One time only recording on a 8 cm disc RW V R 1 Finalize the disc on this unit l 85 2 Insert the disc in the playbac...

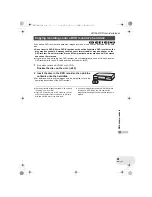
Page 91: ... with the AV S cable and then dub the disc l 92 1 Only when you dub a DVD RW or a DVD R Finalize the disc on the unit l 85 2 Insert the disc in the DVD recorder then dub the contents onto the hard disk For details on how to dub the images onto the hard disk refer to the operating instructions of the DVD recorder You cannot record images that allow One time only recording on a 8 cm disc If your DVD...

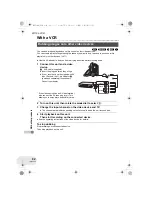
Page 92: ...on this unit then rotate the mode dial to select 3 Change the input channel on the video device and TV The channel set will differ depending on the terminal to which the unit is connected 4 Start playback on this unit Then start recording on the connected device See the operating instructions of the video device for details To stop dubbing Stop recording on the connected device Then stop playback ...

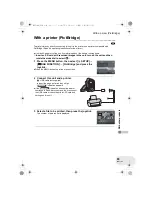
Page 93: ...d then rotate the mode dial to select 1 Press the MENU button then select SETUP USB FUNCTION PictBridge and press the joystick Press the MENU button to exit the menu screen 2 Connect this unit and a printer indication appears If the indication does not appear or continues to flash disconnect and then reconnect the USB cable or check the printer SD card and settings on this unit 3 Select a file to ...

Page 94: ...et in succession by repeating steps 3 and 4 5 Press the MENU button to display the PictBridge menus 6 Select the date print setting on DATE PRINT If the printer is not capable of date printing this setting is unavailable 7 Select the paper size setting on PAPER SIZE You cannot set paper sizes not supported on the printer STANDARD Size specific to the printer 4t5 INCH L size 5t7 INCH 2L size 4t6 IN...

Page 95: ...o step 3 If NO is selected all the settings are kept and the screen returns to step 3 Avoid the following operations during printing These operations disable proper printing Disconnecting the USB cable Removing the SD card Switching the mode dial Turning off the power Check the settings for the paper size quality of print etc on the printer You may not be able to print still pictures recorded with...

Page 96: ...MIC l 47 SETUP DISPLAY l 98 DATE TIME l 38 DATE FORMAT l 38 POWER SAVE l 98 BEEP SOUND l 98 LCD SET l 39 EVF SET l 39 INITIAL SET l 98 DEMO MODE l 98 LANGUAGE l 34 Still picture recording menus For SETUP items refer to the motion picture recording menus BASIC SCENE MODE l 55 PICT QUALITY l 45 CLOCK SET l 37 ADVANCED SHTR EFFECT l 45 LANGUAGE l 34 Menu list EVF DEMO LSQT1180 ENG book 96 ページ 2007年1月...

Page 97: ...OMBINE l 76 DELETE l 77 SETUP FORMAT DISC l 83 FINALIZE l 85 UN FINALIZE l 86 DISC PROTECT l 87 INFORMATION l 88 DISPLAY l 98 DATE l 62 DATE FORMAT l 38 POWER SAVE l 98 BEEP SOUND l 98 LCD SET l 39 EVF SET l 39 LANGUAGE l 34 Still picture playback menus DELETE SELECT l 80 ALL l 80 PLAY SETUP PLAY MODE l 65 LOCK l 81 DPOF SET l 82 SETUP DISPLAY l 98 DATE TIME l 38 DATE FORMAT l 38 FORMAT CARD l 84 ...

Page 98: ...rting Check the sentence displayed on the screen l 101 INITIAL SET YES NO When there is a menu that cannot be selected depending on a combination of functions set to YES for changing the menu settings back to the initial shipping condition Language setting cannot be back to the initial shipping condition DEMO MODE OFF ON This item is used to start the unit demonstration Only when using the AC adap...

Page 99: ...F2 0 F number 0dB Gain value Soft skin mode Fade White Fade Black Night view function Zoom microphone Wind noise reduction Motion picture recording mode AUTO MNL ZOOM XP SP LP 5 Sports mode Portrait mode Low light mode Spotlight mode Surf snow mode Auto white balance Indoor mode recording under incandescent lamp Outdoor mode Manual adjustment mode Disc type DVD RAM DVD RW VR format DVD RW Video fo...

Page 100: ...e than 1 Locked still pictures Number of recording pixels for still pictures 640k480 For pictures not recorded with this unit the size display is determined as follows according to the number of horizontal pixels If this number is 2048 1920 1280 or 640 then or will be displayed respectively regardless of the number of vertical pixels 2048 pixels or more 1600 or more less than 2048 pixels 1280 or m...

Page 101: ... about disc compatibility etc http panasonic co jp pavc global cs e_cam This website is in English only CANNOT RECORD THIS DISC IS FINALIZED A finalized DVD RW Video format or DVD R has been inserted After finalizing the discs become play only and cannot record If you un finalize a DVD RW Video format it can be used for recording l 86 CANNOT RECORD DISC IS FULL The disc is full or the number of sc...

Page 102: ...nother device This may cause the loss of data or the disc CHECK CARD This card is not compatible or it cannot be recognized by the unit CARD LOCKED The write protection switch on the SD card is set to LOCK l 19 CARD FULL The SD card is full so no further data can be recorded Delete unnecessary files l 79 or insert a new SD card PUSH THE RESET SWITCH An irregularity in the unit has been detected Pr...

Page 103: ... mode Fade Backlight compensation When the Night view function is used When the iris gain is set Night view In card recording mode Image stabilizer When the Night view function is used In card recording mode Functions Conditions which disable the functions Scene mode When setting the AUTO MANUAL FOCUS switch to AUTO When the Night view function is used Change of white balance When digital zoom 30k...

Page 104: ...nuously from one side of the disc to the other The recording time indicated on the disc package is the total time for both sides You will need to eject the disc and turn it over to record on both sides Can DVD R only be recorded to once only Recording can be started and stopped until the disc is full However the data recorded on the DVD R cannot be erased Is playback possible on a DVD player By fi...

Page 105: ...ld place The battery is affected by ambient temperature In cold places the operating time of the battery becomes shorter Has the battery worn out The battery has a limited life If the operating time is still too short even after the battery is fully charged the battery has worn out and can no longer be used This unit cannot be operated though powered up This unit does not operate normally Press th...

Page 106: ...e same device Has the DVD RW Video format or DVD R been finalized After finalizing the discs become play only and cannot record If you un finalize a DVD RW Video format it can be used for recording l 86 Has the SD card s write protect switch been set to LOCK No recording is possible while the write protect switch is set to LOCK l 19 Is the memory of the disc or card full If the disc or card has no...

Page 107: ...d video input on the TV Please read the operating instructions of your TV and select the channel that matches the input used for the connection Scenes cannot be deleted or edited Is the DVD RAM or the DVD RW VR format write protected Release the protection l 87 If the disc or the contents on the disc have been protected on another device release the protection on the same device It may not be poss...

Page 108: ... After that turn on the power again If normal operation is still not restored detach the power connected and consult the dealer who you purchased this unit from PUSH THE RESET SWITCH is displayed Is the disc scratched or dirty After using the following method to restart the unit eject the disc and clean it l 20 If there are scratches on the disc use a new disc The unit has automatically detected a...

Page 109: ...rds and cables If you use optional accessories use the cords and the cables supplied with them Do not extend the cords and the cables Do not spray insecticides or volatile chemicals onto the unit If the unit is sprayed with such chemicals its body may be marred and the surface finish may peel off Do not leave rubber or plastic products in contact with the unit for a long time When you use the unit...

Page 110: ...e battery This may result in you not being able to use the battery even after it is charged Prepare spare batteries when going out for recording In cold places such as a ski resort the period during which you can record pictures is shortened When you travel do not forget to bring an AC adaptor supplied so that you can recharge the batteries at your destination If you drop the battery accidentally ...

Page 111: ...r dealer When the lamp is off Charging is completed When the lamp is off but charging is not completed trouble may have occurred in the AC adaptor or the battery Contact your dealer If there is dust a scratch or dirt on disc or if it is warped the following phenomena may occur Block noise in playback image Momentary stop of playback image Sound interrupted during playback or abnormal sound Thumbna...

Page 112: ...ts dirty wipe it with a dry soft cloth In a place with drastic temperature changes condensation may form on the LCD monitor Wipe it with soft dry cloth When the unit has become very cold for example due to storage in a cold area its LCD monitor will be slightly darker than usual immediately after the power is turned on The normal brightness will be restored when the unit s internal temperature ris...

Page 113: ...of rain When this unit is in a very humid place where the air is thick with steam e g a heated swimming pool When this unit is taken to a location with a significant temperature difference such as from a cold place to a hot place If for example you have used this unit for recording on a ski slope and are taking it into a heated room place the unit inside a plastic bag remove as much of the air fro...

Page 114: ...of the effective range of automatic white balance adjustment the image will become reddish or bluish Even within the effective range of automatic white balance adjustment the automatic white balance adjustment may not function properly if there is more than one light source For light outside the functional automatic white balance adjustment range use the manual white balance adjustment mode White ...

Page 115: ...rly when recording something on the opposite side of a road with heavy traffic a vehicle that happens to pass by may be brought into focus Recording a subject that is surrounded by objects with glossy surfaces or by highly reflective objects Since whatever is shiny or glistens is brought into focus it is hard to focus on the subject to be recorded The focus may become blurry when recording subject...

Page 116: ...mm to 57 0 mm Filter diameter 30 5 mm Zoom 30k optical zoom 50 1000k digital zoom Monitor 2 5z LCD monitor approx 105 K pixels Viewfinder Colour electric viewfinder approx 123 K pixels Microphone Stereo with a zoom function Speaker 1 round speaker 20 mm Standard illumination 1 400 lx Minimum required illumination 12 lx Low light mode 1 50 2 lx with the Night view function Video output level 1 0 Vp...

Page 117: ...2 Recording mode and transfer rate XP 9 Mbps VBR SP 5 Mbps VBR LP 2 5 Mbps VBR Audio compression Dolby Digital Dolby AC3 16 bit 48 kHz 2 ch Recording media SD Memory Card 8 MB 16 MB 32 MB 64 MB 128 MB 256 MB 512 MB 1 GB 2 GB FAT12 and FAT16 format corresponding SDHC Memory Card 4 GB FAT32 format corresponding Compression JPEG Design rule for Camera File system based on Exif 2 2 standard DPOF corre...

Page 118: ...corded The numbers shown in the table are approximations Number of recordable pictures on an SD card Picture size 640k480 Picture quality 8 MB 42 86 16 MB 97 195 32 MB 210 420 64 MB 430 870 128 MB 820 1650 256 MB 1710 3430 512 MB 3400 6790 1 GB 6800 13600 2 GB 13830 27660 4 GB 27150 54310 LSQT1180 ENG book 118 ページ 2007年1月29日 月曜日 午後3時25分 ...
Page 119: ... 61 Motion picture recording 41 N Night view function 54 Number of recordable pictures 118 O Operation icons 30 P Pickup lens 26 PictBridge 93 Picture quality 45 Playing back motion pictures by date 63 Playlist 70 Power save 98 Protect Disc 87 R Recording mode 43 Recording time elapsed 42 Remaining number of still pictures 45 Remaining time 42 Resume playback 63 S Scene mode 55 SD Memory Card 19 S...

Page 120: ...Backcover LSQT1180 A F0207Ns0 4000 A B Matsushita Electric Industrial Co Ltd Web site http panasonic net LSQT1180 ENG book 120 ページ 2007年1月29日 月曜日 午後3時25分 ...
Reviews: