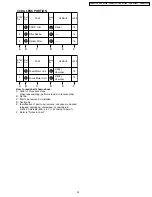
Notes in chart
1. Removal of Top Cover Unit
1) Open the LCD and Jack Cover to remove the 6 Screws
(518, 519, 533, 537).
2) Pull and slide carefully the Top Cover Unit.
3) Disconnect the F.P.C. from Connector FP6501.
Open LCD
FP6501
Open
Jack Cover
Slide
Front/Mic
Ass'y
533
533
518
519
519
537
Fig. D1
2. Removal of Side R & LCD Ass'y
1) Remove the 7 Screws (518, 519, 537), and remove the
Shoe.
2) Remove the Side R & LCD Ass'y while releasing the 2
Locking Tabs (L-1).
3) Disconnect the Front F.P.C. from Connector FP81.
(L-1)
(L-1)
FP81
Side R &
LCD Ass'y
Shoe
537
519
519
519
519
518
518
Fig. D2
3. Removal of Rear Case Unit
1) Remove the Screw (537) and remove the Disc Eject
Cover.
2) Remove the Screw (519) and disconnect the F.P.C.
from Connector FP11.
Rear Case Unit
Disc Eject
Cover
FP11
537
519
Fig. D3
4. Removal of Grip/EVF Ass'y
1) To access the screw, open the Disc Cover to slide the
Lock Lever with a screwdriver, etc.
2) Remove the 3 Screws (519, 537).
3) Disconnect the EVF F.P.C. from Connector FP91.
Lock Lever
Grip/EVF Ass'y
Open Disc Cover
Slide to eject
FP91
519
537
519
Fig. D4
27
VDR-D210P / VDR-D220P / VDR-D230P / VDR-D210PC / VDR-D220PC / VDR-D230PC
Summary of Contents for VDRD220P - DVD Palmcorder Camcorder
Page 7: ...4 Specifications 7 VDR D210P VDR D220P VDR D230P VDR D210PC VDR D220PC VDR D230PC ...
Page 12: ...Fig 3 12 VDR D210P VDR D220P VDR D230P VDR D210PC VDR D220PC VDR D230PC ...
Page 38: ...38 VDR D210P VDR D220P VDR D230P VDR D210PC VDR D220PC VDR D230PC ...
Page 50: ...VDR D210P VDR D220P VDR D230P VDR D210PC VDR D220PC VDR D230PC 50 ...


