Getting started
Precautions
SQT0852
17
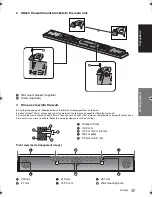
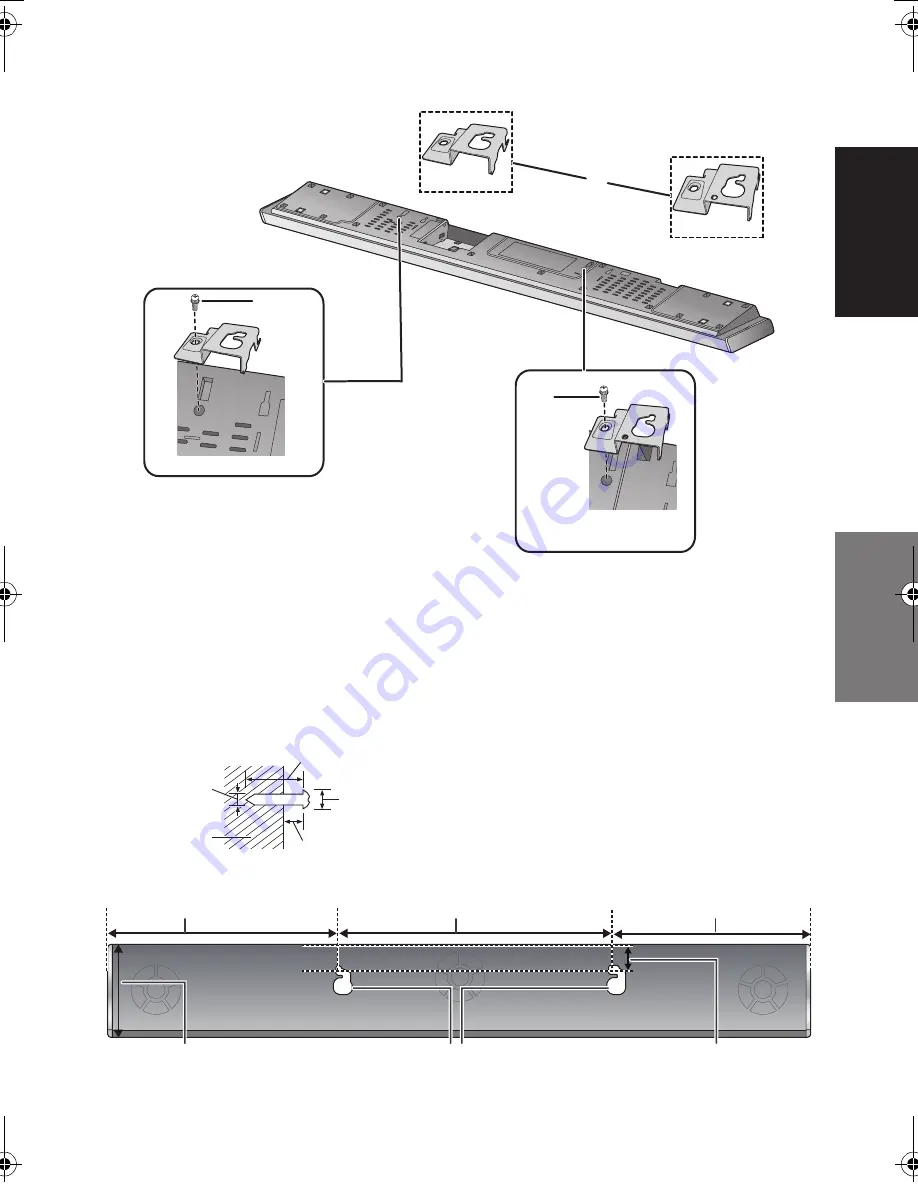
2 Attach the wall mount brackets to the main unit.
A
Wall mount bracket (supplied)
B
Screw (supplied)
3 Drive a screw into the wall.
≥
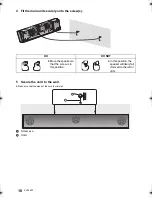
Use the measurements indicated below to identify the screwing positions on the wall.
≥
Leave at least 100 mm of space above of the main unit to allow enough space for fitting the main unit.
≥
Position the main unit with at least 50 mm of free space to its right. If not, it may not be possible to access the touch keys.
≥
Be sure to use a level to ensure that both mounting holes are level to each other.
Front view (semi-transparent image)
C
At least 30 mm
D
‰
4.0 mm
E
‰
7.0 mm to
‰
9.4 mm
F
Wall or pillar
G
5.5 mm to 6.5 mm
H
374 mm
I
315 mm
J
261 mm
K
41 mm
L
125.5 mm
M
Wall mounting hole
SC-HTB690-SQT0852.book 17 ページ 2015年1月30日 金曜日 午後2時2分
Summary of Contents for viera SC-HTB690
Page 38: ...38 SQT0852 ...
Page 39: ...SQT0852 39 ...


