background image

TM

Customer’s Record

The model number and serial number of this product can be found on its back cover. You should note this serial number in 
the space provided below and retain this book, plus your purchase receipt, as a permanent record of your purchase to aid 
in identification in the event of theft or loss, and for Warranty Service purposes.

Model 

Number 

     Serial 

Number 


Web Site:  http://panasonic.net/

©

 Panasonic Corporation 2010

Printed in Mexico

M0510-0

This product has a fluorescent lamp that contains mercury.
Disposal may be regulated in your community due to environmental 
considerations. For disposal or recycling information, please contact your 
local authorities, or the Electronic Industries Alliance:
http://www.eiae.org.

Quick Start Guide

 See page 7-14

Operating Instructions

32”/37” Class 720p LCD HDTV

(31.5/37.0 inches measured diagonally)

TQB3AC0010

Thank you for purchasing this Panasonic product.
Please read these instructions before operating your set and retain them for future 
 reference. The images shown in this manual are for illustrative purposes only.

Model No.

TC-L32C22M

TC-L37C22M

English

Summary of Contents for Viera TC-L32C22M

Page 1: ...0 This product has a fluorescent lamp that contains mercury Disposal may be regulated in your community due to environmental considerations For disposal or recycling information please contact your local authorities or the Electronic Industries Alliance http www eiae org Quick Start Guide See page 7 14 Operating Instructions 32 37 Class 720p LCD HDTV 31 5 37 0 inches measured diagonally TQB2AC0017...

Page 2: ...quality etc 23 VIERA LinkTM HDAVI ControlTM 26 Lock 32 Editing and Setting Channels 34 Closed Caption 36 Input Labels 37 Using Timer 38 Recommended AV Connections 39 Ratings List for Lock 40 Technical Information 41 Care and Cleaning 45 FAQ 46 Specifications 48 Enjoy your TV Basic Features Advanced Features FAQs etc Safety Precautions 4 Please read before using the unit Accessories Optional Access...

Page 3: ... 0 This product has a fluorescent lamp that contains mercury Disposal may be regulated in your community due to environmental considerations For disposal or recycling information please contact your local authorities or the Electronic Industries Alliance http www eiae org Quick Start Guide See page 7 14 Operating Instructions 32 37 Class 720p LCD HDTV 31 5 37 0 inches measured diagonally TQB3AC001...

Page 4: ...quality etc 23 VIERA LinkTM HDAVI ControlTM 26 Lock 32 Editing and Setting Channels 34 Closed Caption 36 Input Labels 37 Using Timer 38 Recommended AV Connections 39 Ratings List for Lock 40 Technical Information 41 Care and Cleaning 45 FAQ 46 Specifications 48 Enjoy your TV Basic Features Advanced Features FAQs etc Safety Precautions 4 Please read before using the unit Accessories Optional Access...

Page 5: ...nding of the lead in wire to an antenna discharge unit size of grounding conductors location of antenna discharge unit connection to grounding electrodes and requirements for the grounding electrode CAUTION RISK OF ELECTRIC SHOCK DO NOT OPEN WARNING To reduce the risk of electric shock do not remove cover or back No user serviceable parts inside Refer servicing to qualified service personnel The l...

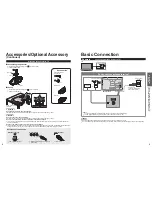
Page 6: ...Pedestal TBL3AX0005 or TBL3AX0010 TC L32C22M TBL2AX0029 TC L37C22M Installing the remote s batteries Open Hook Note the correct polarity or Close Caution Incorrect installation may cause battery leakage and corrosion resulting in damage to the remote control Do not mix old and new batteries Do not mix different battery types such as alkaline and manganese batteries Do not use rechargeable Ni Cd ba...

Page 7: ...become damaged and personal injury may result Reference of connection Antenna terminal Pin terminals HDMI terminal green blue red green Firmly tighten by hand Match colors of plugs and terminals Insert firmly Insert firmly Attaching the pedestal to TV Basic Connection Note Not all cables and external equipment shown in this book are supplied with the TV For more details on the external equipment s...

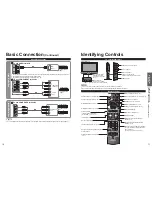
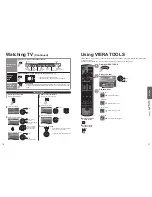
Page 8: ...LS p 17 Viewing from SD Card p 18 19 Selects OK Change Returns to previous menu Channel up down Displays or removes the channel banner p 16 Operates the Favorite channel list function p 16 Numeric keypad to select any channel p 15 or press to enter alphanumeric input in menus p 14 20 22 30 32 34 37 38 Remote control sensor within about 23 feet 7 meters in front of the TV set High Definition Standa...

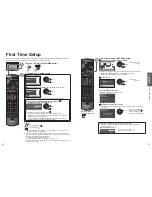
Page 9: ...ock later go to the Menu screen p 25 First Time Setup First time setup screen is displayed only when the TV is turned on for the first time after the power cord is inserted into a wall outlet and when Auto power on p 25 is set to No Press to return to the previous screen Auto channel setup ANT Cable setup Select the connected Antenna in terminal ANT Cable setup Step 3 of 6 Cable Antenna Not used A...

Page 10: ...Select the Input labels Label inputs Select NEXT then press OK to go to next step Label inputs Step 5 of 6 Press RIGHT to select a label for each input Example DVD Blu ray etc or Not used Press OK to customize the label Edit Blu ray DVD HDMI HDMI RETURN Change Select Component Video 1 Video 2 PC Next HDMI 1 HDMI 2 ABC Delete abc R G B Y 1 4 GHI 7PQRS 2 ABC 5 JKL 8 TUV 3 DEF 6MNO 9WXYZ 0 LAST selec...

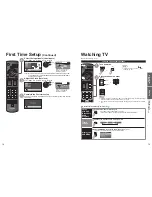
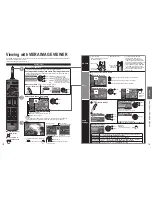
Page 11: ...layed channel Set favorite 1 3 26 1 2 3 4 5 select the list number save the displayed channel select the list number to save the channel without pressing OK or Delete a favorite channel Set favorite 1 3 26 1 2 3 4 5 select delete while holding down Favorite Feature Use the Favorite Feature 1 Display Favorite channels 2 Select the channel Favorite channels 1 3 26 1 2 3 4 5 select or 3 Set Favorite ...

Page 12: ...ng microSDHC Card miniSD Card microSD Card adapter If a microSDHC Card miniSD Card or microSD Card is used insert remove it together with the adapter For cautions and details on SD Cards p 42 Gently insert the SD Card label surface facing front Label surface Push until a click is heard Press in lightly on SD Card then release Sort To sort by Folder month or date In Select the sort type Slideshow F...

Page 13: ...ls see the manual for the connected equipment If you connect equipment that has the HDAVI Control function to the TV using an HDMI cable you will find it easier to use Please refer to p 26 31 Before using these functions you need to set VIERA Link setting to On as shown below Press to exit from a menu screen Press to return to the previous screen Display the menu Select Setup Menu Adjusts Surf mod...

Page 14: ...enu adjust or select Displaying PC Screen on TV The screen of the PC connected to the unit can be displayed on the TV You can also listen to PC sound with the audio cable connected To connect PC p 39 PC menu setting change as desired Making settings How to Use Menu Functions to p 23 Menu Item Adjustments Configurations options Picture PC adjustments Reset to defaults Resets PC adjust Confirmation ...

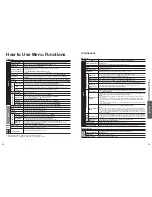
Page 15: ... set with Setup such as channel settings Sub menu list Menu Item Adjustments Configurations alternatives Setup SUB MENU Channel surf mode Sets the mode to select the channel with Channel up down button All Favorite Set favorite Sets favorite channels p 16 Edit CH caption Changes the station identifier p 35 How to Use Menu Functions Menu list Menu Item Adjustments Configurations alternatives Pictur...

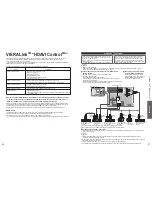
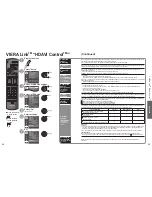
Page 16: ...ipped components using one button on the TV remote Enjoy additional HDMI Inter Operability with Panasonic products which have the HDAVI Control function This TV supports HDAVI Control 5 function Connections to the equipment DVD recorder DIGA HD Camcorder Home theater system Amplifier etc with HDMI cables allow you to interface with them automatically Equipment with the HDAVI Control function enabl...

Page 17: ...information about the TV settings can be transmitted to each piece of an equipment Recorder Home theater Player that has HDAVI Control 3 or later function connected to a TV with HDMI cable Transmittable data Recorder Home theater Player On Screen Display Language setting English Español Français Panel Aspect Ratio 16 9 fixed Closed caption information Mode CC type Channel information Input signal ...

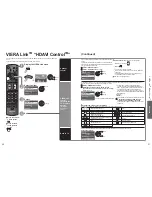
Page 18: ... and a total of three for Home theater Player Camcorder LUMIX Digital camera Note There is a limit to the number of HDMI connectors Recorder TV VIERA Link control Speaker output Back to TV select change You can select available items only Operate the equipment with the TV s remote control pointing it at the TV To operate the equipment read the manual of the equipment Available TV s remote control ...

Page 19: ...ating and any other more restrictive ratings will also be blocked To select the channel or the rating of the program to lock Channel lock Select up to 7 1 7 channels to block These channels will be blocked regardless of the program rating Select Mode and set to Custom Select a channel to lock Menu Selects the lock mode Custom Channel lock Mode Channel 1 Channel 2 Channel 3 Channel 4 Channel 5 Chan...

Page 20: ...R G B Y Select RETURN OK Manual program Edit Cancel Apply Caption Favorite Add 2 Yes 3 Yes 4 Yes 5 Yes 6 Yes 7 Yes 8 Yes 9 Yes Channel Prev page Next page Caption Favorite Add Proceed to next page Go back to the previous page select the item to edit Caption Favorite Add next Caption Changes the station identifier Favorite Registers channels to the Favorite List Add Adds or skips channels To cancel...

Page 21: ...ts Surf mode Language Clock Channels Inputs and other settings Setup 1 2 Clock ANT Cable setup Input labels Language All Channel surf mode next select Select Input labels Menu Customize TV inputs with the names of your connected devices For easier input selections Setup 1 2 Clock ANT Cable setup Input labels Language All Channel surf mode next select Closed Caption Closed caption Display Closed ca...

Page 22: ...d On by the Timer This operation will be cancelled if the Off time is selected or if a key is pressed Display the menu Select Timer Menu Set the TV to turn on or off automatically at the designated date and time Timer Sleep Timer 1 Timer 2 Timer 3 Timer 4 Timer 5 next select Select the timer to set Menu Turns the TV off after selected time Timer Sleep Timer 1 Timer 2 Timer 3 Timer 4 Timer 5 select...

Page 23: ...ming restricted to adults Contains constant violence or scenes of extreme violence CANADIAN FRENCH RATINGS C F L R E Exempt Exempt programming G General Programming intended for audience of all ages Contains no violence or the violence content is minimal or is depicted appropriately 8 ans 8 General Not recommended for young children Programming intended for a broad audience but contains light or o...

Page 24: ...first few seconds when Input mode is switched Volume function will be displayed when adjusting the volume of the equipment If you connect equipment that has HDAVI Control 2 or later function to the TV with HDMI cable the sound from DIGITAL AUDIO OUT terminal can be output as multi channel surround HDAVI Control 5 is the newest standard current as of December 2009 for the HDAVI Control compatible e...

Page 25: ...mes for D sub 15P Connector Care and Cleaning First unplug the Power cord plug from the wall outlet Display panel The front of the display panel has been specially treated Wipe the panel surface gently using only a cleaning cloth or a soft lintfree cloth If the surface is particularly dirty soak a soft lint free cloth in diluted mild liquid dish soap 1 part mild liquid dish soap diluted by 100 tim...

Page 26: ...el and will have no impact on the performance of the TV Chaotic image noisy Check nearby electrical products car or motorcycle ignition systems fluorescent lamp etc No image is displayed on screen Check Picture menu p 24 Check the cable connections Check that the correct input has been selected Only spots are displayed instead of images Check the channel settings p 34 Check the antenna cables Neit...

Page 27: ...rizontal scanning frequency 31 69 kHz Vertical scanning frequency 59 86 Hz Channel Capability NTSC Analog VHF UHF 2 69 CATV 1 135 Operating Conditions Temperature 32 F 95 F 0 C 35 C Humidity 20 80 RH non condensing Connection Terminals VIDEO IN 1 2 VIDEO RCA PIN Type 1 1 0 V p p 75 Ω AUDIO L R RCA PIN Type 2 0 5 V rms COMPONENT IN Y 1 0 V p p including synchronization PB PR 0 35 V p p AUDIO L R RC...

Reviews: