background image

47

F

AQs, etc.

 Specifications

 Maintenance

TH-42PX75U

TH-50PX75U

Power Source

AC 120 V, 60 Hz

Power

Consumption

Maximum

387 W

499 W

Standby condition

0.2 W

0.2 W

Plasma Display 

panel

Drive method

AC type

Aspect Ratio

16:9

Visible screen size
(W × H × Diagonal)

(No. of pixels) 

106 cm

127 cm

36.3 ” × 20.3 ” × 41.6 ”
(922 mm × 518 mm × 1,057 mm)

43.5 ” × 24.4 ” × 49.9 ”
(1,106 mm × 622 mm × 1,269 mm)

786,432 (1,024 (W) × 768 (H))
[3,072 × 768 dots]

1,049,088 (1,366 (W) × 768 (H))
[4,098 × 768 dots]

Sound

Audio Output

20 W [ 10 W + 10 W ] ( 10 % THD )

Channel Capability
(Digital/Analog)

VHF/ UHF:  2 - 69, CATV:  1 - 135

Operating Conditions

Temperature: 

32 °F – 104 °F (0 °C – 40 °C) 

Humidity: 

20 % – 80 % RH (non-condensing)

Connection T

erminals

INPUT 1-2

VIDEO:   

RCA PIN Type × 1 1.0 V [p-p] (75 

Ω

)

S-VIDEO: 

Mini DIN 4-pin        Y:  1.0 V [p-p] (75 

Ω

)        C:  0.286 V [p-p] (75 

Ω

)

AUDIO L-R: 

RCA PIN Type × 2  0.5 V [rms]

COMPONENT VIDEO
INPUT 1-2

Y: 


1.0 V [p-p] (including synchronization)

P

B

, P

R

:   

±0.35 V [p-p]

AUDIO L-R: 

RCA PIN Type × 2  0.5 V [rms]

HDMI 1-2

AUDIO IN

TYPE A Connector × 2

•  

This TV supports “HDAVI Control 2” function.

AUDIO L-R:  

RCA PIN Type × 2  0.5 V [rms]

Card slot

SD CARD slot × 1

AV PROG. OUT

VIDEO:   

RCA PIN Type × 1  1.0 V [p-p] (75 

Ω

)

AUDIO L-R:  

RCA PIN Type × 2  0.5 V [rms] 

DIGITAL AUDIO OUT

PCM / Dolby Digital, Fiber Optic

FEATURES

3D Y/C FILTER   
CLOSED CAPTION 

V-Chip   

Photo Viewer 


HDAVI Control 2

Dimensions

( W × H × D )

Including pedestal

40.2 ” × 28.6 ” × 13.0 ” 
(1,020 mm × 725 mm × 330 mm)

47.7 ” × 33.1 ” × 14.6 ” 
(1,210 mm × 839 mm × 369 mm)

TV Set only

40.2 ” × 26.8 ” × 3.8 ” 
(1,020 mm × 680 mm × 97 mm)

47.7 ” × 31.3 ” × 3.8 ” 
(1,210 mm × 793 mm × 97 mm)

Mass  

Including pedestal

75.0 lb. (34  )

99.2 lb. (45  )

TV Set only

59.6 lb. (27  )

83.8 lb. (38  )

Specifications

Note

• 

Design and Specifications are subject to change without notice. Weight and Dimensions shown are approximate.

40.2 ” (1,020 mm)

3.8 ” (97 mm)

13.0 ”  (330 mm)

26.8 ” (680 mm)

28.6 ” (725 mm)

26.7 ” (676 mm)

47.7 ” (1,210 mm)

3.8 ” (97 mm)

14.6 ” (369 mm)

31.3 ” (793 mm)

33.1 ” (839 mm)

28.8 ”  (730 mm)

[TH-42PX75U]

[TH-50PX75U]

Summary of Contents for Viera TH-42PX75U

Page 1: ...788 or visit us at www panasonic com contactinfo For assistance Puerto Rico please call 787 750 4300 or visit us at www panasonic com For assistance Canada please call 1 800 561 5505 or visit us at www panasonic ca Para solicitar ayuda EE UU llame al 1 888 VIEW PTV 843 9788 ó visítenos en www panasonic com contactinfo Para solicitar ayuda Puerto Rico llame al 787 750 4300 ó visítenos en www panaso...

Page 2: ...tsushita Electric Industrial Co Ltd HDMI the HDMI logo and High Definition Multimedia Interface are trademarks or registered trademarks of HDMI Licensing LLC HDAVI Control HDAVI Control is a trademark of Matsushita Electric Industrial Co Ltd Experience an amazing level of multimedia excitement Turn your own living room into a movie theater ...

Page 3: ...AVI ControlTM 30 Lock 32 Editing and Setting Channels 34 Input Labels Monitor out Closed Caption 36 Using Timer 38 Recommended AV Connections 40 Ratings List for Lock 42 Technical Information 43 Maintenance 46 Specifications 47 FAQ 48 Limited Warranty for U S A 50 Customer Services Directory for U S A 51 Limited Warranty for Canada 52 Enjoy your TV Basic Features Advanced Features FAQs etc Safety ...

Page 4: ...n a triangle is intended to tell the user that parts inside the product are a risk of electric shock to persons The exclamation point within a triangle is intended to tell the user that important operating and servicing instructions are in the papers with the appliance WARNING To reduce the risk of fire or electric shock do not expose this apparatus to rain or moisture Do not place liquid containe...

Page 5: ... not handle the power cord plug with wet hands Doing so may cause electric shocks Do not do anything that might damage the power cable When disconnecting the power cable hold the plug not the cable Do not make any modifications to place heavy objects on place near hot objects heat bend twist or forcefully pull the power cable Doing so may cause damage to the power cable which can cause fire or ele...

Page 6: ...nsmitter 2 AA Battery AC cord Antenna Adapter F Type for 5C 2V Pedestal TBL2AX00161 TH 42PX75U TBL2AX00171 TH 50PX75U Product Registration Card U S A Customer Care Plan Card U S A How to assemble p 7 Note In order to maintain the TV s performance and safety be absolutely sure to ask your dealer or a licensed contractor to secure the wall hanging brackets Carefully read the instructions accompanyin...

Page 7: ...it might fall over and become damaged and personal injury may result Use the accessory fall prevention brackets to secure the TV If the TV is knocked or children climb onto the pedestal with the TV installed the TV may fall over and personal injury may result Warning Do not disassemble or modify the pedestal Otherwise the TV may fall over and become damaged and personal injury may result Base 1 M5...

Page 8: ...and base together with band Securing to a base To Prevent TV from falling over The TV must be fastened to both a base and a wall Band 2 Screw 2 Wood screw 2 Accessories Nominal diameter 4mm x 10 for 42 4mm x 12 for 50 ...

Page 9: ...9 Quick Start Guide To Prevent TV from falling over Fix to wall or post with strong commercial wire or chain Main screw Remove screw Securing to a wall Main screw Clamp 2 Accessory ...

Page 10: ... operate your Panasonic DVD Recorder with this TV s remote control p 25 EZ SyncTM All cables and external equipment shown in this book are not supplied with the TV For the details of the external equipment s connections please refer to the operating manuals of the equipment Enjoying Home theater and DVD recorder with HDMI connection Home theater and DVD Recorder HDMI connection enables you to enjo...

Page 11: ...on Connecting Antenna To watch TV Example 1 If no Cable Box If using Cable Box Set the TV channel to CH3 or CH4 Power Cord Connect after all the other connections Cable TV VHF UHF Antenna TV Back of the TV Cable TV AC 120 V 60Hz VHF UHF Antenna Cable Box Antenna terminal Note When disconnecting the power cord be absolutely sure to disconnect the power cord plug at the wall outlet first For additio...

Page 12: ... Y R R R L L L L R L ANTENNA Cable In Basic Connection Continued Connecting DVD recorder VCR To record playback Example 2 To use HDMI terminals next page To use COMPONENT terminals next page To use COMPOSITE terminals next page VHF UHF Antenna DVD Recorder or VCR TV Back of the TV Power Cord AC 120 V 60Hz VHF UHF Antenna DVD Recorder or VCR with TV tuner Antenna terminal To use S VIDEO terminals n...

Page 13: ...s may be affected by copyright protection systems and the picture will be distorted on the other TV monitor Note DVD Recorder DVD Recorder HDMI AV OUT COMPONENT VIDEO OUT AUDIO OUT white red green blue red white red green blue white red white red AUDIO OUT S VIDEO OUT red To use COMPOSITE terminals To use S VIDEO terminals VCR COMPOSITE OUT yellow white red yellow white red VCR The S Video input w...

Page 14: ...1 AV IN 2 R L HDMI 1 AUDIO IN DIGITAL AUDIO OUT Example 3 Connecting DVD recorder VCR and satellite receiver Connect in the same way as on p 13 Basic Connection Continued DVD Recorder or VCR Satellite Receiver TV Satellite Receiver DVD Recorder or VCR with TV tuner VHF UHF Antenna VHF UHF Antenna Back of the TV Power Cord AC 120 V 60Hz Antenna terminal To use HDMI terminals p 13 To use COMPONENT t...

Page 15: ...der To use COMPOSITE terminals To use S VIDEO terminals Satellite Receiver COMPOSITE OUT VCR VCR yellow white red yellow white red Satellite Receiver The S Video input will override the composite video signal when S Video cable is connected Connect either S Video or Video cable Connecting to S VIDEO terminals will enable you to enjoy greater picture quality than using Composite terminals AUDIO OUT...

Page 16: ...s or To use S VIDEO terminals If you connect RAM theater or Player theater with HDMI cable use audio cable instead of the optical digital audio cable p 41 Note or Home theater HDMI AV OUT Home theater DIGITAL AUDIO IN When listening to TV audio ATSC only AC cord Cable Binding Instructions Do not bundle the RF cable and AC cord together could cause distorted image Fix cables with Cable clampers as ...

Page 17: ...ite channel list function p 21 Switches to previously viewed channel and input modes EZ Sync menu p 25 30 31 Selects Audio Mode for TV viewing p 20 Exits menus Selects OK Change Returns to previous menu Volume up down Displays or removes the channel banner p 20 Sound mute On Off Numeric keypad to select any channel p 20 or press to enter alphanumeric input in menus p 24 25 32 34 Direct channel acc...

Page 18: ... outlet and when Auto power on p 28 29 is set to No Turn the TV On with the POWER button 1 Select your language 2 Adjust the clock 3 Year Select the year Month Select the month Day Select the day Hour Adjust the hour Minute Adjust the minute Go back to previous screen Press to exit from menu screen Press to return to previous screen Note To change setting Language Clock Auto program Picture later ...

Page 19: ...o program Select ANT in 5 Confirm registered channels Available channels analog digital are automatically set If OK is not pressed after selecting Apply the channels will not be saved If you perform scanning more than twice previously saved channels are erased Note About broadcasting systems Analog NTSC traditional TV programming Digital ATSC new programming that allows you to view more channels f...

Page 20: ...V Digital mode Press SAP to select the next audio track if available when receiving a digital channel Audio track 1 of 2 English Analog mode Press SAP to select the desired audio mode Each press of SAP will change the audio mode Stereo SAP Mono Press SUB MENU to show sub menu screen p 28 This menu consists of shortcuts to convenient functions When tuning to a digital channel press the button to en...

Page 21: ... same even after the TV is turned off 1 Press FAVORITE Press FAVORITE repeatedly to change between pages 1 3 2 3 3 3 or exit 2 Press or a Numbered key 1 9 and 0 to highlight a channel on the list Selecting a channel number from the list with the number button will display the channel directly 3 Press OK to display the highlighted channel Use Favorite Feature select ok To change the page Pressing c...

Page 22: ... view Selected picture information is displayed No Image number or file name is displayed Date Date of recording is displayed Pixel Display resolution is displayed Press to exit from menu screen Press to return to the previous screen Total number of images Navigation area to Slide show Present status While reading the data 1 Insert the SD Card For cautions and details on SD Cards p 44 Note Dependi...

Page 23: ...n Picture menu p 26 To change the view slide show mode adjusting images etc To watch photos in slide show mode In When MENU is pressed the JPEG menu is displayed Disp time You can set how many seconds each image is displayed in Slide show mode 1 10 15 20 30 45 60 120 sec Repeat Turn the slide show Repeat function On or Off Note For large image sizes the display time will be longer than the number ...

Page 24: ...seconds the Input select menu disappears The terminal and label of the connected equipment is indicated To label each of the inputs please refer to p 36 37 example or Operate the connected equipment using the remote control supplied with the equipment For details see the manual of the equipment Select the input mode Label example Terminal To return to TV Note 3 1 2 select enter Watching Videos and...

Page 25: ...rol Follow the menu of the equipment and enjoy watching For the remote control operations refer to p 31 Select the equipment 3 1 2 select enter If you connect equipment that has HDAVI Control 2 function to a TV with HDMI cable you can enjoy using more convenient functions For details EZ Sync Control on p 30 31 For details see the manual of the equipment or ask your local dealer Note To return to T...

Page 26: ...tness Color Set Vivid 0 0 0 Tint 0 Sharpness 0 Picture 1 2 Normal Picture mode Picture Brightness Color Set Vivid 0 0 0 Tint 0 Sharpness 0 Menu Audio Lock Setup Memory card Timer Picture EZ Sync Displays the functions that can be set varies according to the input signal select next select adjust or select example Picture menu Press to exit from menu screen Press to return to the previous screen Se...

Page 27: ...ture On Off 3D Y C filter Off Selects image resolution of component connected devices HD SD SD Standard Definition HD High Definition Only 480p signal accepted regular TV NTSC is not available Color matrix SD Reduces noise of specific digital signals of DVD STB etc On Off MPEG NR Off Selects Dark or Light Valid only for external input signals Dark Light Black level Light Resets Bass Treble and Bal...

Page 28: ...U MENU Menu Audio Lock Setup Memory card Timer Picture EZ Sync Setup 1 2 All Surf mode Language Clock Program channel External devices CC SUB SUB MENU MENU How to Use Menu Functions Menu list Displays the functions that can be set varies according to the input signal Press to exit from menu screen Press to return to the previous screen 1 Display menu Various menus allow you to make settings for th...

Page 29: ...is Bright to prevent panel Image retention p 45 Side bar Bright To conserve energy the TV automatically turns off when NO SIGNAL continues more than 10 minutes Set No Note Not in use when setting Auto power on On Off Timer Lock SD Mode or Digital channel No signal shut off was activated will be displayed for about 10 seconds when the TV is turned on for the first time after turning the power off b...

Page 30: ...s an industry standard known as HDMI CEC Consumer Electronics Control is a unique function that we have developed and added As such its operation with other manufacturers equipment that supports HDMI CEC cannot be guaranteed For the first time When adding new equipment reconnecting the equipment or changing the setup After the connection turn the equipment on and then switch the TV on Select the i...

Page 31: ...f if it is still in rec mode Caution The TV remains on even if the EZ Sync compatible equipment is turned off You can select Home theater or TV speakers for audio output Control theater speakers with the TV s remote control This function is available only when Panasonic Amplifier or Player theater is connected In the EZ Sync menu you can select an HDMI connected Panasonic equipment and access it q...

Page 32: ...rd If it is the first time to enter the password enter the code twice in order to register it next select Select the Lock mode Off Unlocks all the lock setting of Channel Game and Program All Locks all the inputs regardless of the lock setting of Channel Game and Program Custom Locks specified inputs of Channel Game and Program When you select a locked channel a message will be displayed that allo...

Page 33: ...ms that have been set to Blocked Off Turns off the monitor terminal output for programs that have been set to Blocked To disable recording of the locked program Select Monitor out and set to On This television is designed to support the Downloadable U S Region Rating System when available Available only in U S A The Off rating is independent of other ratings When placing a block on a specific age ...

Page 34: ...anged according to your needs and reception conditions 2 1 3 4 5 Press to exit from menu screen Display menu Select Setup Select Program channel Select the function Set To reset the settings of setup menu Select Reset in Setup menu and press OK Input your 4 digit password with number buttons Select YES on the confirmation screen and press OK next select next select next select Auto Set automatical...

Page 35: ...aption select next select item to edit Caption Favorite Add next Select the item to be edited Caption Favorite Add Caption Changes the station identifier Favorite Registers channel to Favorite List Add Adds or skips channels Check the signal strength if interference is found or freezing occurs on a digital image change channel ok Signal intensity Not available if Cable is selected in ANT in see ab...

Page 36: ...ut labels Monitor out Input Labels Monitor out next select next select Select Setup 2 Display menu 1 3 5 Press to exit from menu screen Set Select External devices or CC Stop output the picture and audio Display Closed Caption CC next select 4 External devices Select Input Labels or Monitor out Monitor out Display labels of external devices Input labels ...

Page 37: ...d must be transmitting Closed Caption CC information p 43 Select the item and set Size Text size Font Text font Style Text style Raised Depressed etc Foreground Color of text Fore opacity Opacity of text Background Color of text box Back opacity Opacity of text box Outline Outline color of text Identify the setting options on the screen Mode Select On when not using select Off Analog Choose the Cl...

Page 38: ...t next select Turns Off automatically Sleep Turns On Off automatically 5 timers can be set Timer 1 Timer 5 Press to exit from menu screen Press to return to the previous screen The TV can automatically turn On Off at the designated date and time The Clock must be set before On time Off time settings p 18 The Sleep timer and On Off timer will not function if Auto power on p 29 is set ...

Page 39: ... 4 set select set Select the channel Channel Select the day Day The time to turn On On time The time to turn Off Off time Timer setting On Off Set To set Sleep Off Timer Set to shut the unit off after a pre selected amount of time Note The TV automatically turns Off after 90 minutes when turned On by the Timer This operation will be cancelled if the Off time is selected or if a key is pressed 0 30...

Page 40: ...DVDs DVD Player Set Top Box Optical digital audio cable The picture and audio input signals connected to a terminal specified in Monitor out p 36 cannot be output from PROG OUT terminals However audio output can be obtained from DIGITAL AUDIO OUT terminal To prevent howling and image oscillation set the Monitor out setting when connecting the VCR with loop connection p 28 36 Note DVD Recorder VCR ...

Page 41: ... with HDAVI control is changed switch the power of this unit Off then On again while the power of all equipment is On so that the unit can correctly recognize the connected equipment and check that DIGA RAM theater and Player theater playback operate EZ SyncTM Connections Setting of this unit after connection After making connections as shown above set EZ Sync under EZ Sync setting to On using the...

Page 42: ...over No profanity nudity or sexual content G General programming suitable for all audiences PG Parental Guidance suggested Some material may not be suitable for children 14 Programming contains themes or content which may not be suitable for viewers under the age of 14 Parents are strongly cautioned to exercise discretion in permitting viewing by pre teens and early teens 18 18 years old Programmi...

Page 43: ...t and the TV captions from each unit will overlap FULL JUST FULL JUST Enlarges the 4 3 image horizontally to the screen s side edges Recommended for anamorphic picture Stretches to justify the 4 3 image to the four corners of the screen Recommended for normal TV broadcast H FILL 4 3 H FILL Enlarges the 4 3 image horizontally to the screen s side edges The side edges of the image are cut off Standa...

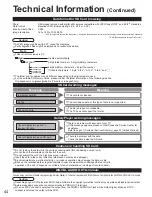
Page 44: ...e for camera file system A Japan Electronics and Information Technology Industries Association s standard EXIF Exchangeable Image File Format 3 digit folder number 5 digit arbitrary characters 4 digit arbitrary characters 4 digit file number Usable characters 1 byte a to z A to Z 0 to 9 and _ Technical Information Continued Cautions in handling SD Card Do not remove the card while the unit is acce...

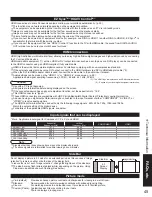
Page 45: ...MI compliant device 2 Enquire at your local digital equipment retailer shop Caution Use with a PC is not assumed All signals are reformatted before being displayed on the screen If the connected device has an aspect adjustment function set the aspect ratio to 16 9 This HDMI connector is type A These HDMI connectors are compatible with HDCP High Bandwidth Digital Content Protection copyright protec...

Page 46: ...ion and then wring the cloth dry Use this cloth to wipe the cabinet and then wipe it dry with a dry cloth Do not allow any detergent to come into direct contact with the surface of the Plasma TV If water droplets get inside the unit operating problems may result Avoid contact with volatile substances such as insect sprays solvents and thinner otherwise the quality of the cabinet surface may be adv...

Page 47: ... Y 1 0 V p p including synchronization PB PR 0 35 V p p AUDIO L R RCA PIN Type 2 0 5 V rms HDMI 1 2 AUDIO IN TYPE A Connector 2 This TV supports HDAVI Control 2 function AUDIO L R RCA PIN Type 2 0 5 V rms Card slot SD CARD slot 1 AV PROG OUT VIDEO RCA PIN Type 1 1 0 V p p 75 Ω AUDIO L R RCA PIN Type 2 0 5 V rms DIGITAL AUDIO OUT PCM Dolby Digital Fiber Optic FEATURES 3D Y C FILTER CLOSED CAPTION V...

Page 48: ...direction and connection of the aerial Interference or frozen digital channels intermittent sound Change the direction of antenna for digital channels Check Signal meter p 35 If the signal is weak check the antenna and consult your local dealer The remote control does not work Are the batteries installed correctly p 6 Has the battery run down Pictures from external equipment are distorted when the...

Page 49: ...nd is produced If there is a problem with your TV please refer to the table below to determine the symptoms then carry out the suggested check If this does not solve the problem please contact your local Panasonic dealer quoting the model number and serial number both found on the rear of the TV The function to prevent Image retention is activated Not a faulty symptom The screen saver is activated...

Page 50: ...ages which occurred in shipment or failures which are caused by products not supplied by the warrantor or failures which result from accidents misuse abuse neglect bug infestation mishandling misapplication alteration faulty installation set up adjustments misadjustment of consumer controls improper maintenance power line surge lightning damage modification or commercial use such as in a hotel off...

Page 51: ...am 9 pm Saturday Sunday 10 am 7 pm EST For hearing or speech impaired TTY users TTY 1 877 833 8855 Purchase Parts Accessories and Instruction Books on line for all Panasonic Products by visiting our Web Site at http www pstc panasonic com or send your request by E mail to npcparts us panasonic com You may also contact us directly at 1 800 332 5368 Phone 1 800 237 9080 Fax Only Monday Friday 9 am t...

Page 52: ...AL INDIRECT OR CONSEQUENTIAL DAMAGES In certain instances some jurisdictions do not allow the exclusion or limitation of incidental or consequential damages or the exclusion of implied warranties so the above limitations and exclusions may not be applicable In home service requires clear complete and easy access to the product by the Authorized Servicentre and does not include removal or re instal...

Page 53: ...53 FAQs etc Note Limited Warranty for Canada ...

Page 54: ...54 Note ...

Page 55: ...55 Note ...

Page 56: ...56 Note ...

Page 57: ...57 Note ...

Page 58: ...ie de este producto se encuentran en su panel posterior Deberá anotarlos en el espacio provisto a continuación y guardar este manual más el recibo de su compra como prueba permanente de su adquisición para que le sirva de ayuda al identificarlo en el caso de que le sea sustraído o lo pierda y también para disponer de los servicios que le ofrece la garantía Modelo Número de serie Customer s Record ...

Page 59: ...Instrucciones en Español Televisor de plasma de alta definición Número de modelo TH 42PX75U TH 50PX75U ...

Page 60: ...ica de Matsushita Electric Industrial Co Ltd HDMI el símbolo HDMI y la Interface de Multimedios de Alta Definición son marcas comerciales ó marcas registradas de HDMI Licensing LLC HDAVI Control HDAVI ControlTM es una marca de fábrica de Matsushita Electric Industrial Co Ltd Sienta un nivel increíble de excitación multimedia Convierta su propia sala de estar en un cine ...

Page 61: ...nús imagen sonido calidad etc 26 EZ SyncTM HDAVI ControlTM 30 Bloqueo 32 Edición y configuración de canales 34 Títulos de entradas Salida a monitor Subtítulos 36 Utilización del temporizador 38 Conexiones AV recomendadas 40 Lista de clasificaciones para el bloqueo 42 Información técnica 43 Mantenimiento 46 Especificaciones 47 Preguntas frecuentes 48 Disfrute de su televisor Características básicas...

Page 62: ...ene la finalidad de avisar al usuario de que hay piezas en el interior del producto que si las tocan las personas éstas pueden recibir una descarga eléctrica El signo de exclamación dentro de un triángulo equilátero tiene la finalidad de avisar al usuario de la existencia de instrucciones de utilización y servicio importantes en el material impreso que acompaña al aparato ADVERTENCIA Para reducir ...

Page 63: ...léctrico con las manos mojadas Puede recibir una descargue eléctrica No haga nada que pueda dañar el cable eléctrico Cuando desenchufe el cable eléctrico sujete del enchufe y no el cable No dañe el cable eléctrico no lo modifique ni coloque objetos pesados encima ni coloque cerca de objetos que desprendan calor no tuerza ni tire excesivamente del mismo Esto puede provocar un fuego ó descarga eléct...

Page 64: ...para 5C 2V Nota Para mantener el rendimiento y la seguridad de la unidad cerciórese absolutamente de pedir a su concesionario o a un contratista cualificado que asegure las abrazaderas de suspensión de pared Lea atentamente las instrucciones suministradas con el soporte o pedestal del televisor de pantalla de plasma y cerciórese absolutamente de tomar los pasos necesarios para impedir que el telev...

Page 65: ... evitar la caída y sostener el televisor con pantalla de plasma En caso de terremoto ó cuando los niños se suben al pedestal para televisor con pantalla de plasma instalada el televisor con pantalla de plasma puede caerse pudiendo causar daños a las personas No desarme ni modifique el pedestal De lo contrario la unidad podría caerse y dañarse y también podría causar heridas a personas Base 1 M5 x ...

Page 66: ... con una banda Si se asegura a la base Para impedir la caída del televisor El televisor deberá estar sujeto a la base y a una pared Accesorios Banda 2 Tornillo 2 Tornillo de madera 2 Diámetro nominal de 4mm x 10 para 42 4mm x 12 para 50 ...

Page 67: ... Para impedir la caída del televisor Fije a una pared o columna con un alambre o cadena fuerte de venta en el comercio Si se asegura a una pared Tornillo principal Quite el tornillo Tornillo principal Abrazadera 2 Accesorios ...

Page 68: ... ATSC Advanced Television Systems Committee Las normas de televisión digital incluyen la televisión de alta definición digital HDTV la televisión de definición estándar SDTV la emisión de datos el audio multicanal de sonido envolvente y la televisión interactiva Receptor de televisión por cable cable Usted necesita suscribirse a un servicio de televisión por cable para poder ver sus programas Podr...

Page 69: ...evisión por cable Si se utiliza un receptor de televisión por cable Ponga el canal de televisión CH3 ó CH4 Cable de alimentación de CA Conecte después de haber terminado todas las demás conexiones TV por cable Antena de VHF UHF TV Parte posterior de la unidad TV por cable 120 V CA 60Hz Antena de VHF UHF Receptor de televisión por cable Terminal de antena Nota Cuando desconecte el cable de alimenta...

Page 70: ...na grabadora DVD videograbadora Para grabar reproducir Ejemplo 2 Antena de VHF UHF Grabadora DVD ó Videograbadora TV Parte posterior de la unidad Cable de alimentación de CA 120 V CA 60Hz Antena de VHF UHF Grabadora DVD Videograbadora con sintonizador de televisión Terminal de antena Para utilizar terminales HDMI página siguiente Para utilizar terminales COMPONENT página siguiente Para utilizar te...

Page 71: ...er afectadas por los sistemas de protección de los derechos de autor y las imágenes se distorsionarán en el otro monitor de TV Nota Grabadora DVD Grabadora DVD HDMI AV OUT COMPONENT VIDEO OUT AUDIO OUT blanco rojo verde azul rojo blanco rojo verde azul blanco rojo blanco rojo AUDIO OUT S VIDEO OUT rojo Para utilizar terminales COMPOSITE Para utilizar terminales S VIDEO Videograbadora COMPOSITE OUT...

Page 72: ... una grabadora DVD videograbadora y un receptor de satélite Conecte de igual forma que en la página 13 Conexión básica Continuación Grabadora DVD ó Videograbadora Receptor de satélite TV Receptor de satélite Grabadora DVD Videograbadora con sintonizador de televisión Antena de VHF UHF Antena de VHF UHF Cable de alimentación de CA 120 V CA 60Hz Terminal de antena Ejemplo 3 Para utilizar terminales ...

Page 73: ...rminales COMPOSITE Para utilizar terminales S VIDEO Receptor de satélite COMPOSITE OUT Videograbadora Videograbadora amarillo blanco rojo amarillo blanco rojo Receptor de satélite La entrada de S Vídeo anulará la señal de vídeo compuesto cuando se conecte un cable de S Vídeo Conecte un cable de S Vídeo ó uno de vídeo La conexión a los terminales S VIDEO le permitirá disfrutar de una calidad de ima...

Page 74: ...éltelo Para soltar Para colocar Agujero Meter Para atar Para quitar Para aflojar Mantenga empujados ambos cierres de resorte laterales Cierre de resorte Ajustar Ganchos Perilla Mantenga empujada la perilla DIGITAL AUDIO IN Grabadora DVD Cine para casa Amplificador AV HDMI AV OUT HDMI AV IN HDMI AV OUT Se le recomienda utilizar un cable HDMI de Panasonic pág 30 Cuando utilice las terminales COMPONE...

Page 75: ...de la lista de canales favoritos pág 21 Cambia al canal visto previamente Menú EZ Sync pág 25 30 31 Seleccione el modo de audio para ver la televisión pág 20 Menús de salida Selección OK Cambio Vuelve al menú anterior Subida bajada del volumen Visualiza ó elimina la bandera de canal pág 20 Encendido Apagado del silenciamiento del sonido Teclado numérico para seleccionar cualquier canal pág 20 ó pa...

Page 76: ... pone en No Encienda el televisor con el interruptor POWER 1 Seleccione su idioma 2 Ajuste el reloj 3 Año Seleccione el año Mes Seleccione el mes Día Seleccione el día Hora Ajuste la hora Minuto Ajuste el minuto Vuelva a la pantalla anterior Pulse para salir de la pantalla de menú Para volver a la pantalla anterior Nota Para cambiar la configuración Idioma Reloj Programa auto Imagen más adelante v...

Page 77: ... Seleccione Entrada ANT 5 Confirme los canales registrados Los canales disponibles analógicos digitales se establecen automáticamente Si no se pulsa OK después de seleccionar Aceptar los canales no se memorizarán Si realiza la exploración más de 2 veces los canales guardados previamente se borrarán Nota Acerca de los sistemas de emisión analógico NTSC programación de TV tradicional Digital ATSC nu...

Page 78: ...ccionar la siguiente pista de audio si está disponible cuando se recibe un canal digital Pista de audio 1 de 2 Ingles Modo analógico Pulse SAP para seleccionar el modo de audio como se describe a continuación Cada vez que se pulsa el botón SAP el modo de audio cambiará como se muestra a continuación Estéreo SPA Mono Pulse SUB MENU para mostrar la pantalla del submenú pág 28 Este menú consiste en a...

Page 79: ...amente FAVORITE para cambiar entre las páginas 1 3 2 3 3 3 ó salir 2 Pulse ó una tecla numerada 1 9 y 0 para resaltar un canal de la lista Al seleccionar un número de canal de la lista con las teclas numeradas se visualizará directamente el canal 3 Pulse OK para visualizar el canal resaltado Configuración de la función de favoritos Utilización de la función de favoritos Seleccione Aceptar Para cam...

Page 80: ...archivo Fecha Se visualiza la fecha de la grabación Pixel Se visualiza la resolución de la visualización Número total de imágenes Área de navegación a diapositiva Estado actual Mientras se leen los datos Nota Dependiendo del formato JPEG el contenido de Info puede que no se visualice correctamente Consulte la pág 44 Formato de datos para examinar tarjetas SD para conocer detalles a visualización d...

Page 81: ...oducción sencilla ajuste de imágenes etc Para ver fotos en el modo de reproducción sencilla En Cuando se pulsa MENU se visualiza Menú JPEG Tiempo desp Puede ajustar los segundos que se va a visualizar cada imagen en el modo de diapositiva 1 10 15 20 30 45 60 120 segundos Repetir Sí ó No la función de repetición de diapositiva Nota Para las imágenes de tamaño grande el tiempo de visualización será ...

Page 82: ...ndente descendente para seleccionar la entrada de su elección y luego pulse OK Durante la selección el menú Seleccionar entrada desaparece si no se realiza ninguna acción durante varios segundos La terminal y la etiqueta del dispositivo conectado se indican Para cambiar la etiqueta de entrada pág 36 37 Pantalla inicial ó Utilice el equipo conectado empleando el mando a distancia del mismo Para con...

Page 83: ...uipo y disfrute viendo Para las operaciones del control remoto consulte la pág 31 Seleccione el equipo 3 1 2 Seleccione Introducir Si conecta el equipo que tiene la función HDAVI Control 2 al televisor con un cable HDMI usted puede disfrutar utilizando la función más conveniente Para conocer más detalles consulte Control EZ Sync en las págs 30 31 Para conocer detalles vea el manual del equipo ó pr...

Page 84: ... Tinte 0 Nitidez 0 Imagen 1 2 Normal Modo Contraste Brillo Color Sí Vívido 0 0 0 Tinte 0 Nitidez 0 Menú Audio Bloqueo Ajuste Tarjeta memoria Cronómetro Imagen EZ Sync Visualiza las funciones que pueden establecerse cambia según la señal de entrada Seleccione Siguiente Seleccione Ajuste ó Seleccione Ejemplo Menú Imagen Pulse para salir de la pantalla de menú Para volver a la pantalla anterior Selec...

Page 85: ...a de la imagen Sí No 3D Y C filtro No Selecciona la resolución de la imagen de los dispositivos conectados a componentes HD SD SD Visión normal HD Visión de alta definición Sólo se acepta la señal 480p la televisión convencional NTSC no se está disponible Matriz color SD Reduce el ruido de las señales digitales específicas de DVD STB etc Sí No MPEG NR No Seleccione Obscuro ó Claro Sólo es válido p...

Page 86: ...uste Tarjeta memoria Cronómetro Imagen EZ Sync Ajuste 1 2 Todos Modo surf Idioma Reloj Programa canal Dispositi Externos CC SUB SUB MENU MENU Cómo utilizar las funciones de los menús Lista de menús Visualiza las funciones que pueden establecerse cambia según la señal de entrada Pulse para salir de la pantalla de menú Para volver a la pantalla anterior 1 Visualice el menú Varios menús le permiten h...

Page 87: ...ar energía el televisor se apaga automáticamente cuando no se recibe ninguna señal durante más de 10 minutos Sí No Nota No se utiliza cuando se configura Autoencendido Cronómetro Bloqueo Modo SD o el canal digital Apaga sin señal fue activado se visualizará durante unos 10 segundos cuando el televisor se encienda por primera vez después de desconectarse la alimentación mediante Apaga sin señal La ...

Page 88: ...o de consumidores es una función única que nosotros hemos desarrollado y agregado Como tal su funcionamiento con equipos de otros fabricantes que soportan HDMI CEC no puede ser garantizado Para la primera vez Cuando se agrega un equipo nuevo se reconecta un equipo o se cambia la instalación Después de hacer la conexión encienda el equipo y luego encienda el televisor Seleccione el modo de entrada ...

Page 89: ...stá en el modo de grabación Aviso El televisor permanece encendido aunque se apague el equipo compatible con EZ Sync Para la salida de audio puede seleccionar los altavoces de cine para casa o del televisor Controle los altavoces de cine para casa con el control remoto del televisor Esta función sólo está disponible cuando está conectado un amplificador o reproductor de cine para casa de Panasonic...

Page 90: ...ra vez que introduce una contraseña introduzca el número dos veces en orden para registrarlo Siguiente Seleccione Seleccione el modo de bloqueo No Desbloquea toda la configuración de bloqueo de Canal Juego y Programa Total Bloquea todas las entradas independientemente de la configuración de bloqueo Canal Juego y Programa Usuario Bloquea las entradas especificadas de Canal Juego y Programa Cuando s...

Page 91: ...eo No Desactiva la salida del terminal del monitor para los programas que han sido establecidos en Bloqueo Para desactivar la grabación del programa bloqueado Seleccione Salida a monitor y póngalo en Sí Este televisor ha sido diseñado para soportar el Downloadable U S Region Rating System cuando se encuentre disponible Sólo está disponible en los EE UU La clasificación No es independiente de otras...

Page 92: ...e la recepción 2 1 3 4 5 Pulse para salir de la pantalla de menú Visualice el menú Seleccione Ajuste Seleccione Programa canal Seleccione la función Establezca Siguiente Seleccione Siguiente Seleccione Auto Ajuste automático Manual Ajuste manual Medidor de señal Compruebe la intensidad de la señal Siguiente Seleccione Para restablecer los ajustes del menú Ajuste Seleccione Restaurar en el menú Aju...

Page 93: ...ulos Favoritos Agregar Siguiente Seleccione el elemento que quiera editar Títulos Favoritos Agregar Títulos Cambio del identificador de emisoras Favoritos Registra los canales en la lista de favoritos Agregar Agrega ó brinca canales Encendido apagado de sintonía secuencial Compruebe la intensidad de la señal si se encuentra interferencia ó se congela una imagen digital Seleccione el canal Aceptar ...

Page 94: ...da a monitor Siguiente Seleccione Siguiente Seleccione Seleccione Ajuste 2 Visualice el menú 1 3 5 Pulse para salir de la pantalla de menú Establezca Seleccione Dispositi Externos ó CC Pare la salida de imagen y sonido Visualización de subtítulos CC Siguiente Seleccione 4 Dispositi Externos Seleccione Títulos de entradas ó Salida a monitor Salida a monitor Etiquetas de visualización de dispositivo...

Page 95: ...información de subtítulos ocultos CC pág 43 Seleccione el elemento y establézcalo Tamaño Tamaño del texto Letra Fuente del texto Estilo Estilo del texto Elevado Deprimido etc Frente Color del texto Opacidad frontal Opacidad del texto Fondo Color de la caja de texto Fondo obscuro Opacidad de la caja de texto Contorno Color del contorno del texto Identifique las opciones de configuración en la panta...

Page 96: ...one Se apaga automáticamente Apagado Se enciende automáticamente Se pueden establecer 5 temporizadores Cronómetro 1 Cronómetro 5 Pulse para salir de la pantalla de menú Para volver a la pantalla anterior El televisor se puede encender apagar automáticamente en la fecha y a la hora designadas El reloj deberá estar puesto en hora antes de hacer los ajustes de la hora de encendido apagado pág 18 El c...

Page 97: ...ncenderse Canal El día de encendido Día Seleccione el canal Encender Seleccione el día Apagar Ajuste del temporizador Sí No Fijar Para establecer Apagado Temporizador de apagado Pulse para que la unidad se apague automáticamente después de transcurrir un tiempo preseleccionado Nota El televisor se apaga automáticamente después de pasar 90 minutos cuando se enciende mediante el Cronometro Esto se c...

Page 98: ...a oscilación de la imagen establezca la configuración Salida a monitor cuando conecte la videograbadora mediante una conexión en bucle pág 28 36 Nota Cuando se conecte un equipo STB DVD etc a los terminales HDMI ó COMPONENT sólo se podrán obtener señales de audio Por los terminales de salida no pueden pasar señales de vídeo Cuando se reciban señales de canales digitales todos los formatos digitale...

Page 99: ...GA el equipo de cine para casa RAM y el reproductor de cine para casa EZ SyncTM Conexiones Configuración de esta unidad después de la conexión Después de hacer las conexiones como se muestra arriba ponga EZ Sync bajo Ajuste EZ Sync en Sí utilizando el menú Ajuste pág 30 31 Nota Se recomienda HDMI 1 Cuando se conecta a HDMI 2 ponga el modo de entrada en HDMI 2 pág 24 inicialmente antes de conectar ...

Page 100: ...le para niños de 8 años y menos Sin blasfemias desnudos ni contenido sexual G Programación general para todos los públicos PG Se sugiere la supervisión de los padres Algún material puede no ser apropiado para los niños 14 La programación contiene temas que pueden no ser apropiados para el público menor de 14 años A los padres se les avisa que no deben dejar ver estos programas a los niños ni a los...

Page 101: ...ubtítulos CC COMP JUSTO COMP JUSTO Amplía horizontalmente la imagen 4 3 hasta los bordes laterales de la pantalla Recomendada para la imagen anamórfica Alarga para justificar la imagen 4 3 a las cuatro esquinas de la pantalla Recomendada para la emisión de televisión normal H LLENO 4 3 H LLENO Amplía horizontalmente la imagen 4 3 hasta los bordes laterales de la pantalla Los bordes laterales de la...

Page 102: ... software DVD Audio la función de protección del copyright tal vez se active y apague la salida óptica Los altavoces externos no se pueden conectar directamente a los terminales PROG OUT Cuando se seleccione un canal ATSC la salida procedente de la toma DIGITAL AUDIO OUT será Dolby Digital Cuando se seleccione un canal NTSC la salida será PCM Cuidados al manejar la tarjeta SD No retire la tarjeta ...

Page 103: ...los dispositivos El equipo compatible con HDMI 1 que tenga un terminal de salida HDMI o DVI como por ejemplo un receptor digital multimedia ó un reproductor DVD podrá ser conectado al terminal HDMI utilizando un cable que cumpla con HDMI función completa HDMI es la primera interfaz AV completamente digital del mundo para el consumidor que cumple con un estándar de no compresión Si el dispositivo e...

Page 104: ...mita que el detergente entre en contacto directo con la superficie del televisor de plasma Si las gotas de agua entran en el interior del aparato pueden surgir problemas en el funcionamiento Evite el contacto con sustancias volátiles tales como rociadores de insecticida disolventes y diluyentes de pintura debido a que puede verse afectada la superficie del mueble y puede desprenderse el revestimie...

Page 105: ...ENT VIDEO INPUT 1 2 Y 1 0 V p p incluyendo sincronización PB PR 0 35 V p p AUDIO L R Tipo RCA PIN 2 0 5 V rms HDMI 1 2 AUDIO IN Conector tipo A 2 Este televisor soporta la función HDAVI Control 2 AUDIO L R Tipo RCA PIN 2 0 5 V rms Ranura de tarjeta 1 ranura de tarjeta SD AV PROG OUT VIDEO Tipo RCA PIN 1 1 0 V p p 75 Ω AUDIO L R Tipo RCA PIN 2 0 5 V rms DIGITAL AUDIO OUT PCM Dolby Digital Fibra ópt...

Page 106: ...a agotado la batería La imagen se ve distorsionada cuando el equipo se conecta a través de HDMI Está conectado correctamente el cable HDMI pág 40 41 Apague el televisor y el equipo y luego vuelva a encenderlos Compruebe una señal de entrada procedente del equipo pág 45 Utilice un dispositivo que cumpla con la norma EIA CEA 861 861B Puntos blancos ó imágenes con sombra ruido Compruebe la posición l...

Page 107: ...CM Si la conexión de sonido digital tiene un problema seleccione la conexión de sonido analógico Presione cualquier boton para regresar se mueve en la pantalla Un punto permanece oscuro Imagen desordenada y ruidosa No se puede visualizar imagen Sólo se visualizan puntos en lugar de imágenes No se produce imagen ni sonido La función para impedir la imagen remanente está activada No es un síntoma de...

Page 108: ...50 Nota ...

Reviews: