1. Safety Precautions
2
1.1 General
Guidelines
2
1.2 Touch-Current
Check
2
2. Prevention of Electro Static Discharge(ESD) to
Electrostatically Sensitive(ES) Devices
3
3. Chasis Board Layout
4
4. Servicing method
5
4.1 Removing the tilt base
5
4.2 Removing the rear cover
5
4.3 Removing the Switch Unit
6
4.4 Removing the C-Board
6
4.5 Removing the E-Board
6
4.6 Removing the F-Board
6
4.7 Removing the D-Board
7
4.8
Removing the Speaker Unit
7
4.9 Removing the BRKT hinge
7
4.10 Removing the Shield pcd assy
7
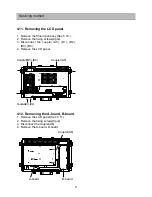
4.11 Removing the LCD Panel
8
4.12 Removing the A-Board, B-Board
8
5. Service Mode Function
9
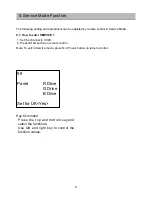
5.1 How to enter SERVICE 1
9
1
Design and Specifications are subject to change without notice.
Weight and Dimensions shown are approximate.
WARNING
This service information is designed for experienced repair technicians only and is not designed for use by the general public.
It does not contain warnings or cautions to advise non-technical individuals of potential dangers in attempting to service a product.
Products powered by electricity should be serviced or repaired only by experienced professional technicians. Any attempt to service
or repair the product or products dealt with in this service information by anyone else could result in serious injury or death.
6. Conductor Views
10
6.1 MAIN
PCB(TOP)
10
6.2 MAIN
PCB(BOTTOM)
11
7. Block and Schematic Diagrams
12
7.1 Schematic Diagram Notes
12
7.2 Power Block Diagram
13
7.3 Power Block Diagram
14
7.4 VCTI Block Diagram
15
7.5 Input Block Diagram
16
7.6 Memory AMP Schematic Diagram
17
7.7 AD9883 Schematic Diagram
18
7.8 Deinterlace Schematic Diagram
19
7.9 SDRAM Schematic Diagram
20
7.10 Image Processor Schematic Diagram
21
7.11 LVDS, KEY Schematic Diagram
22
8. Parts Location & Mechenical Replacement
Parts List
23
8.1 Part
Location
23
8.2 Packing Exploded View
24
9. Service Parts List
25
Contents
Summary of Contents for Viera TX-17LX2
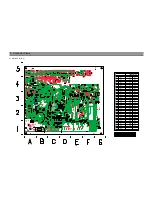
Page 12: ...11 Conductor Views 6 2 MAIN PCB BOTTOM...
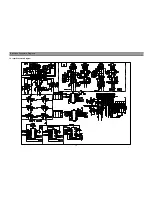
Page 14: ...13 Block and Schematic Diagrams 7 2 Signal Block Diagram...
Page 15: ...14 Block and Schematic Diagrams 7 3 Power Schematic Diagram...
Page 16: ...15 Block and Schematic Diagrams 7 4 VCTI Schematic Diagram...
Page 17: ...16 Block and Schematic Diagrams 7 5 Input Schematic Diagram...
Page 18: ...17 Block and Schematic Diagrams 7 6 Memory AMP Schematic Diagram...
Page 19: ...18 Block and Schematic Diagrams 7 7 AD9883 Schematic Diagram...
Page 20: ...19 Block and Schematic Diagrams 7 8 Deinterlace Schematic Diagram...
Page 21: ...20 Block and Schematic Diagrams 7 9 SDRAM Schematic Diagram...
Page 22: ...21 Block and Schematic Diagrams 7 10 Image Processor Schematic Diagram...
Page 23: ...22 Block and Schematic Diagrams 7 11 LVDS KEY Schematic Diagram...
Page 25: ...24 Parts Location Mechanical Replacement Parts List 8 2 Packing Exploded View...

