background image

 English

2

  Safety Precautions

 Warning

 Handling the mains plug and lead


 Insert the mains plug fully into the socket outlet. (If the mains plug is loose, it could generate heat and cause fire.)


 Ensure that the mains plug is easily accessible.


 Ensure the earth pin on the mains plug is securely connected to prevent electrical shock.


 An apparatus with CLASS I construction shall be connected to a mains socket outlet with a protective earthing 
connection.


 Do not touch the mains plug with a wet hand. (This may cause electrical shock.)


 Do not use any mains lead other than that provided with this TV. (This may cause fire or electrical shock.)


 Do not damage the mains lead. (A damaged lead may cause fire or electrical shock.)


 Do not move the TV with the lead plugged in the socket outlet.


 Do not place a heavy object on the lead or place the lead near a high-temperature object.


 Do not twist the lead, bend it excessively or stretch it.


 Do not pull on the lead. Hold onto the mains plug body when disconnecting the lead.


 Do not use a damaged mains plug or socket outlet.

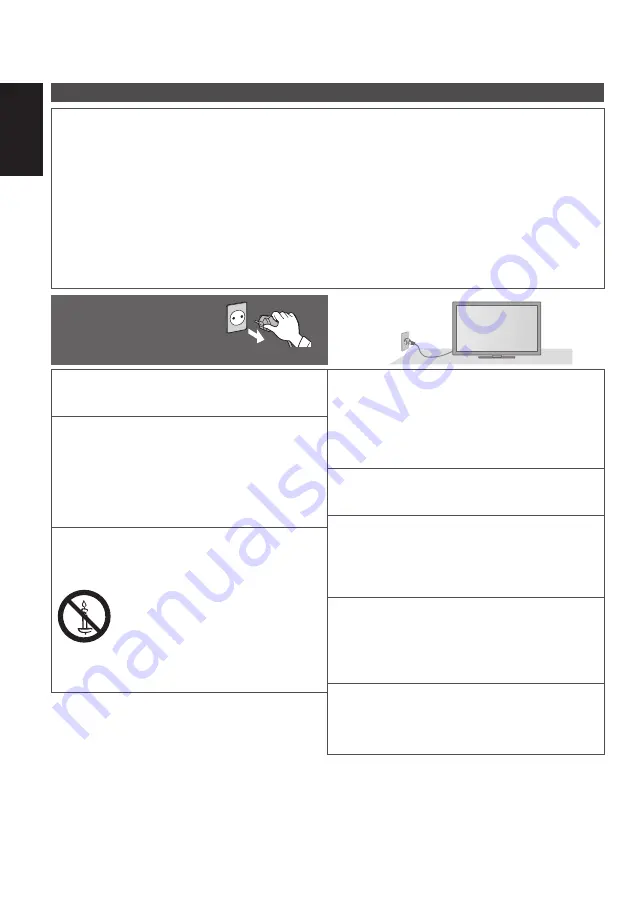
 If you find any abnormality, 
remove the mains plug 
immediately!


 AC 220-240 V 
50 / 60 Hz

 Power source


 This TV is designed to operate on AC 220-240 V, 
50 / 60 Hz.

 Do not remove covers and NEVER 
modify the TV yourself


 Do not remove the rear cover as live parts are 
accessible when it is removed. There are no user 
serviceable parts inside. (High-voltage components 
may cause serious electrical shock.)


 Have the TV checked, adjusted, or repaired at your 
local Panasonic dealer.

 Do not expose to direct sunlight and 
other sources of heat


 Avoid exposing the TV to direct sunlight and other 
sources of heat.


 To prevent the spread 
of fire, keep candles 
or other open flames 
away from this product 
at all times

 Do not expose to rain or excessive 
moisture


 To prevent damage which might result in electric shock 
or fire, do not expose this TV to rain or excessive 
moisture. This TV must not be exposed to dripping or 
splashing water and objects filled with liquid, such as 
vases, must not be placed on top of or above the TV.

 Do not insert foreign objects into the TV


 Do not allow any objects to drop into the TV through 
the air vents. (Fire or electrical shock may result.)

 Do not place the TV on sloped or 
unstable surfaces, and ensure that the 
TV does not hang over the edge of the 
base


 The TV may fall off or tip over.

 Use only the dedicated pedestals / 
mounting equipment


 Using an unapproved pedestal or other fixtures may 
make the TV unstable, risking injury. Be sure to ask 
your local Panasonic dealer to perform setup.


 Use approved pedestals (p. 4) / wall-hanging brackets.

 Do not allow children to handle SD Card


 As with any small object, SD Cards can be 
swallowed by young children. Please remove SD 
Card immediately after use and store out of reach of 
children.

Summary of Contents for Viera TX-P42ST50E

Page 1: ...ions refer to the Operating Instructions on the CD ROM To view the Operating Instructions on the CD ROM you need a computer equipped with a CD ROM drive and Adobe Reader Version 8 0 or later is recomm...

Page 2: ...live parts are accessible when it is removed There are no user serviceable parts inside High voltage components may cause serious electrical shock Have the TV checked adjusted or repaired at your loca...

Page 3: ...eversible damage can be caused Do not apply strong force or impact to the display panel This may cause damage resulting in injury The TV is heavy Handle the TV by 2 or more people Support as shown to...

Page 4: ...ation may cause battery leakage and corrosion resulting in damage to the remote control Do not mix old and new batteries Do not mix different battery types such as alkaline and manganese batteries Do...

Page 5: ...rwise the TV and or pedestal may fall over and become damaged and personal injury may result Assembly screw black 5 TX P42ST50E TX P50ST50E 1 TX P55ST50E TX P65ST50E M4 10 Assembly screw silver 7 TX P...

Page 6: ...repacking the TV 1 Remove the assembly screws TX P42ST50E TX P50ST50E or TX P55ST50E TX P65ST50E from the TV 2 Pull out the pedestal from the TV 3 Remove the assembly screw from the cover 4 Remove the...

Page 7: ...n yellow blue Used for the selection navigation and operation of various functions 10 Sound Mute Switches sound mute on or off 11 Teletext Switches to teletext mode 12 Volume Up Down 13 Numeric button...

Page 8: ...period selected in Auto Standby This function does not affect the recording of Timer Programming Direct TV Recording and One Touch Recording 1 Function select Volume Contrast Brightness Colour Sharpn...

Page 9: ...erminals 6 7 8 1 9 10 4 3 5 2 1 CI slot 2 SD Card slot 3 Headphone jack 4 USB 1 2 port 5 HDMI1 3 6 ETHERNET 7 Terrestrial cable terminal 8 DIGITAL AUDIO OUT 9 AV1 SCART 10 AV2 COMPONENT VIDEO Connecti...

Page 10: ...VCR Terrestrial aerial RF cable RF Cable Supplied with this TV Note Connect to the TV s AV1 for a DVD Recorder VCR supporting Q Link Please also read the manual of the equipment being connected Keep t...

Page 11: ...Use the Unshielded Twist Pair UTP LAN cable Ferrite core Large size supplied Installing the Ferrite core Pull back the tabs in two places Wind the cable twice Close Wireless connection Internet envir...

Page 12: ...ederlands select set 3 Select your country Country Germany Denmark Poland Austria Sweden Czech France Norway Hungary Italy Finland Slovakia Spain Luxembourg Slovenia Portugal Belgium Croatia Switzerla...

Page 13: ...compatible recorder is connected channel language and country region settings are automatically downloaded to the recorder 0 100 Sending Preset Data Please wait Remote control unavailable If downloadi...

Page 14: ...d access point is not encrypted the confirmation screen will be displayed It is recommended to select the encrypted access point 3 Enter the encryption key of the access point A B C D E F G H I J K L...

Page 15: ...select Retry To set manually select Manual and set each item 4 Go to the next step Press twice 7 Select Home Select Home viewing environment to use in your home environment Please select your viewing...

Page 16: ...e TV VIERA Connect introduction banner appears The banner is subject to change Enjoy selected internet content with VIERA Connect Simply press the OK INTERNET button 2 Access VIERA Connect While the b...

Page 17: ...to correct your vision before using the 3D Eyewear Stop using the 3D Eyewear if you can clearly see double images when viewing 3D content Do not use the 3D Eyewear at a distance less than the recommen...

Page 18: ...supported 3D format Playing back 3D compatible Blu ray disc Frame Sequential format Connect the 3D compatible player via a fully wired HDMI compliant cable If input mode is not switched automatically...

Page 19: ...3D 3D Mode Selection Manual Top and Bottom 2D Top and Bottom 3D Side by Side 2D Side by Side 3D Frame Sequential 2D Frame Sequential 3D Original select set Table of images that can be seen for each 3D...

Page 20: ...IERA TOOLS You can access some special features easily by using the VIERA TOOLS function 1 Display icons of the feature 2 Select a feature VIERA Link select access 3 Follow the operations of each feat...

Page 21: ...ct store Adjust using the slide bar 5 Sharpness Moved change store Go to the next screen Child Lock Access Displays the next screen access To return to TV at any time To return to the previous screen...

Page 22: ...rface quality or cause peeling of the paint The surface of the display panel is specially treated and may be easily damaged Take care not to tap or scratch the surface with your fingernail or other ha...

Page 23: ...vakia Slovenia Spain Turkey The WLAN feature of this TV shall exclusively be used inside buildings This equipment complies with the EMC standards listed below EN55013 EN61000 3 2 EN61000 3 3 EN55020 E...

Page 24: ...tion on Disposal in other Countries outside the European Union These symbols are only valid in the European Union If you wish to discard these items please contact your local authorities or dealer and...

Page 25: ...cd rom voor gedetaileerdere instructies Als u de bedieningsinstructies op de cd rom wilt bekijken hebt u een computer nodig met cd romdrive plus Adobe Reader bij voorkeur versie 8 0 of hoger Afhankeli...

Page 26: ...de TV niet verwijderen anders kunt u in contact komen met de onderdelen die onder spanning staan Er zijn geen door de gebruiker repareerbare onderdelen aan de binnenkant Hoogspanningsonderdelen kunnen...

Page 27: ...lbaar zijn Oefen geen krachtige druk uit op het beeldscherm en houd het vrij van schokken Dit kan leiden tot schade die letsels kan veroorzaken De TV is zwaar Verplaats de TV altijd met twee of meer p...

Page 28: ...uik geen oude en nieuwe batterijen door elkaar Gebruik geen verschillende batterijtypen door elkaar bijvoorbeeld alkaline en mangaanbatterijen Gebruik geen oplaadbare batterijen Ni Cd Houd batterijen...

Page 29: ...re manier dan met de hier opgegeven methode p 6 Anders bestaat de kans dat de tv en of de standaard omvalt en beschadigd worden hetgeen tot verwondingen kan leiden Montageschroef zwart 5 TX P42ST50E T...

Page 30: ...ingssteun gebruikt of de tv opnieuw inpakt 1 Verwijder de montageschroeven TX P42ST50E TX P50ST50E of TX P55ST50E TX P65ST50E uit de tv 2 Trek de standaard van de tv 3 Verwijder de montageschroef van...

Page 31: ...ties 10 Geluid uitschakelen Schakelt het geluid uit en weer in 11 Teletekst Schakelt over naar de teletekstmodus 12 Volume omhoog omlaag 13 Cijfertoetsen Overschakelen naar een ander kanaal of een and...

Page 32: ...s niet bediend tijdens de periode die is geselecteerd in Automatisch in Stand by Deze functie heeft geen invloed op het opnemen van een timerprogramma directe tv opname en One Touch Recording 1 Functi...

Page 33: ...ie p 17 18 Aansluitingen 6 7 8 1 9 10 4 3 5 2 1 CI sleuf 2 SD kaartsleuf 3 Ingang koptelefoon 4 USB poort 1 2 5 HDMI1 3 6 ETHERNET 7 Aansluiting aardse ingang kabel 8 DIGITAL AUDIO OUT 9 AV1 SCART 10...

Page 34: ...F kabel Meegeleverd bij de tv Opmerking Sluit een DVD recorder videorecorder met Q Link ondersteuning aan op AV1 van de tv Lees ook de handleiding van het apparaat dat moet worden aangesloten Houd de...

Page 35: ...el UTP Ferrietkern groot formaat meegeleverd De ferrietkern installeren Trek de lipjes achteruit op twee plaatsen Wind de kabel twee keer op Sluiten Draadloze verbinding Internetomgeving Toegangspunt...

Page 36: ...selecteren instellen 3 Selecteer uw land Land Duitsland Denemarken Polen Oostenrijk Zweden Tsjechi Frankrijk Noorwegen Hongarije Itali Finland Slovakije Spanje Luxemburg Sloveni Portugal Belgi Kroati...

Page 37: ...e instellingen voor kanaal taal en land regio automatisch gedownload naar de recorder 0 100 Overdracht voorkeuze gegevens Even geduld a u b Afstandsbediening niet beschikbaar Als het downloaden misluk...

Page 38: ...uteld is wordt een bevestigingsscherm weergegeven Het is raadzaam om een versleuteld toegangspunt te selecteren 3 Voer de coderingssleutel van het toegangspunt in A B C D E F G H I J K L M N O P Q R S...

Page 39: ...teert u Handmatig en u stelt elk onderdeel in 4 Ga naar de volgende stap Twee keer indrukken 7 Selecteer Thuis Voor gebruik thuis selecteert u de weergaveomgeving Thuis Selecteer weergave omgeving Thu...

Page 40: ...aanzet wordt de introductiebalk van VIERA Connect weergegeven De balk kan veranderen Geniet van een exclusief aanbod van websites via VIERAConnect Druk simpelweg op de OK INTERNET toets 2 Open VIERA...

Page 41: ...l gebruikt Stop het gebruik van de 3D bril als u duidelijk dubbele beelden ziet wanneer u 3D inhoud bekijkt Gebruik de 3D bril niet dichterbij dan de aanbevolen afstand De aanbevolen kijkafstand is mi...

Page 42: ...r Afspelen van 3D compatibele Blu ray schijven Frame Sequential formaat Sluit de 3D compatibele speler aan via een volledig bedrade HDMI compatibele kabel Als de ingangsmodus niet automatisch wordt om...

Page 43: ...e Handmatig Boven en Onder 2D Boven en Onder 3D Zij aan Zij 2D Zij aan Zij 3D Frame Sequential 2D Frame Sequential 3D Origineel selecteren instellen Tabel met beeldweergaven bij verschillende instelli...

Page 44: ...functie VIERA TOOLS hebt u eenvoudig toegang tot een aantal speciale functies 1 Geef de functiepictogrammen weer 2 Selecteer de gewenste functie VIERA Link selecteren openen 3 Volg de instructies voor...

Page 45: ...chuifbalk 5 Scherpte Verplaatst wijzigen opslaan Naar het volgende scherm gaan Kinderslot Openen Geeft het volgende scherm weer openen Terug naar de tv op elk gewenst moment Terug naar het vorige sche...

Page 46: ...het oppervlak afnemen of kan de verf afbladderen Het scherm is behandeld en voorzien van een gevoelige oppervlaktelaag Tik en kras niet op het oppervlak met uw vingernagel of een hard voorwerp Zorg da...

Page 47: ...kije De WLAN functie van deze tv mag uitsluitend in gebouwen gebruikt worden Dit apparaat voldoet aan de volgende EMC normen EN55013 EN61000 3 2 EN61000 3 3 EN55020 EN55022 EN55024 Productkaart Produc...

Page 48: ...formatie Informatie over de verwijdering in andere landen buiten de Europese Unie Deze symbolen zijn enkel geldig in de Europese Unie Indien u wenst deze producten te verwijderen neem dan contact op m...

Reviews:

Related manuals for Viera TX-P42ST50E