background image

Thank you for purchasing a Panasonic Repeater.

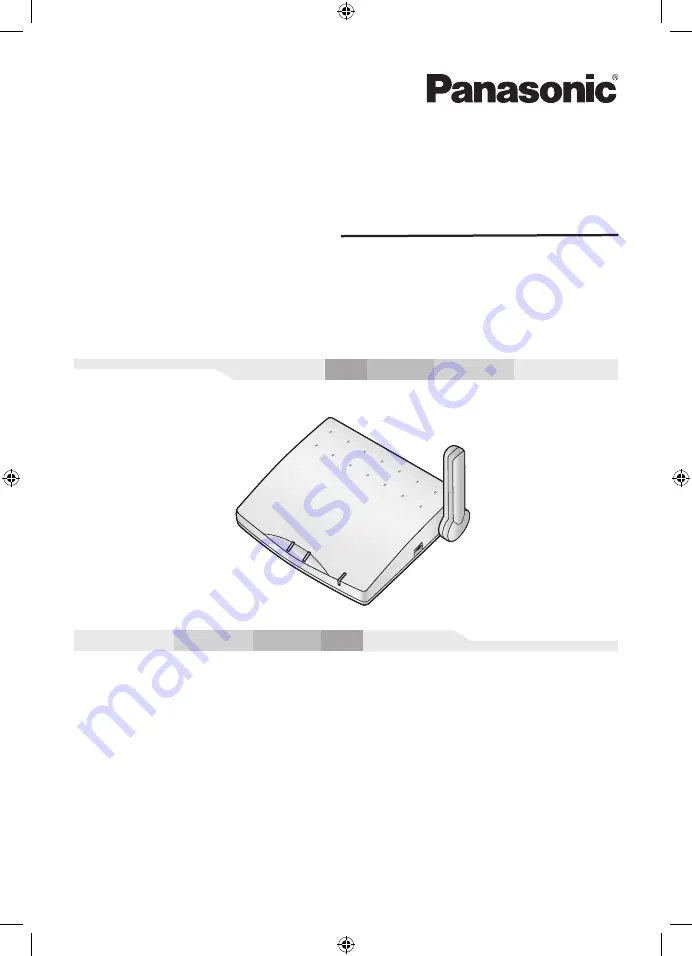
This unit is an accessory unit for Panasonic Wireless Video Intercom System. 
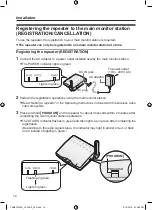
You must register this unit to the main monitor station before using.

Please read these Operating Instructions before using the unit and save for future reference.

Repeater

Operating Instructions

Model No.

 VL-FAN2

PNQX7534ZA_VL-FAN2_CS3.indd   1

9/16/2015   4:15:00 PM

Summary of Contents for VL-FAN2

Page 1: ...Wireless Video Intercom System You must register this unit to the main monitor station before using Please read these Operating Instructions before using the unit and save for future reference Repeater Operating Instructions Model No VL FAN2 PNQX7534ZA_VL FAN2_CS3 indd 1 9 16 2015 4 15 00 PM ...

Page 2: ...ns 7 Introduction Included items 8 Feature highlights 9 Preparation Location of controls 10 LIndicators 11 Installation Registering the repeater to the main monitor station REGISTRATION CANCELLATION 12 LRegistering the repeater REGISTRATION 12 LTo stop using the repeater CANCELLATION 13 Installing the repeater 14 Wall mounting 15 Help Troubleshooting 16 Cleaning 17 Resetting to the default setting...

Page 3: ...ver be blocked by placing the product on a bed sofa rug or other similar surface 8 Do not install near any heat sources such as radiators heat registers stoves or other apparatus including amplifiers that produce heat This product should not be placed in a built in installation such as a bookcase or rack unless proper ventilation is provided or the manufacturer s instructions have been adhered to ...

Page 4: ...moke rises or an unaccustomed noise or smell is discharged from the unit B If metal objects have been dropped inside the unit 9 Do not make any wiring connections when the power supply is turned on 10 Never install wiring during a lightning storm 11 Do not connect the AC adaptor other than the specified voltage 12 Do not connect the AC adaptor to any terminal other than the one specified 13 The AC...

Page 5: ...t should be kept away from heat sources such as heaters kitchen stoves etc It should not be placed in rooms where the temperature is less than 0 C or greater than 40 C Damp basements should also be avoided L The maximum calling distance approx 100 m may be shortened when the unit is used in the places Where there are following obstacles between this unit and the main monitor station or the sub mon...

Page 6: ...s installed L In places where the radio signal from the main monitor station is stronger the main monitor station directly communicates with the sub monitor station without relaying through the repeater In this case the IN USE indicator may not light up Radius of radio waves from the main monitor station Radius of radio waves from the repeater In places where the radio signal from the main monitor...

Page 7: ... not use the unit in health care facilities if any regulations posted in the area instruct you not to do so Hospitals or health care facilities may be using equipment that could be sensitive to external RF radio frequency energy Product names used in these Operating Instructions For plain explanation the product names used in these Operating Instructions are described as follows Product figure VOI...

Page 8: ...1 2 3 4 5 No Item Quantity Notes 1 Repeater 1 2 AC adaptor 1 Cord length Approx 1 8 m 3 Wood screws 2 For wall mounting 4 Washers 2 For wall mounting 5 Registration number sticker 1 PNQX7534ZA_VL FAN2_CS3 indd 8 9 16 2015 4 15 01 PM ...

Page 9: ...ain monitor station and the sub monitor station Possible obstacles L Metallic door or shutter L Heat insulator including aluminium foil L Concrete wall or wall made of galvanized iron sheet L When using the sub monitor station on the different floor or house in the same grounds where the main monitor station has been installed L Multiple walls of any sort The registration to the main monitor stati...

Page 10: ...gister to the main monitor station C Indicators L Show the status of this unit and the radio signal level page 11 A B C N Rear view D DC IN jack L Connect the AC adaptor E FACTORY DEFAULT RESET button L Press to reset the settings of this unit to their default settings page 17 D E Bottom view PNQX7534ZA_VL FAN2_CS3 indd 10 9 16 2015 4 15 01 PM ...

Page 11: ...nit has not been registered to the main monitor station Green light on Shows the radio signal status from the main monitor station L Take notice of this indicator when installing page 14 Weak Strong Amber light on Red light on Red flashing Out of radio wave range so you cannot install the repeater here IN USE Green light on Repeater is relaying radio waves Light off Repeater is not relaying radio ...

Page 12: ... outlet 100 240 V AC AC adaptor 2 Perform the registration operations using the main monitor station L Read Setting a repeater in the Operating Instructions included with the wireless video intercom system 3 Press and hold PROGRAM on the repeater for about 3 seconds within 2 minutes after completing the main monitor station operations L The STATUS indicator flashes in green and then lights up in g...

Page 13: ...is not canceled To stop using the repeater CANCELLATION 1 Perform the cancellation operations using the main monitor station L Read Setting a repeater in the Operating Instructions included with the wireless video intercom system There are no repeater operations included Note L Disconnect the AC adaptor from the canceled repeater in order to avoid malfunction L You can reset the settings of the re...

Page 14: ...re the indicator lights in green STATUS indicator Status Lights in green Strong Able to install the repeater Lights in amber L In places where the indicator lights in amber or red calls may be interrupted or disconnected Lights in red Weak Flashing in red Out of range Unable to install the repeater Change the location 3 Install the repeater Note L It is recommended that you install the repeater in...

Page 15: ...wood screws into the slots on the repeater and slide the repeater down until it is secure L About 140 mm of space above the washers is required for raising the antenna Approx 140 mm 2 5 3 mm Wood screw included Wall Pillar Washer included Important L Do not mount the repeater on walls made of plasterboard ALC Autoclaved Lightweight aerated Concrete panel concrete block or plywood of 18 mm or less ...

Page 16: ...ain monitor station L You cannot register one repeater to two or more main monitor stations To register to another main monitor station another repeater is needed Can I locate the repeater in a place where the STATUS indicator does not light in green L You can install the repeater in a location where the STATUS indicator lights in amber or red but sound cuts in and out or calls may be disconnected...

Page 17: ...u want to stop using the repeater or reset it to the default settings press FACTORY DEFAULT RESET on the bottom 1 Press FACTORY DEFAULT RESET for about 3 seconds using a pointed object such as a ball point pen L The STATUS indicator turns off 2 Perform the cancellation operations using the main monitor station L Read Setting a repeater in the Operating Instructions included with the wireless video...

Page 18: ... 07 A During operation Approx 0 15 A Dimensions Approx height 27 mm x width 101 mm x depth 82 mm Approx height 69 5 mm x width 101 mm x depth 82 mm when raising the antenna Mass Weight Approx 85 g Operating environment 0 C to 40 C Up to 90 RH Relative Humidity non condensing Frequency 2 402 GHz 2 481 GHz PNQX7534ZA_VL FAN2_CS3 indd 18 9 16 2015 4 15 02 PM ...

Page 19: ...T button 10 17 I Indicators 10 IN USE indicator 10 11 P POWER indicator 10 11 12 14 PROGRAM button 10 12 R Registration 12 Registration number sticker 8 13 Resetting to the default settings 17 S STATUS indicator 6 10 11 12 14 T Technical data 18 Troubleshooting 16 PNQX7534ZA_VL FAN2_CS3 indd 19 9 16 2015 4 15 02 PM ...

Page 20: ...unit Dealer s name and address Dealer s telephone number Attach your sales receipt here 1 62 4 chome Minoshima Hakata ku Fukuoka 812 8531 Japan Web site http www panasonic com Panasonic System Networks Co Ltd 2015 PNQX7534ZA C0915MM0 PNQX7534ZA_VL FAN2_CS3 indd 20 9 16 2015 4 15 02 PM ...

Reviews: