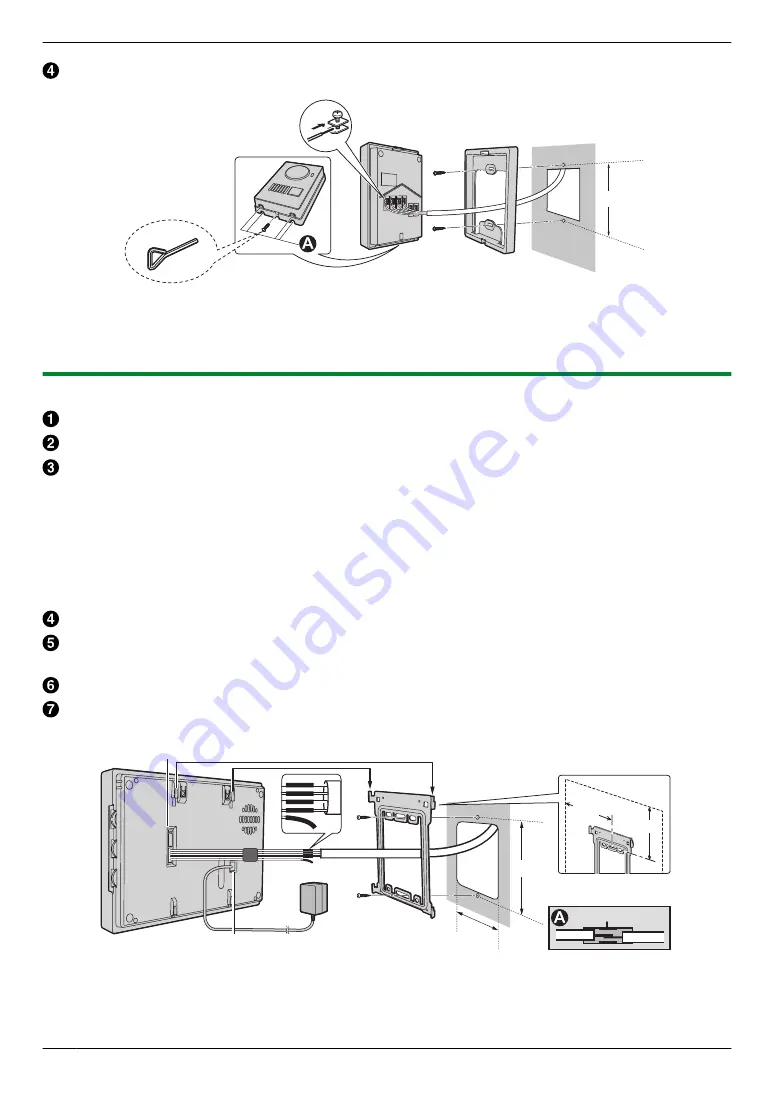
Reattach the door station to the mounting base and then fasten the mounting screw using the hex wrench.
A
/
D
B
C
83.5 mm
Hex wrench
*1
*1 User supplied
Note:
R
Do not cover the water drain holes (
1
).
3.1.4 Installing the monitor
Select the installation position. The monitor should be attached to a wall so that it is centred at eye-level.
Securely attach the mounting bracket to the wall using 2 wood screws (4 mm
´
16 mm).
Connect the 4 wires
to the 5-pin connector (1 of the wires of the 5-pin connector is not used). (Refer to the wiring
schematic diagrams on page 8 for details.)
R
Connect the wires by soldering them together or joining them with crimping sleeves
(
1
).
– Check the signal names of the wires and make sure to only connect the same signal name wires together.
R
Separate the connected parts of the wires and the unused wire with electrical tape or heat shrink tubing.
Note:
R
Connecting the wires incorrectly will cause severe damage and make the system malfunction.
Connect the 5-pin connector to the monitor.
Connect the 2-pin connector of the AC adaptor to the monitor.
R
Make sure to pass the AC adaptor cable between the mounting bracket and monitor.
Mount the monitor to the mounting bracket.
Connect the AC adaptor to the power outlet.
31.4 mm
100.5 mm
83.5 mm
50 mm
+V
G
AU
Vi
*1
+V
G
AU
Vi
Sleeve
*1
A
B
C
D
E
F
G
*1 User supplied
Note:
R
Do not place any objects within 20 cm of the monitor. This may cause communication errors or malfunction.
6
3. Preparation


