


5
Repairing, transferring, disposing, or returning the
product
Requesting repairs for the product
R
Note that the settings of the product may be altered
or changed to the default settings during repairs.
Note for product disposal, transfer, or return
R
Perform the "Initialize" setting for the product. (
→
See the Operating Instructions of the Video
Intercom System.)
Settings are returned to their default values when
initialization is performed.
Information on Disposal in other Countries outside
the European Union
These symbols are only valid in the European Union. If
you wish to discard these items, please contact your
local authorities or dealer and ask for the correct
method of disposal.
Battery installation
– USE ONLY rechargeable Ni-MH batteries AAA
(R03) size.
– Do NOT use Alkaline/Manganese/Ni-Cd batteries.
– Confirm correct polarities ( , ).
Note:
R
Use the supplied rechargeable batteries (Ni-MH
ONLY). When replacing batteries, we recommend
using batteries that match the specifications of the
batteries listed on page 6.
R
Wipe the ends of batteries ( ,
) with a dry cloth.
R
Avoid touching the ends of batteries ( , ) or the
unit contacts.
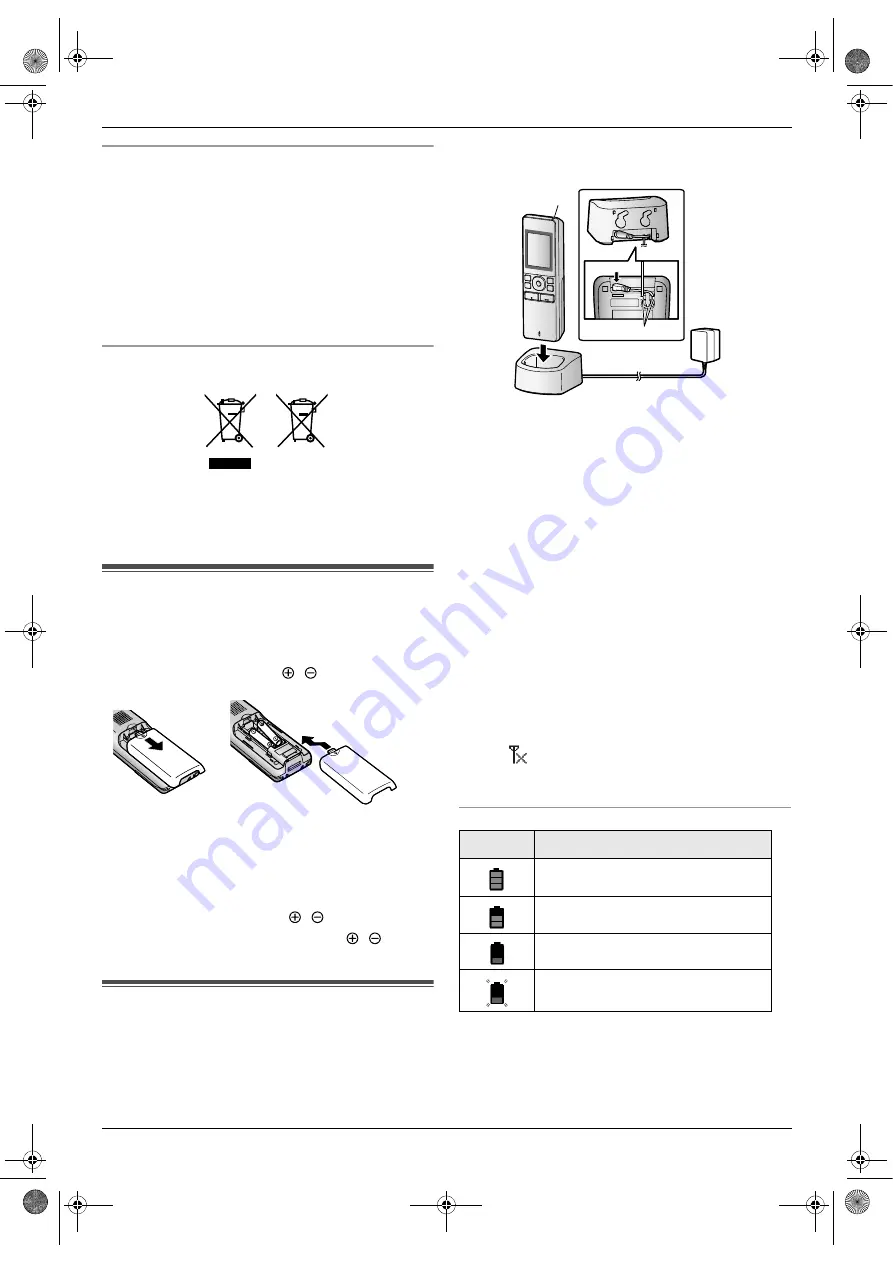
Charging the sub monitor
Only connect the charger with the supplied Panasonic
AC adaptor (
→
page 2).
*1 Press plug firmly.
R
Connect the charger to the power outlet, and then
place the sub monitor in the charger to charge it.
Charging usually takes about 8 hours.
A
Charge indicator
– when charging: lights
– when charging is completed: off
B
Hook
R
Charge the sub monitor for at least 15 minutes
before registering it to the main monitor. Make sure
to completely charge the sub monitor after the
registration is completed.
R
Charging may take longer in the following situations.
– When the operating temperature is low. (
→
page 6)
– When the sub monitor is picked up off the
charger or used during charging.
– When the sub monitor’s signal is out of range
(
).
R
The sub monitor does not overcharge even if it is
continuously placed in the charger.
Battery level
R
See page 6 for a guide on operating times for the
sub monitor.
Note:
R
When the sub monitor is off the charger or the AC
adaptor is disconnected for 1 week or more, remove
AC adaptor connections
Icon
Battery level
High
Medium
Low
Needs charging
A
*1
B
WD619-OI_en.book 5 ページ 2020年3月12日 木曜日 午後3時38分


