


22
Getting Read
y
Checking Your Current
Phone Number and
E-mail Address
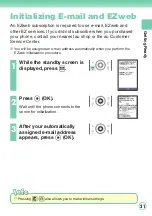
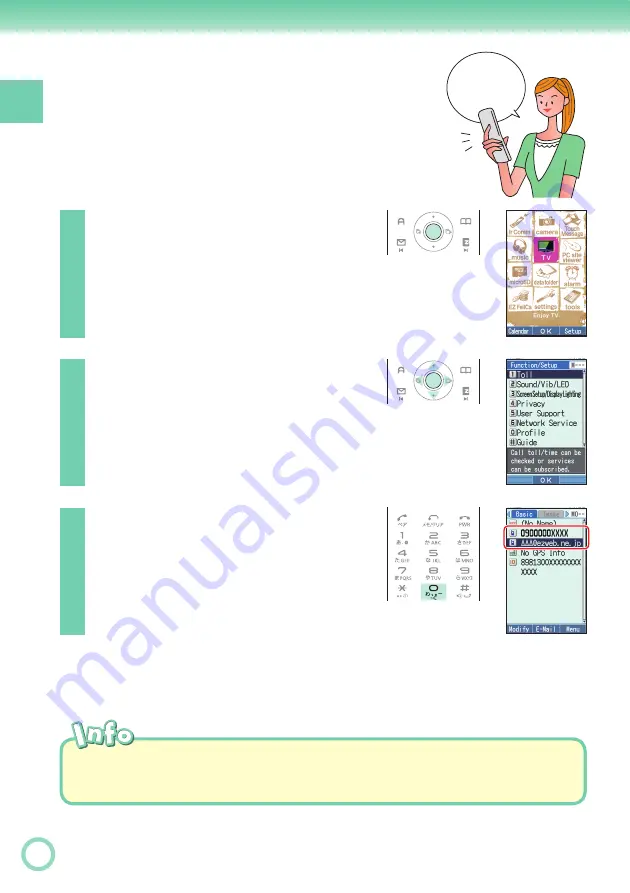
1
While the standby screen is
displayed, press
c
.
2
Use
M
to select “settings”,
and press
c
(OK).
Your phone number and e-mail address can be checked by pressing
c
,
and pressing
0
while the standby screen is displayed.
◎
My phone
number and
mail address
3
Press
0
(Profi le).
Your current phone number and e-mail
address appear.


