INSTALLATION
(SUSPENDED BETWEEN JOIST MOUNTING)
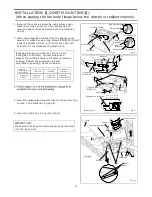
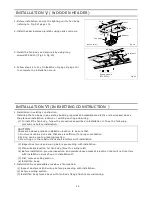
1. Before installation, secure the lighting unit to fan body
(refering to Fig.5 of page 10).
2. Insert the suspension bracket into bracket cover of
adaptor side and the back of the fan body.
(Fig.15-1,15-2)
(select the suspension bracket according to spacing A
as shown below.)
16 inches and 19.2 inches
horizontal joist
Suspension bracket
I
Suspension bracket
I
Suspension bracket
III
Suspension bracket
III
Suspension bracket
II
Suspension bracket
II
16 inches and 19.2 inches
horizontal joist
19.2 inches vertical joist
Fig.15-1
Fig.15-2
Fig.16
Fig.17
Fig.18
Joist
2 Long screws (ST4.2X20)
4 Long screws (ST4.2X20)
2 Screw
(ST4.2X12)
II
Joists
Adaptor
Junction box
Fan body
5/8 (15.9)
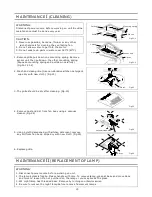
3. Insert the fan body between joists. Make sure the fan
body is level and square (perpendicular) with the joists.
(Fig.16)
If installing with fan body flange below drywall, keep
the distance B (1/ inch, 12.7mm or 5/8 inch, 15.9mm)
for the thickness of ceiling board.
2
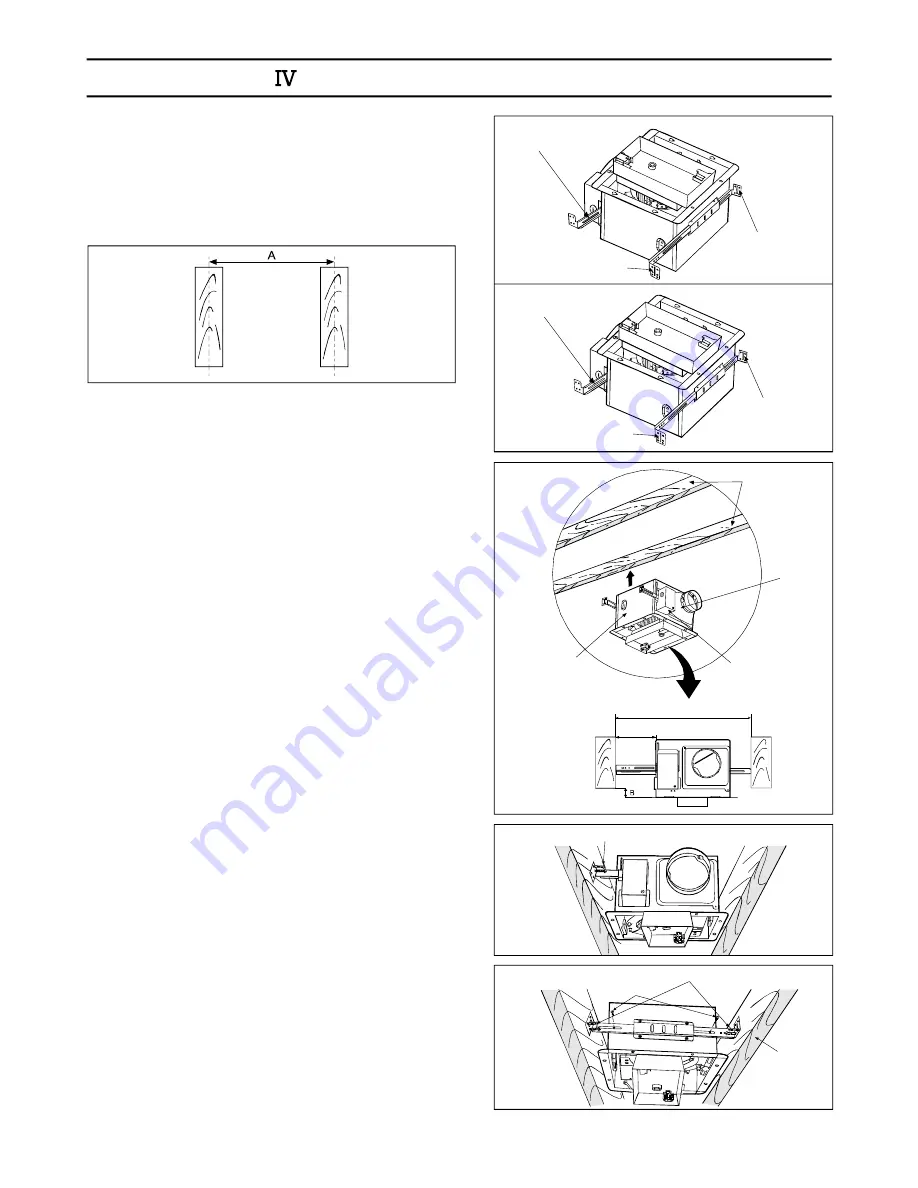
4. Secure the suspension bracket to joists by using long
screws (ST4.2X20) (Fig.17, Fig.18)
5. Secure the suspension bracket to fan body by using
screw
(ST4.2X12) (Fig.18)
II
6. Follow steps 4 to 12 of installation (page 9, page 10)
to complete the installation work.
I
13
Inches(mm)
13 1/4 15 3/4 (336 400)
~
~
16 1/2 18 3/4 (419 480)
~
~
3 5
( 76 126)
5 4/5 7 4/5 (148 198)
~
~
~
~
1/2 (12.7)
PDF created with pdfFactory Pro trial version
www.pdffactory.com

